The egret came back again, this is almost a daily occurrence. She seems to like hunting for lizards or the occasional rodent here.
This Time I used the 400mm 3.5 EDIF ais and TC 300 combo to take the pictures.
My observation is that this 800mm combo does not have equal quality to the 800mm 5.6 EDIF ais; competent combo but not as sharp, not as smooth OOF, and showing minor color aberrations not corrected by the camera.
Rafael,
They both look excellent to me with the edge seemly going to the 800mm f5.6. I have always liked Great Egrets, but the dazzling white of their plumage makes getting the correct exposure a challenge.
Jim
rafaelcasd wrote:
The egret came back again, this is almost a daily occurrence. She seems to like hunting for lizards or the occasional rodent here.
This Time I used the 400mm 3.5 EDIF ais and TC 300 combo to take the pictures.
My observation is that this 800mm combo does not have equal quality to the 800mm 5.6 EDIF ais; competent combo but not as sharp, not as smooth OOF, and showing minor color aberrations not corrected by the camera.
James Markus wrote:
Rafael,
They both look excellent to me with the edge seemly going to the 800mm f5.6. I have always liked Great Egrets, but the dazzling white of their plumage makes getting the correct exposure a challenge.
Jim
James, the 400mm 3.5 was fully open and the quality was excellent, closing it down to f/8 makes it much better. I would not hesitate to get a 400mm 3.5 for less than $1K plus the old TC 14 and 300 for $100 each to get a high quality 400mm 3.5, 560 mm 5.0 and 800mm 7.1. Heck, adding a TC16a modified to work with the D series cameras gets you a high quality auto focusing 640mm 5.6!!!
The 800mm 5.6 is better than any of these combinations but not by a lot, and it will set you back at least $2,500.
Highlights do burn on these egrets under sunlight, but the 800mm keeps the edges of the burned area quite sharp as shown in the last photo.
I have been missing in action the last couple weeks, but catching up with the like button. Great shots folks!
I had to send my computer off for repair and I really don't like browsing on a phone. So took time to redo my home office and continue getting ready for the spring fishing season.
I have all my gear ready to go and resupplied the fly tying gear and getting back in the groove of making some flies.
If the flies in the shot below look a little strange, it is because they are basically reversed from what a traditional "western" style fly would be. The hackles are facing forward in these away from the hook point. These are in the tradition of Japanese tenkara flies.
If you have not tried tenkara fishing, I highly recommend it. No reel. Just rod, line and fly.
My photography took a little slump over the last 4 months with a (still ongoing) bad experience with Leica.
It took all motivation away and I've barely touched a camera.
Anyways, a couple days ago I come across this Micro-Nikkor 55mm f/2.8 lens, in an antique store. It was battered, focus was frozen solid. Scratched, dented and caked up with dirt and grime. There was also plenty oil on the aperture blades.
This is how it looked after I wiped some of the dirt off...
I offered R 50 for it, which is about USD 3.30 and it was accepted. Thought it would be a good time tinkering and trying to fix it. It was the distraction I needed, and it brought back some inspiration.
I cleaned the lens, lubed the helicoids, cleaned the aperture blades.
The enamel paint was pretty scratched and battered, so I just decided to pursue a polished look.
First I tried paint stripper, and soaked one piece for a few hours, giving it a brush with a wire brush every now and then. That did virtually nothing. With no power tools of bench grinder, I just bought some sand paper and went to work with a rectangular eraser over which I wrapped strips of the various papers...
From 100 grit, to 400, then 1000 followed by 1500. Lastly a polish Autosol metal polish.
It's still a little rough, but my hands and fingers could do no more. I need to brush out the lettering paint and fill that with black paint.
I managed to work out the dents, but restoring the thread didn't go great. I can screw on a filter but the threads need to be chased with a cutting tool which I don't have. Its rough.
I just finished painting the lettering to black. The original enamel painted lettering was fading in some areas. I may buy some colours at a future date.
The Ai and pre-Ai 55/3.5 is easily my favourite lens... I own a few copies and have bought and fixed up several, then passed them along to friends. With a good set of JIS drivers, some Helicoid grease, and cleaning benzine, it's not difficult to take apart and clean.
If you are going to replace your 55, I would suggest using your old one to teach yourself to take it apart. Mikeno62 on YouTube has many tutorials.
That restoration/rehab looks really good. Never thought of doing that to an old beater lens. Definitely gives it a second life.
hmzimelka wrote:
My photography took a little slump over the last 4 months with a (still ongoing) bad experience with Leica.
It took all motivation away and I've barely touched a camera.
Anyways, a couple days ago I come across this Micro-Nikkor 55mm f/2.8 lens, in an antique store. It was battered, focus was frozen solid. Scratched, dented and caked up with dirt and grime. There was also plenty oil on the aperture blades.
This is how it looked after I wiped some of the dirt off...
I offered R 50 for it, which is about USD 3.30 and it was accepted. Thought it would be a good time tinkering and trying to fix it. It was the distraction I needed, and it brought back some inspiration.
I cleaned the lens, lubed the helicoids, cleaned the aperture blades.
The enamel paint was pretty scratched and battered, so I just decided to pursue a polished look.
First I tried paint stripper, and soaked one piece for a few hours, giving it a brush with a wire brush every now and then. That did virtually nothing. With no power tools of bench grinder, I just bought some sand paper and went to work with a rectangular eraser over which I wrapped strips of the various papers...
From 100 grit, to 400, then 1000 followed by 1500. Lastly a polish Autosol metal polish.
It's still a little rough, but my hands and fingers could do no more. I need to brush out the lettering paint and fill that with black paint.
I managed to work out the dents, but restoring the thread didn't go great. I can screw on a filter but the threads need to be chased with a cutting tool which I don't have. Its rough. ...Show more →
Wow Martin - that is a very good look on the restore! Looks like my old Zeiss Exacta mount lenses. Any shots with it yet?
Jim
hmzimelka wrote:
My photography took a little slump over the last 4 months with a (still ongoing) bad experience with Leica.
It took all motivation away and I've barely touched a camera.
Anyways, a couple days ago I come across this Micro-Nikkor 55mm f/2.8 lens, in an antique store. It was battered, focus was frozen solid. Scratched, dented and caked up with dirt and grime. There was also plenty oil on the aperture blades.
This is how it looked after I wiped some of the dirt off...
I offered R 50 for it, which is about USD 3.30 and it was accepted. Thought it would be a good time tinkering and trying to fix it. It was the distraction I needed, and it brought back some inspiration.
I cleaned the lens, lubed the helicoids, cleaned the aperture blades.
The enamel paint was pretty scratched and battered, so I just decided to pursue a polished look.
First I tried paint stripper, and soaked one piece for a few hours, giving it a brush with a wire brush every now and then. That did virtually nothing. With no power tools of bench grinder, I just bought some sand paper and went to work with a rectangular eraser over which I wrapped strips of the various papers...
From 100 grit, to 400, then 1000 followed by 1500. Lastly a polish Autosol metal polish.
It's still a little rough, but my hands and fingers could do no more. I need to brush out the lettering paint and fill that with black paint.
I managed to work out the dents, but restoring the thread didn't go great. I can screw on a filter but the threads need to be chased with a cutting tool which I don't have. Its rough. ...Show more →
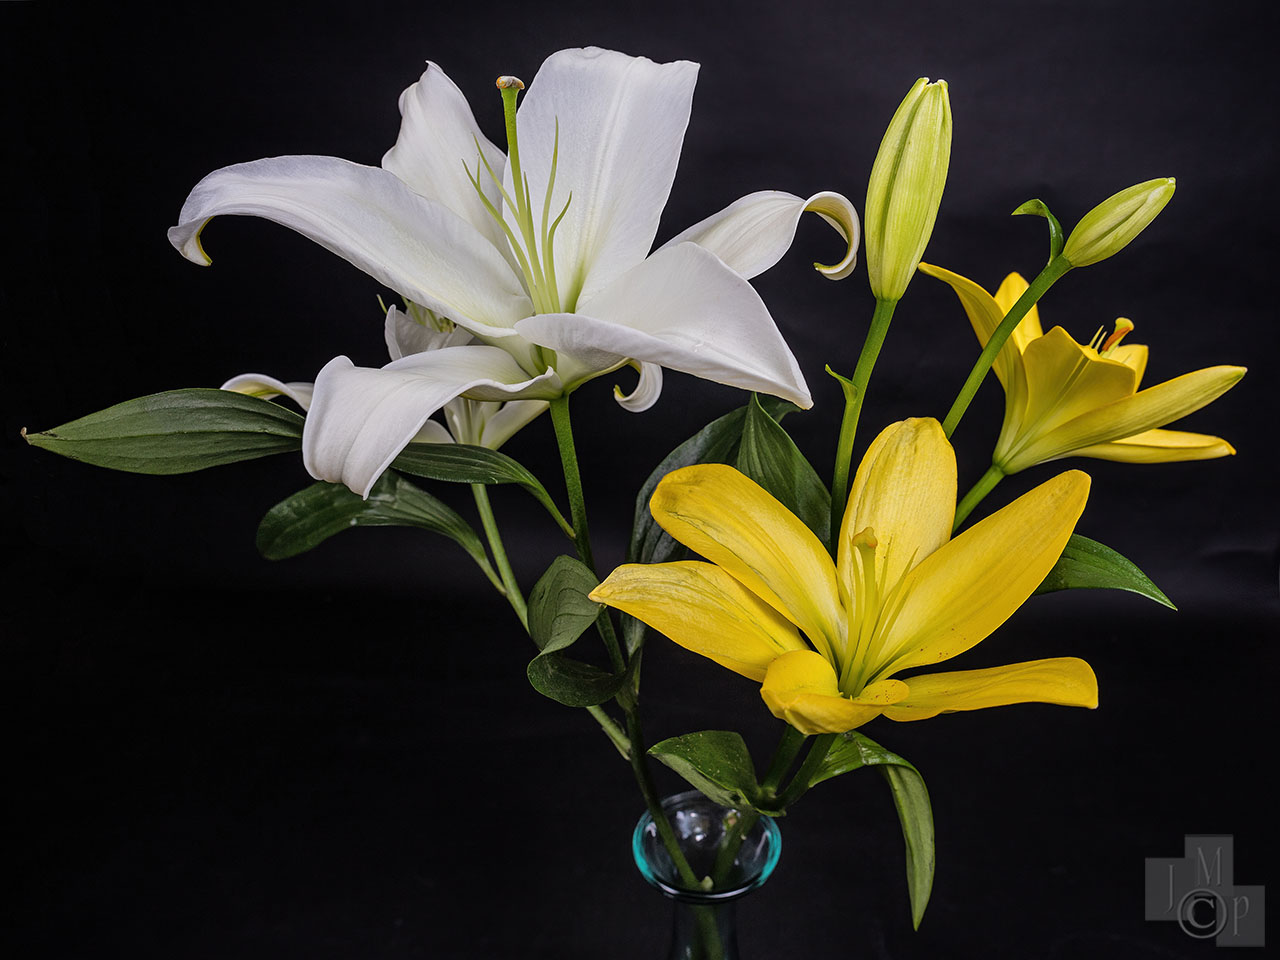
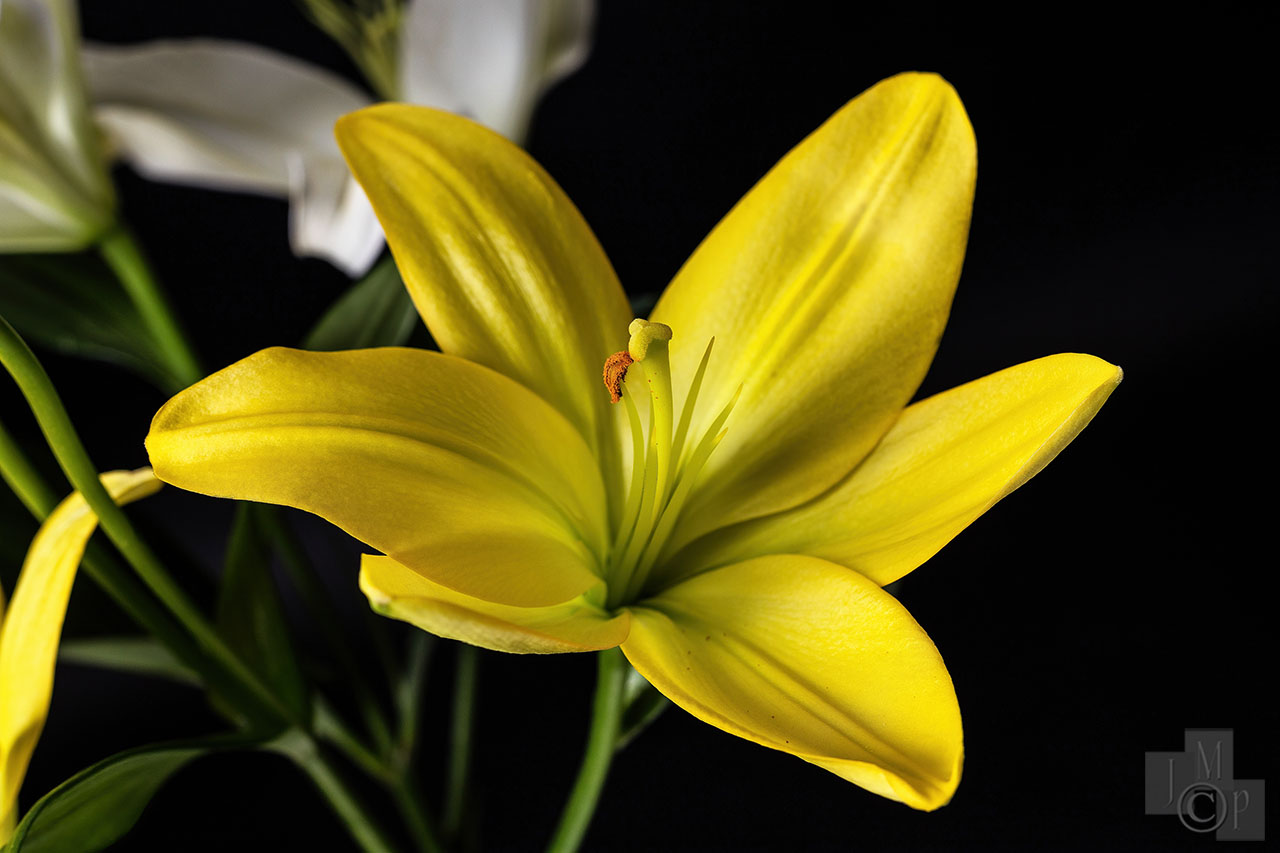
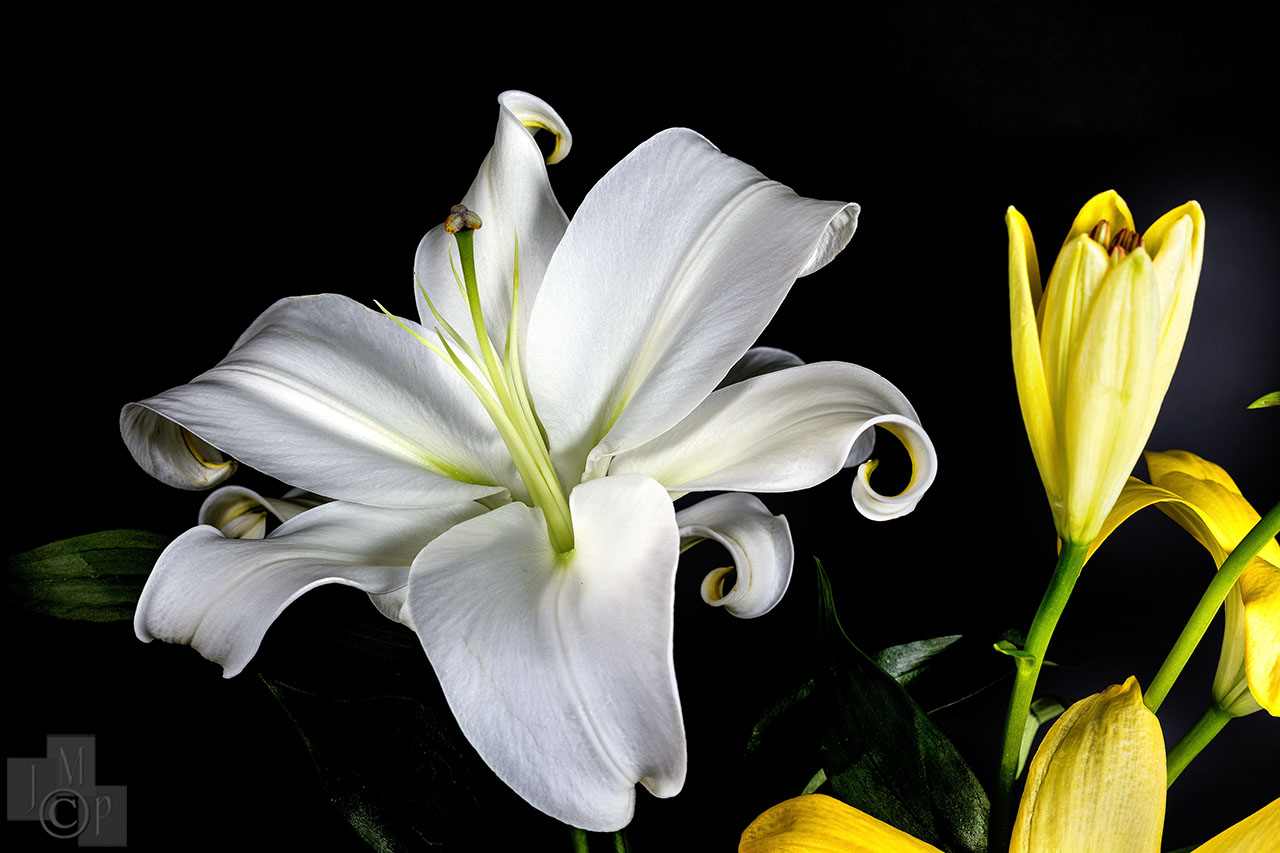
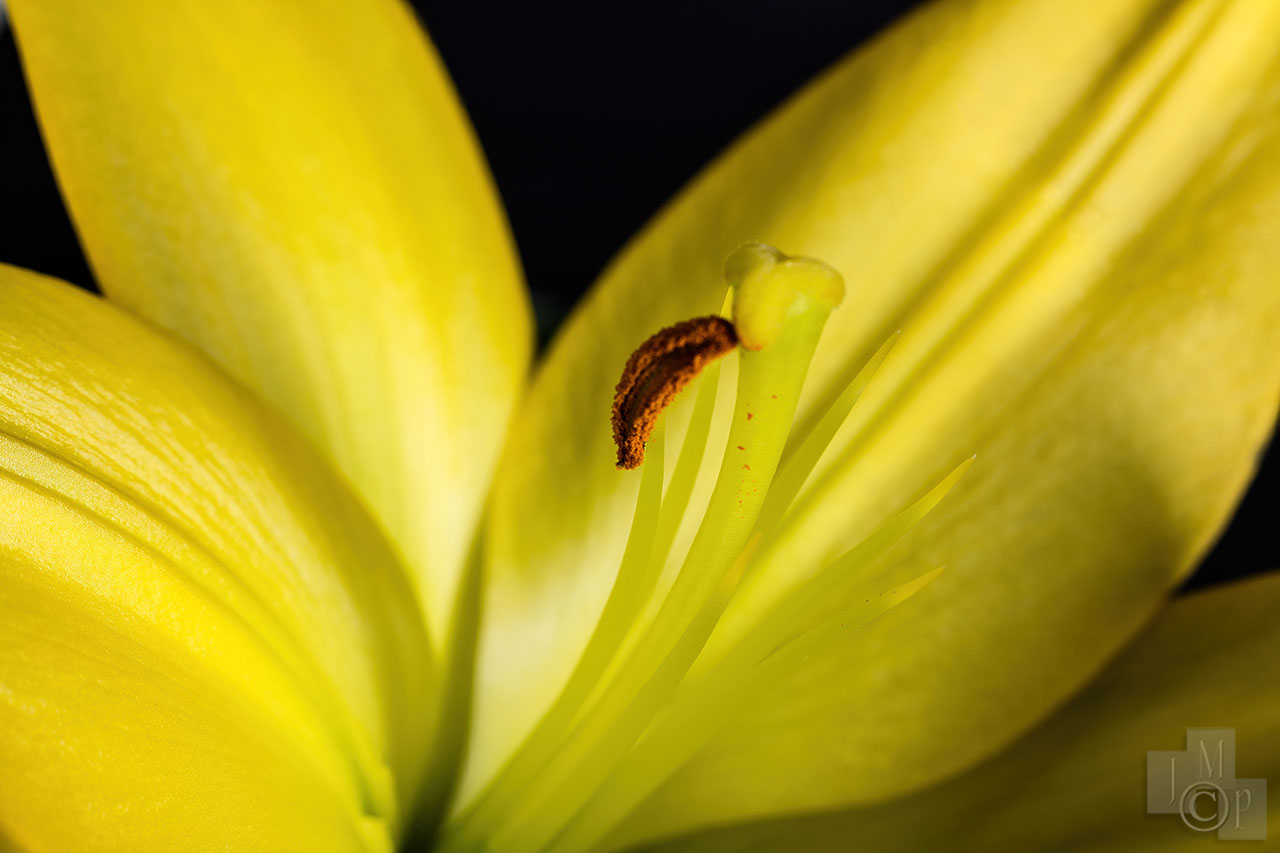
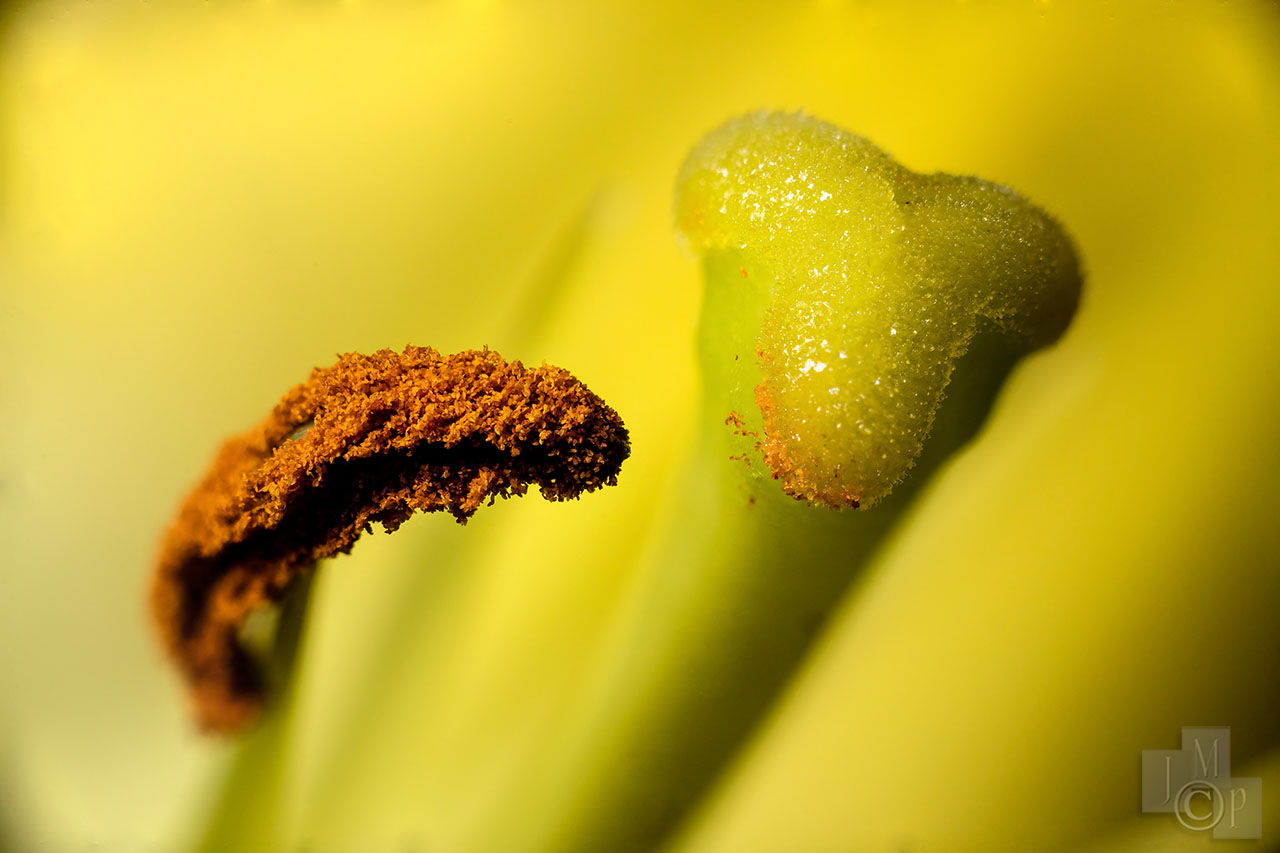
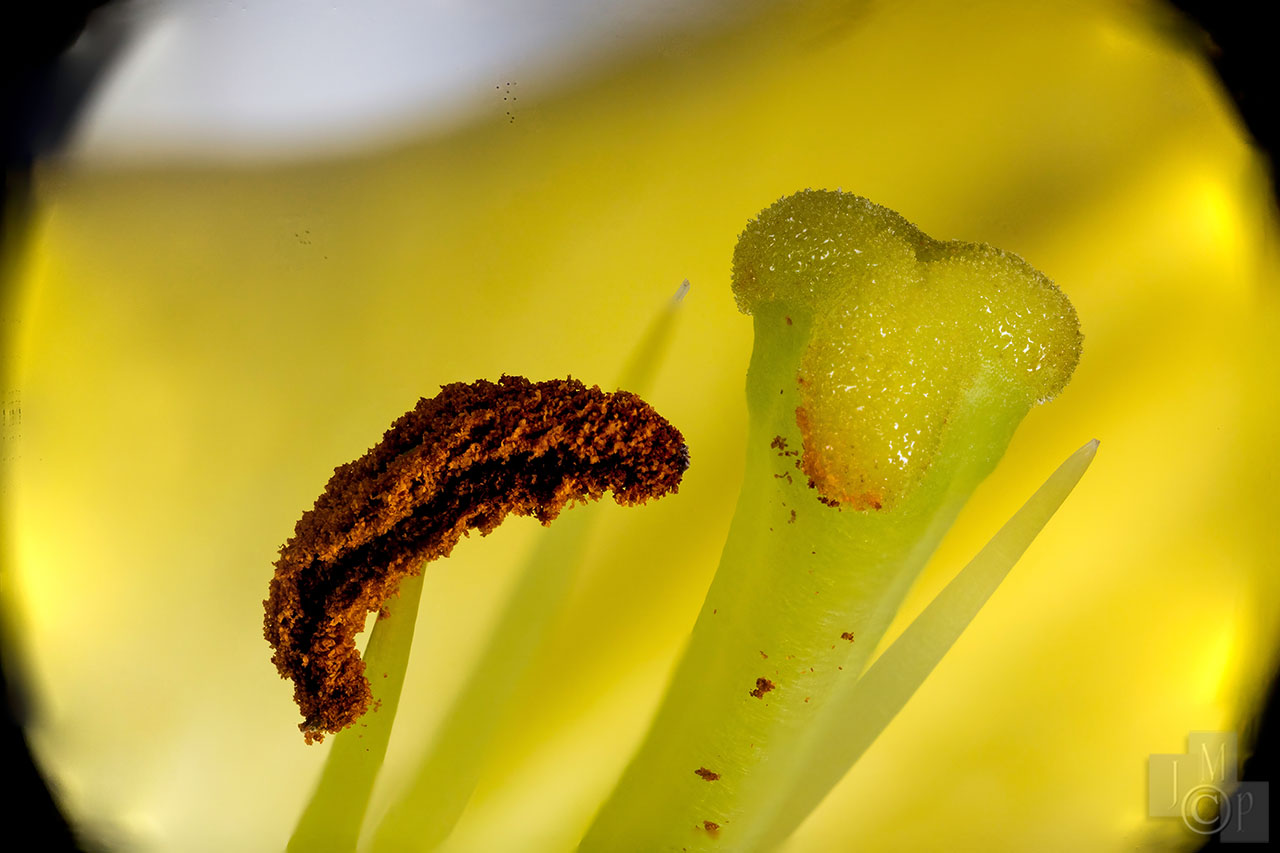
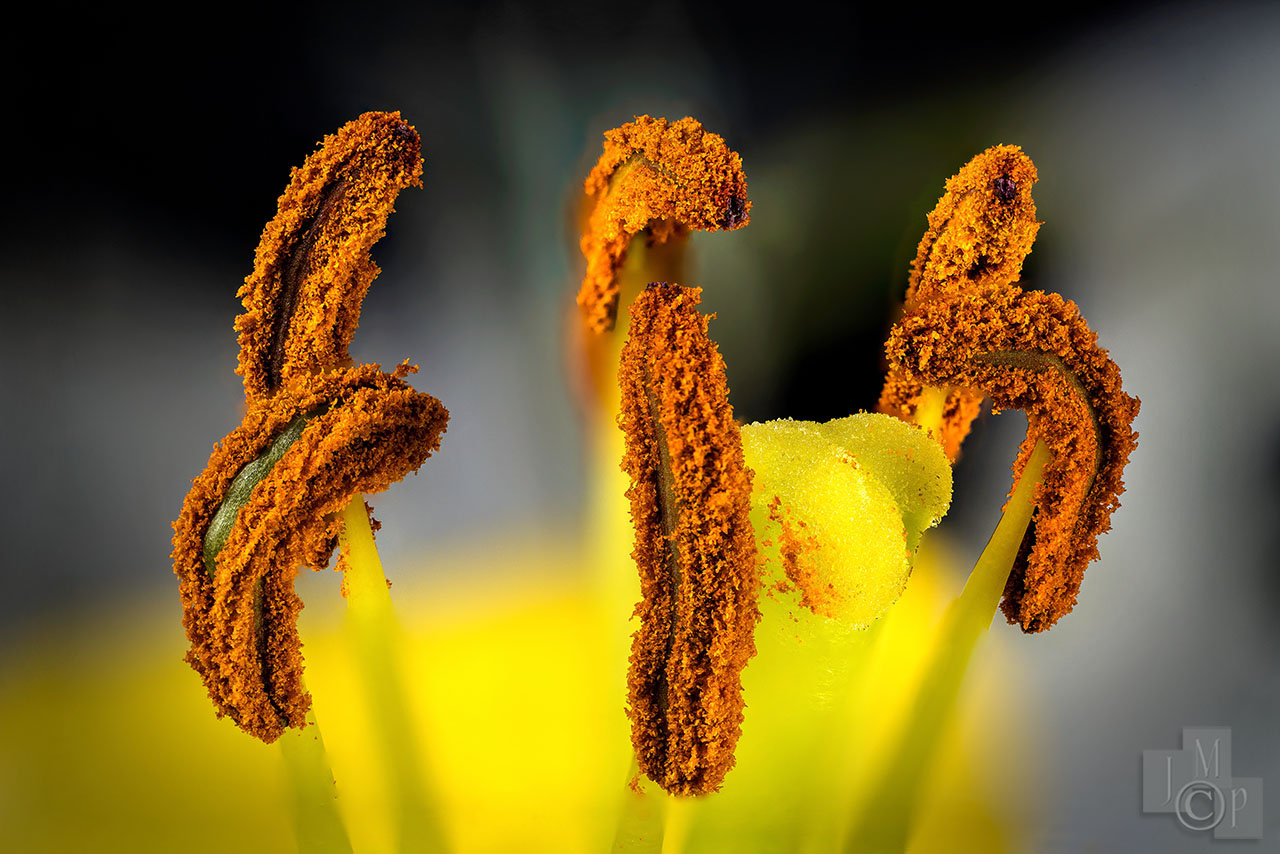
Attempted something I had never done before last night. I took fifty-four 50 megapixel (5DS-R) images of the stamens at the center of one Lily Barbara gave me to increase the DOF. Using the 55mm f3.5 ai'd Nikkor-P.C lens and bellows. Six frames were rejected, but 48 met my criteria (DOF = >1 inch). Imaged (developed) them in LR, and then sent those 16 bit raw files to PS to align and blend. Photoshop didn't choke too bad with the longest part being simply opening each frame as a layer within one photo. There were some artifacts along one edge (bottom) due to the subject size increasing as point of focus changed incrementally for each frame.
Something to push this thread along. Since it's going to be 60 degrees tomorrow, did not feel right to post something with ice, so here's something from Stuck Indoors. No real spring shooting or flowering probably till mid April, so it'll be a quiet month for outdoor shooting.
James Markus wrote:
Attempted something I had never done before last night. I took fifty-four 50 megapixel (5DS-R) images of the stamens at the center of one Lily Barbara gave me to increase the DOF. Using the 55mm f3.5 ai'd Nikkor-P.C lens and bellows. Six frames were rejected, but 48 met my criteria (DOF = >1 inch). Imaged (developed) them in LR, and then sent those 16 bit raw files to PS to align and blend. Photoshop didn't choke too bad with the longest part being simply opening each frame as a layer within one photo. There were some artifacts along one edge (bottom) due to the subject size increasing as point of focus changed incrementally for each frame.