OregonSun wrote:
I can see a grid of blurry spots (the LED grid?) on all of these except for the ones from the Nikon 55 w/bellows. On the f/5.6 shot the spots are dark whereas they're light on the others.
Thanks for the feedback. Here's the setup:
From top to bottom:
-90mm
-Carboard mask over the glass neg carrier
-2 pieces of 3/4" wood (maple and birch veneer if you're interested) with a gap between them
-The light source on top of a stand I made our of scrap wood (maple and birch veneer if you're interested
The lens test pointed out I need to also test light uniformity. I ordered some 3 mm white plastic this morning to use as a diffuser. I need to re-engineer the light holder to be shorter (so I don't run out of column height on the stand when doing 4x5), to include a diffuser and be able to hold both the essential film holder (which I haven't received) and a neg carrier. I'm open to suggestions. Off the top of my head I'm thinking a 3-sided "cabinet" that has a slot for the light, a slot for the plastic and a frame for essential film holder. I also want to do pano exposures of the 4x5, maybe 3 exposures. Just thoughts for now.
BTW, I think same led grid is showing up in all the shots with the 90mm. It became clear when I turned up the contrast on the edit (the last thing I did before posting). What I found interesting is that the narrower DoF at 5.6 seems to hide the problem, so I don't think it would take much added space (an inch or 5/4 inch) to hide the grid pattern. My gut tells me that once I test just uniformity, it'll still be a problem which is why I ordered the diffuser.
Update: the essential film hold has a diffuser built in (and a gap to the negative) so it can be placed directly on the light source. So I need a to figure out the 4x5 setup.
jay w wrote:
Update: the essential film hold has a diffuser built in (and a gap to the negative) so it can be placed directly on the light source. So I need a to figure out the 4x5 setup.
I have the EFH, it can be fiddly to load sometimes, especially with 120 that has some longitudinal curl. Cutting the leading edge of your film at a slight diagonal solves it, but that only works for the initial scan of an uncut roll. I use a pencil eraser to reach into the holder and push up on the curled film when loading previously cut strips.
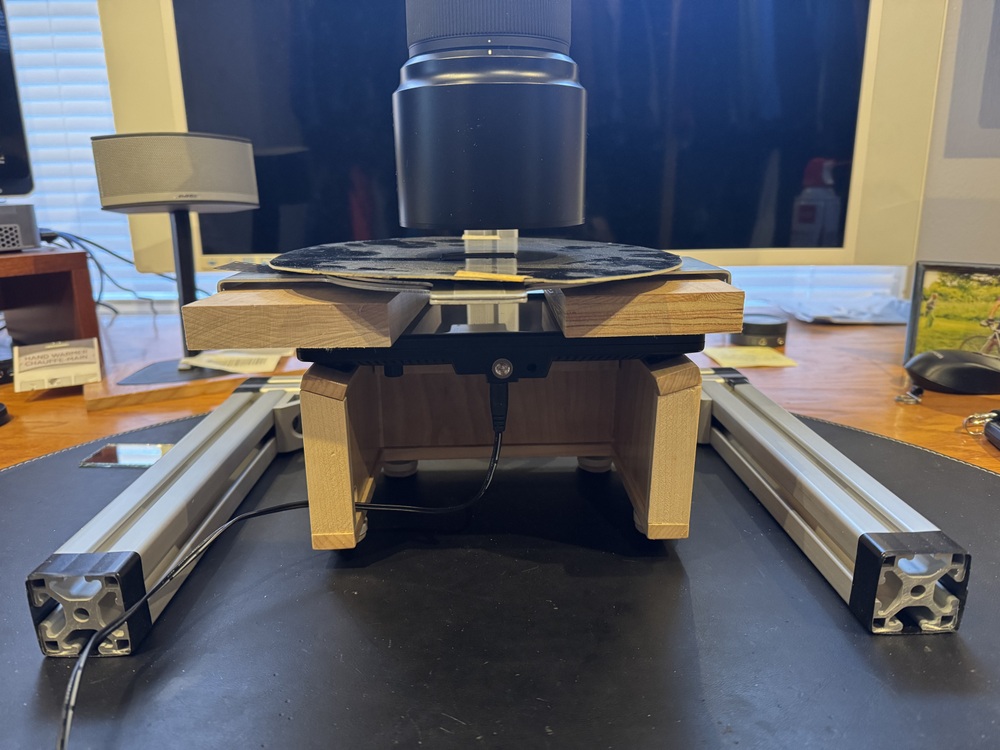
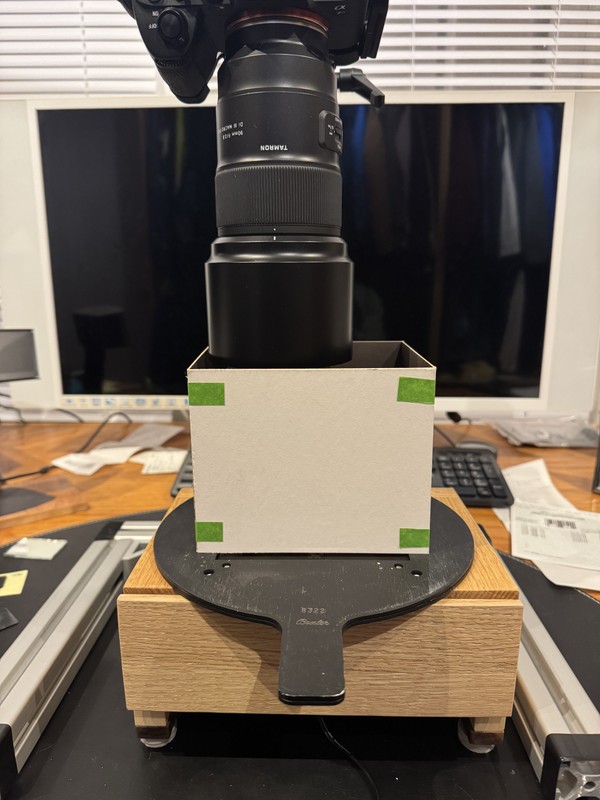
The ongoing saga. The goal here is a 4x5 scanning setup. The gear is similar to before. Top to bottom: camera, 90mm with a lens hood, a matt board shroud, 4x5 Bessler neg carrier with glass on the bottom, and a box I made with a diffusion screen and light source.
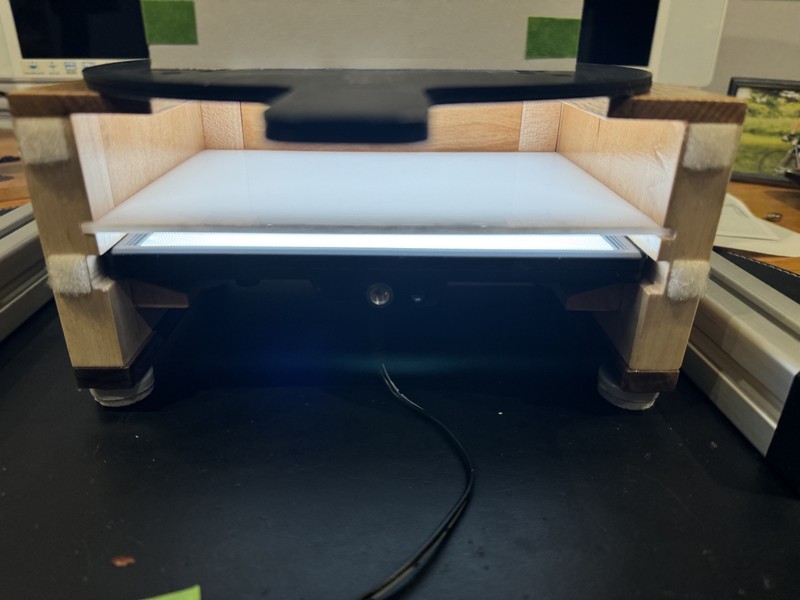
Here's closeup of the box with the light at lowest power (so you can see the detail of the box).
Without the matt board shroud, I was getting some lightness around one edge, maybe a reflection off the stand or monitor.
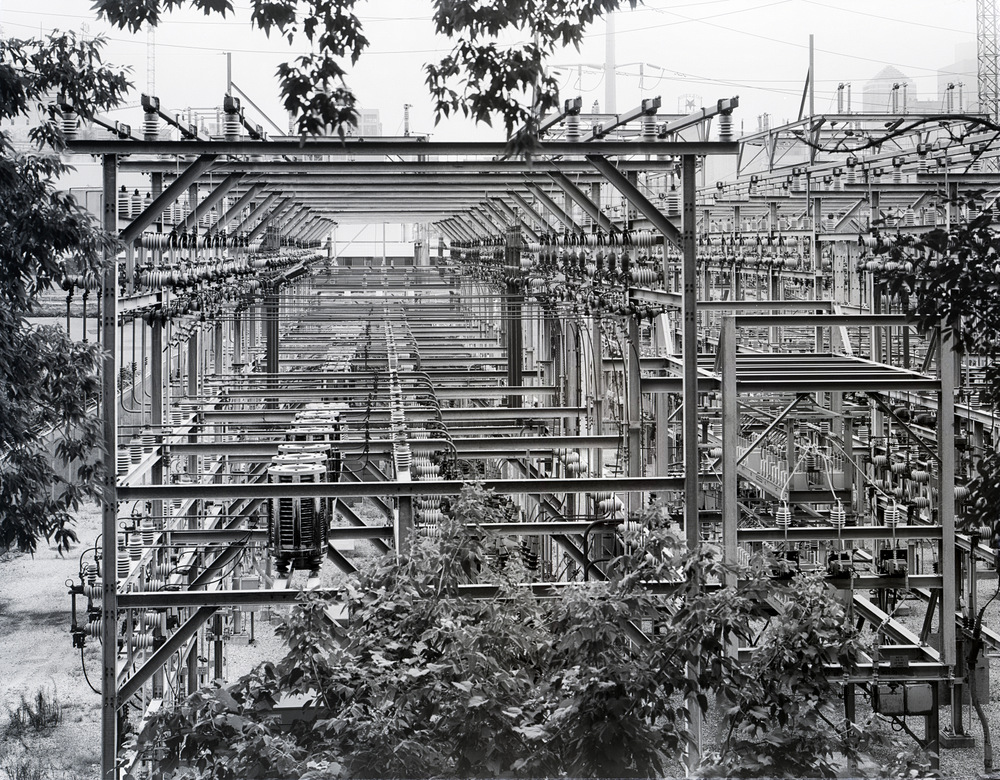
Here's the whole image. I figured this would have detail to check the resolution. It's a 4 image stich.
Here's the 4 corners.
And finally, here's near the center.
I think the lighting is even and detail is good. I'm a little disappointed that the neg carrier crops a bit, maybe an 1/8 on each side, but the neg is flat.
Hopefully all the uploads worked. Open again to comments.
A follow up and comments. Here's a flatbed scan at 3200 dpi for comparison. (The camera scan is above.) I think the resolution from the camera scan is much better. In the past, I could not see a difference between 3200 and 4800, but the files were much larger. Things for consideration:
The copy stand might be a little small. It works, but my little light box runs into the 45 degree corner pieces. An inch or two wider would allow enough room. It works, but it would work better with a slightly wider base. Also, I'm about 2 inches from maximum extension vertically. Were I to order again, I'd probably add a couple inches there too, just "in case I need to go higher."
The light box seemed to give warm light (which doesn't matter for the BW I'm doing, but after inversion the color is blueish), so I lined the box with white foam core (similar to matt board). I figure the box acts as a light mixing chamber. I think the color temp is better. (I'm at maximum 5500k.)
Occasionally, my lens won't focus because the image center is sky or water. (I focus on an area with detail, switch to manual and recompose.)
Occasionally Photoshop (CS5) gets "creative" in how it stiches an image. I'm guessing there are better, more modern alternatives.
I am not using lens correction because I think it would complicate the crunching process fairly significantly. (I shoot raw, convert to dng, then import for stiching. If I open the dng in PS, I'm given a menu of brightness, contrast, etc options before opening. I haven't tested to see if those choices remain the same between images, but it would add one more step and file.) The lens has a some barrel distortion but the final images look good.
I've done about 125 BW 4x5 negs so far. Book 1 (3-ring binder) done.