There's been a few posts about scanning film with a (digital) camera. I'll throw out some links trying to give people a starting point if they're shopping.
It's pages of info, but it seems you don't have to spend a lot on a light source. I mean some folks are pointing flashes into white garbage cans.
Maybe I'm ahead of myself. So, what'd ya need:
-Camera
-Lens
-Light source
-Something to hold the film
-Copy stand (somewhat optional)
Cameras are what you have and even lenses seem to be what you have, but macro lenses, particularly autofocus macro lenses have been recommended here before. I'm gonna try a Nikkor 55mm (on a Sony A7V), but I expect to order an autofocus macro (Tamron 90mm), which was the top lens on a convincing review I read or watched (don't have a link).
Light source? From what I've read, if you're trying to convert color neg film, the light source is pretty damn important. If it's black and white, well, I've pointed the camera out the window and that worked fine. That said, I just ordered a Viltrox 116T (CRI 95+) for $40. I'm converting B&W and slides. I have very few color negs. I suspect the Viltrox would probably do fine for color negs though.
I think neg holder setups range from the expensive Negative Supply
I use a high milage Nikon D610 and the 60mm 2.8D Micro lens. Then I use a Viltrox LED panel which has a good color rating, and the knock off of the Nikon ES-2. My main limitation now is not being able to do medium format.
The $460 refurb'd Z5 that arrives today from Nikon will take place of the D610. Same sensor but live view with exposure preview.
I started with Negative Supply in the Kickstarter days and stayed with them. That being said, the gear is stupidly expensive and occasionally fiddly. If you were scanning dozens of rolls a week, it might be worth it but there are better options for occasional use.
The Valoi is a popular choice. It has tubes that connect it to the lens. This eliminates any stray light from effecting the scan. It also offers a built in light source.
The Nikon ES-2 is another great option. It also attaches to the lens but you need a separate light source. It works best with the Nikon 60mm Macro.
The one piece of Negative Supply equipment I can highly recommend is their Basic Carrier 120. If you use 120 film, it keeps the film flat. You pull the film through by hand. Very simple and works well.
If you decide to use a copy stand, insure the camera mount is parallel to the base.
It's a fun part of film photography and this is a good place for answers.
I haven't used the The Valoi Easy 35 but it looks to solve two annoying things about the ES-2 which is loading the film carrier and, at least in the case of my ES-2 knockoff, rounded edges of your scans due to the film carrier.
JJC makes a film copying set up that does the same thing as the Valoi but is much cheaper and available on Ebay. It comes with a light source, metal tubes to work with various macro lenses and a film and slide carrier. It works with cut film, with up to six frames fitting in the carrier.
I am using the lobster holder and it slightly trims the edges of the 6x7 frame but otherwise does a decent job of holding 120 rolls flat. It struggles with my more curled rolls, but I think I did a poor job of weighing the rolls down as they dried so it's probably user error.
Unfortunately like with most holders, its best when the roll is left whole. I have some negatives that I cut in 1s and 2s to store in plastic sleeves that it really struggles with. I'm thinking of getting a piece of glass and seeing how that goes instead.
I ended up using a manfrotto super clamp which was strong enough to hold up my nikon zf and the af-s 105 G macro. For under 30 bucks I recommend it but I did have spare tripod head already to make it more useful.
After I had ordered the copy stand and light, I found this A to Z article in which he uses the Essential Film Holder, which confirmed I should order that. His copy stand looks rather...interesting in a Rube Goldberg get 'er done way. I like the DIY touch.
I'm a noob at this so bare with me, or feel free to skip past.
I wasn't ready to splurge on the negative supply stuff yet, only shot a few rolls of film.
I particularly didn't want to pay for the very expensive light with progress seeming to be made about narrowband wavelengths to get better colours without too much fiddling.
As well as reading some (mixed) comments about light uniformity, holding 120s flat, same with the valoi.
Both had black friday sales so I was rushed in my research.
I ordered jack's scanlight (not really a commercial offering but one guy putting them together), not yet arrived and I think cinestill have made a new light doing a similar thing, and there might be one from a company called cute something or other.
Someone mentioned the OLED lights are similar but I don't think I have a portable one.
I also ordered the essential film holder (from https://clifforth.co.uk/index.php - seems a little different from the one in the OP, and also waiting on it to arrive) but the negative supply one looks great too, just not sure how it will all work together so thought I'd fiddle with the cheaper options first.
After collecting my first roll of negatives yesterday, and before it all arrives - I tried using my old ipad as the light yesterday. With a thin sheet of diffusion paper.
Definitely not as good as results from the shop with their frontier scanner, and needing tonnes of fiddling using the ipad screen and kodak 200. Tonnnnnes of dust, massively different sharpness when I press the film down but still not as uniform as the shop.
But at least I can see the full negative, they were cropping my images too much.
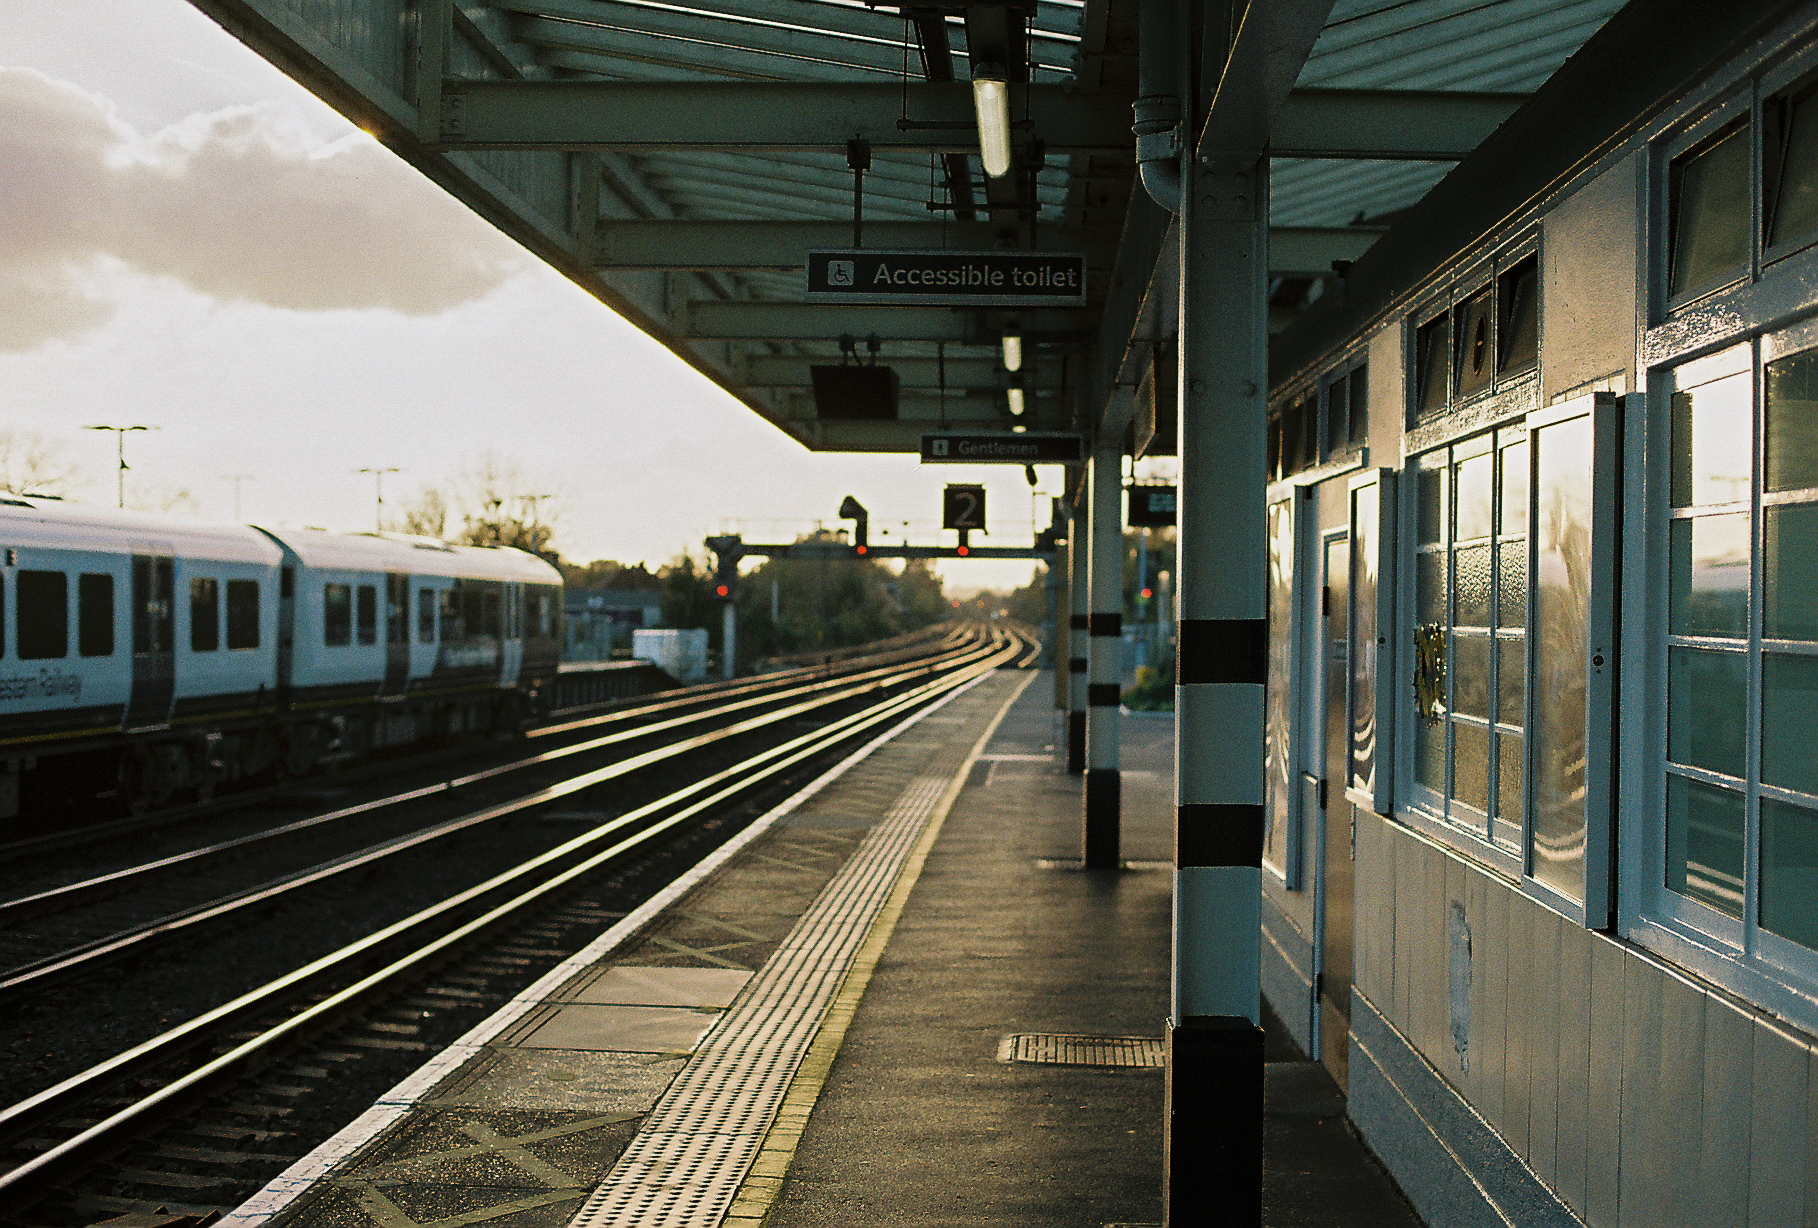
Shop scan (the default 6x4 offering):
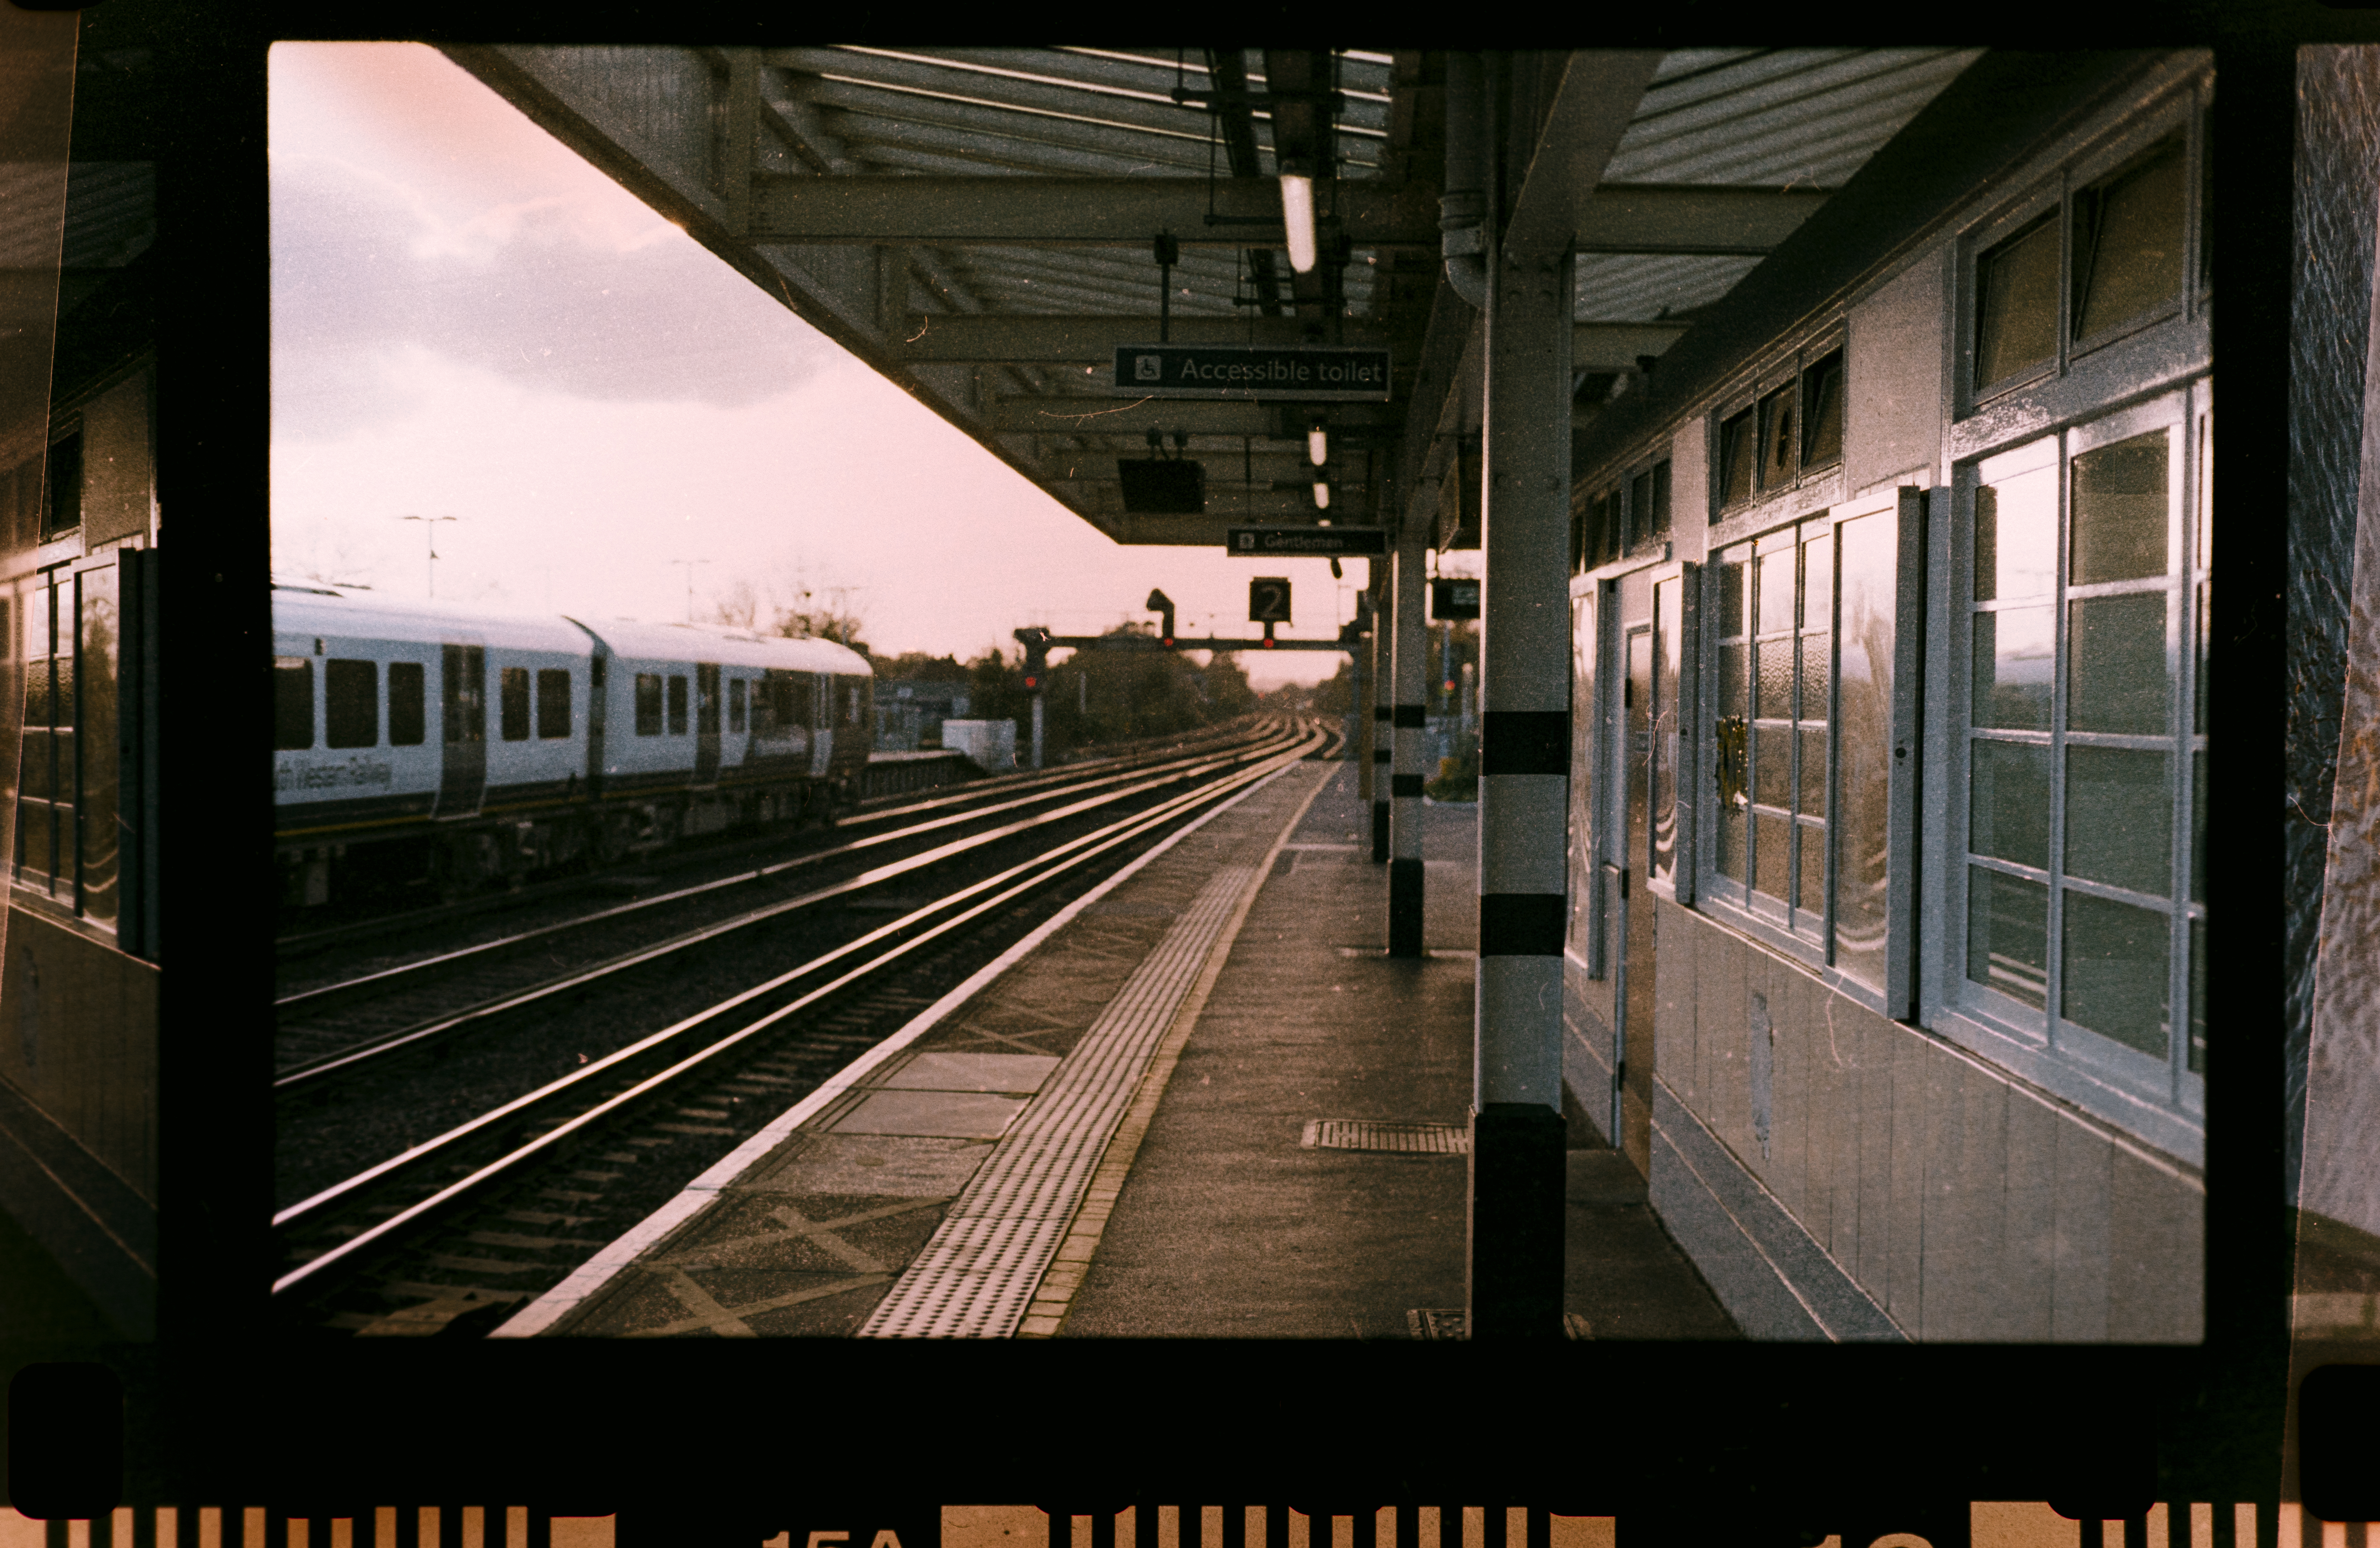
My dusty ipad light test scan from last night (my first one) + editing time:
You can see some diffusion paper pieces on the sides I was using to press things down a bit. Shutter speeds weren't as fast as I'd like either.
Had a lot of trouble with blues appearing in the midtones and shadows with the gold 200 negative once inverted. To correct it I had to push the colours further than I'd want to. I did white balance first on the in-between parts of the film frame. I think that's why the regular lights sometimes offer a "cool mode" and recommend it for c41... I think (and hope).
It took way too much time on the editing to get the colours even acceptable. And I tried it with the lightroom classic plugin trial "negative lab pro", didn't seem much different.
I ordered the higher resolution scan on my second roll (should be here today though they mentioned their frontier machine needed repair ...).
I want to see how good a result I can get (once the proper stuff arrives) without unreasonable time spent editing each image, vs the �10 saving per roll on scanning with the higher res.
It's kind of fun scanning though but quite a bit of time investment getting things clean and set up nicely.
I (clearly) didn't do that for this first test and lost stamina after trialing the first one or two shots! But it was a long day.
I'm using a sturdy tripod with some adjustable heads at the moment, a7cii + cheap ebay Sigma 105mm f/2.8 EX DG Macro (I think that's the model at least) for nikon F adapted that I've had for years. I've seen a video where someone recommended placing a mirror pointing at the camera, placed where your film would be to align the camera and might give that a go instead of some spirit level on the camera. I didn't dim the lights much and the diffusion paper might have added a cast too though I believe it was supposed to be neutral (when bought new years ago anyway).
Have to admit the valoi method without a copy stand or tripod seems like it would save some effort if the results are good. But if you have the space (and can keep it clean) with a copy stand seems like it wouldn't be too slow if the results come out good without much work.
I got some cotton gloves coming. I should probably have wiped down the ipad too but tbh, it's not flat enough just having it ontop of the diffusion paper. Feel like I want to squeeze it with glass but maybe the "s-curve" they talk about in these holders will be enough... First goal is to make sure I can get it a similar sharpness across the frame, then the colours/light, then clean and efficient while maintaining the first two goals.
I wasn't thrilled with my essential film holder, which I was intending to use for 120 film. It was too hard to feed the film through, though this was for cut film. It would work better for uncut rolls where you only have to feed it in once.
I got my scanlight, even a basic holder improves things quite a bit. It was like $8 in case the light arrived before the essential film holder (UK one).
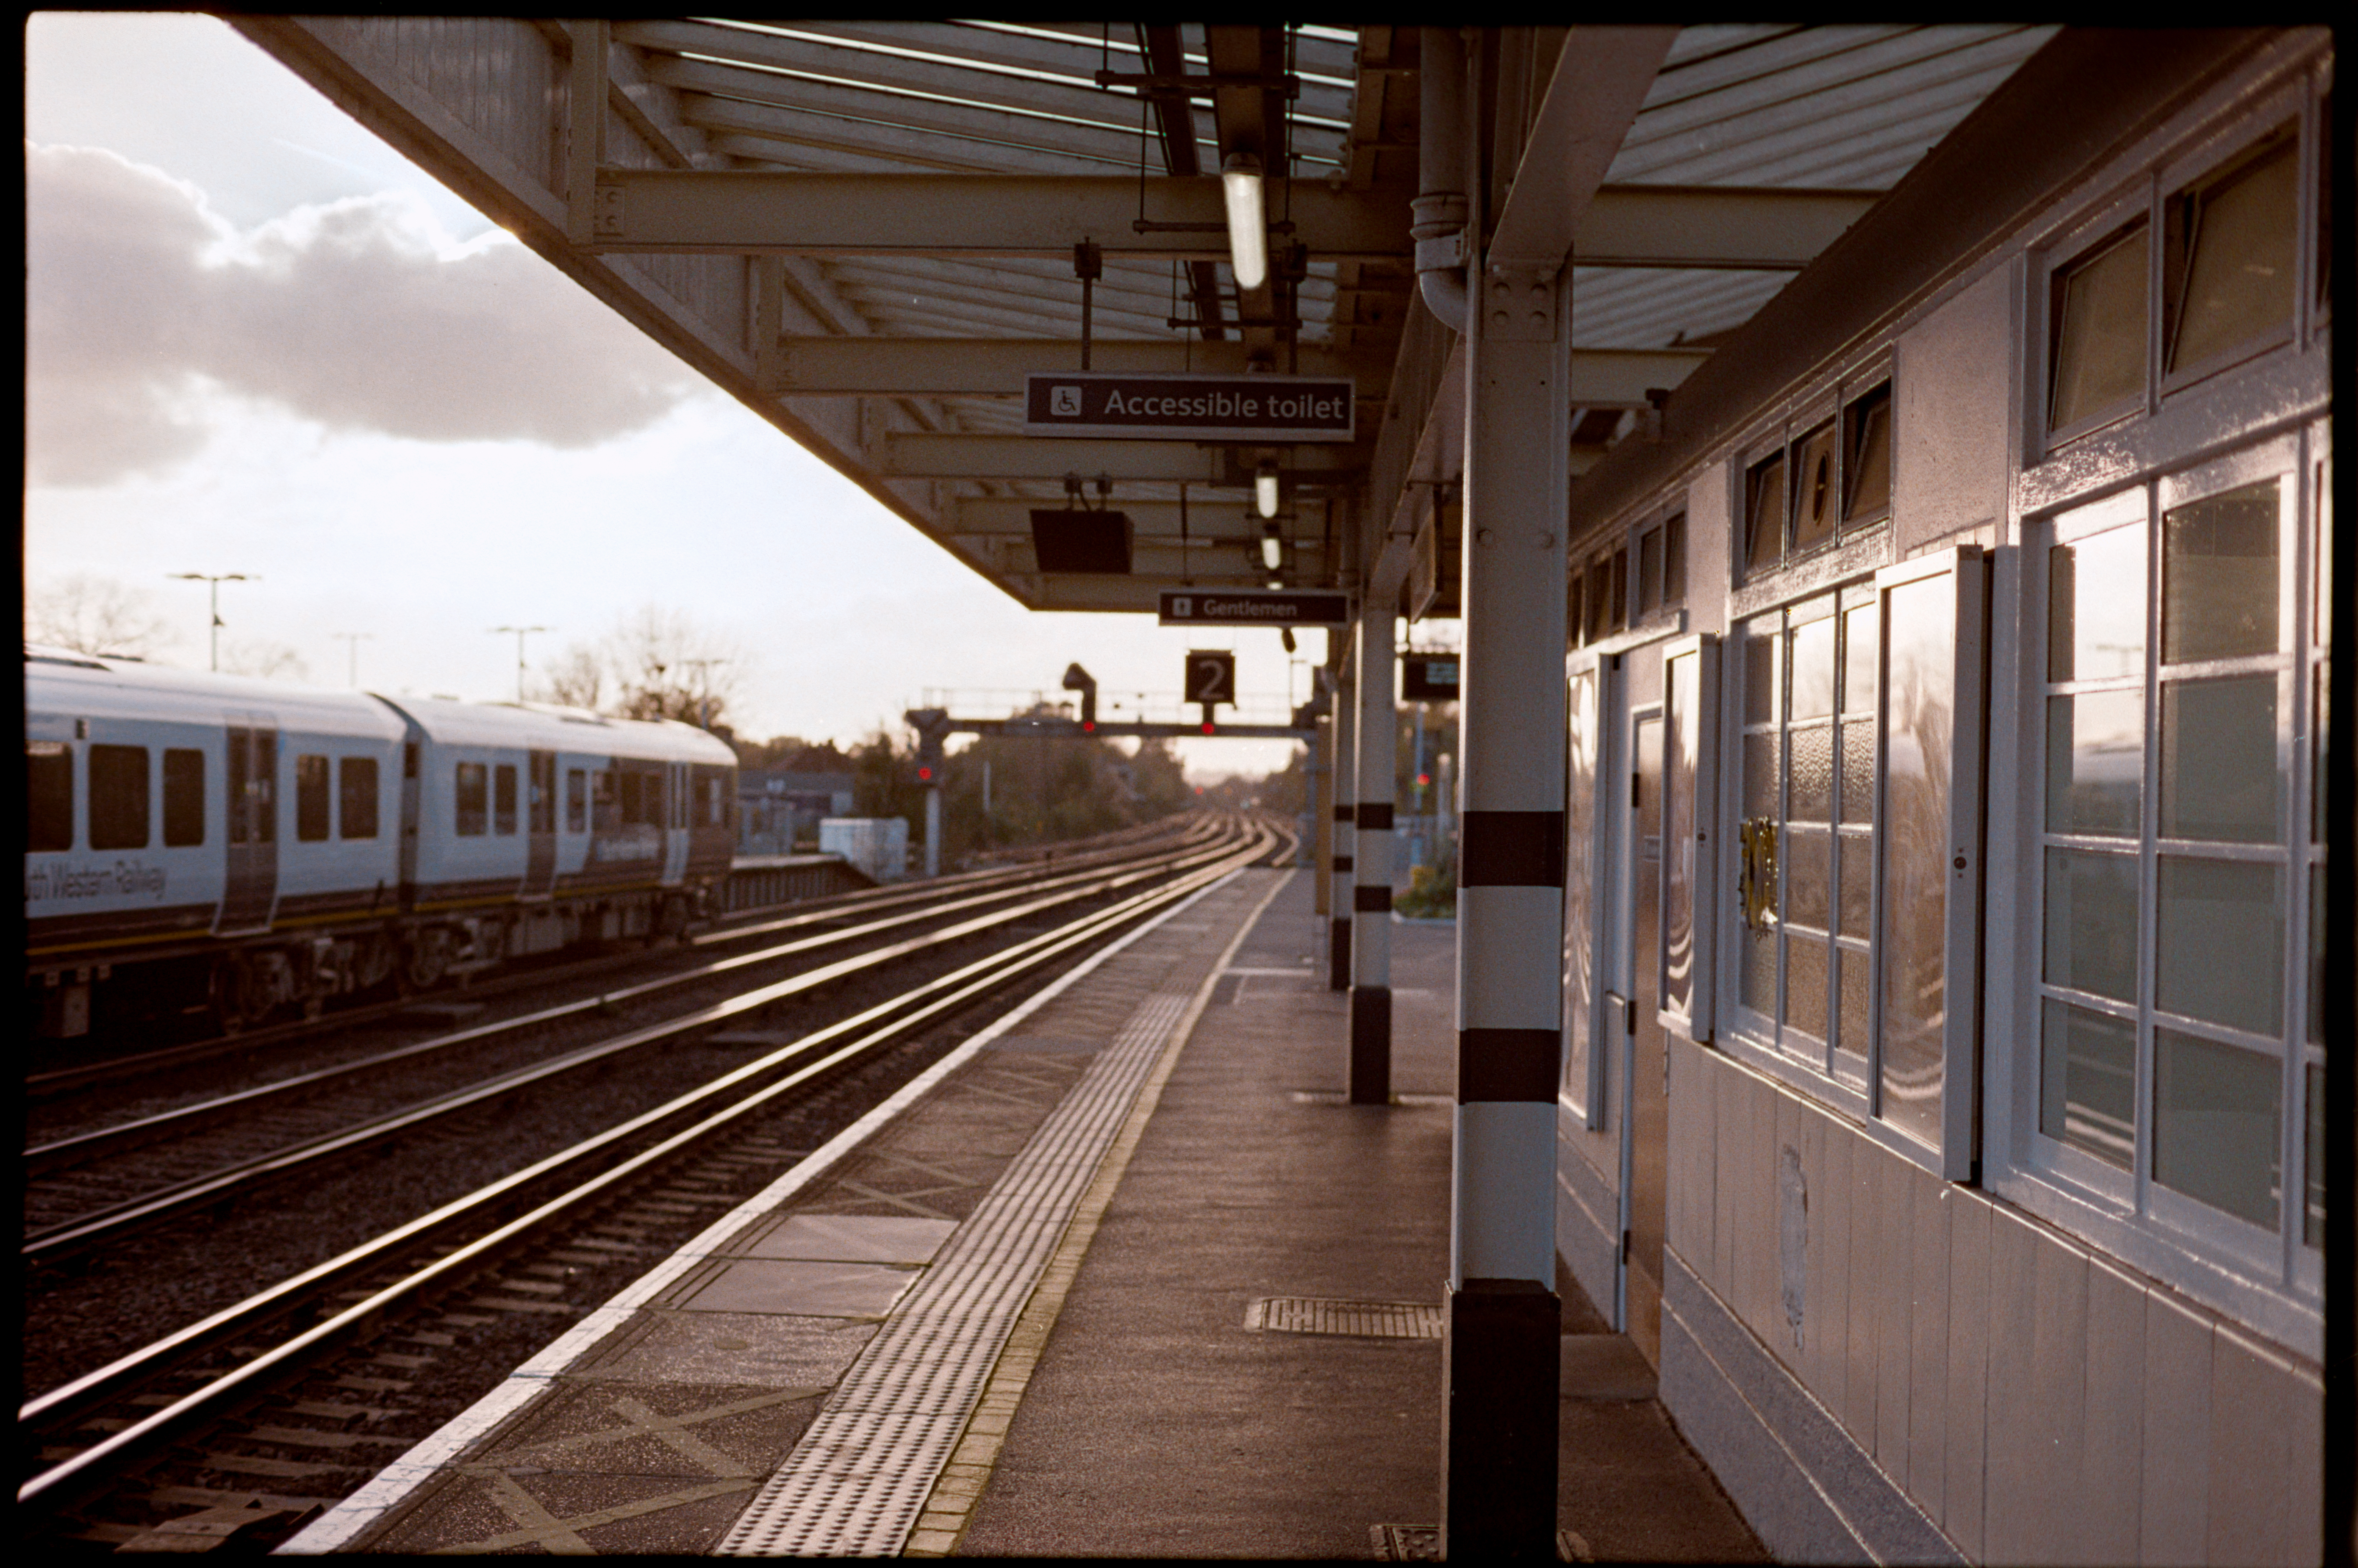
I know it's not a good example because of the stupid DOF (testing my ability to actually focus a shot), but I did the same photo as before just for reference:
There was a tip I read about placing a mirror where the film would be first to make sure the camera was lined up. My floorboard was pretty... well it wasn't the best but even still, I'm quite happy so far.
I didn't use NLP. I white balanced on the frame, then inverted rgb curves and slid them around a little. I'll get a better example later, only have my first ever roll at hand and most of those weren't in focus at all.
Will let you know how I get on here with the scanlight and curious to see your results too, OP.
I will say that I had a portrait shot done by a frontier scanner at the local place. I loved the colours. I scanned that same image and while the colours seemed clean, it was not the same thing. It took me a long time to adjust to get it closer, and I saved that preset.
I used up my entire trial of NLP with this narrowband RGB light and their frontier settings... I couldn't get it close, perhaps someone more skilled can but their Frontier presets just weren't doing it. I understand the technician probably had some influence there too. I tried it with the 95+ CRI mode instead of RGB to see if it made a difference with NLP, and it's still the same. Also quite buggy on mac os. Will keep an eye out for future updates though.
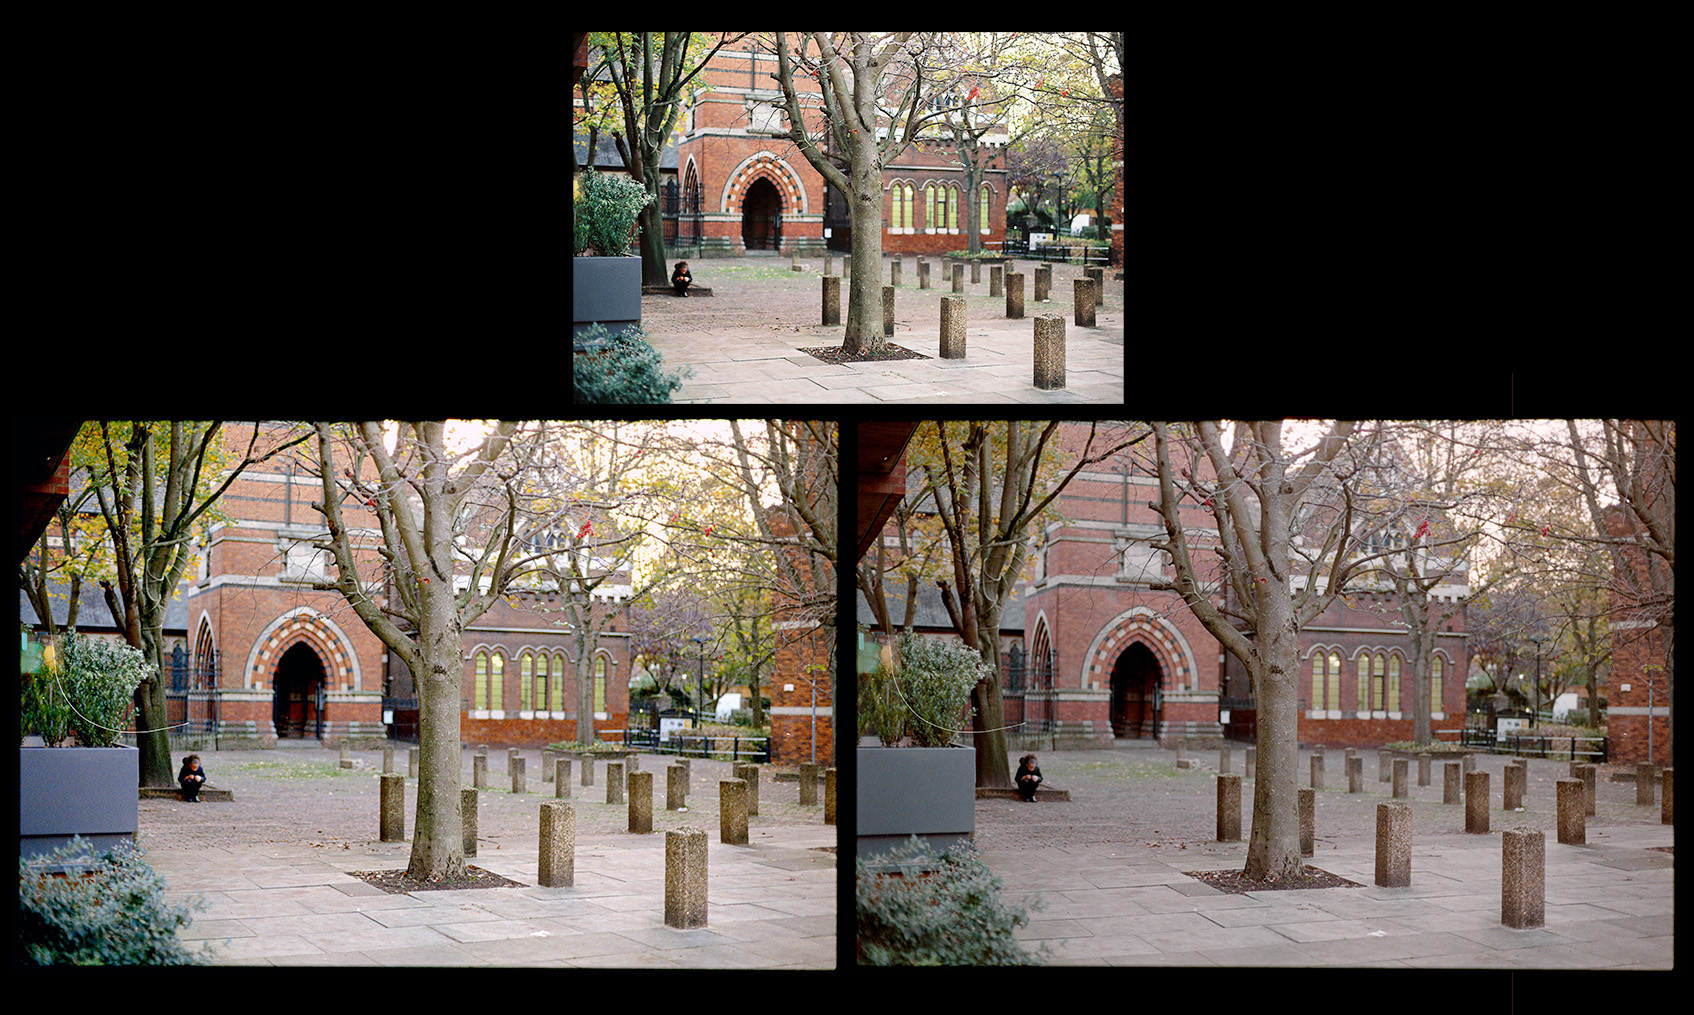
Top: frontier scan (I just got the basic scan on this roll)
Left: is me editing trying to get it closer to the frontier without spending a crazy amount of time (because it would probably be a waste of time as I wouldn't be able to do it)
Right: me editing normally
(sorry it's another shot with dof, testing the focussing and lens)
Can see why I like the frontier scan, my editing, especially without it as a reference, just isn't the same. Maybe more normal, it was late in the day, but not as nice and it's a struggle to tweak colours for me.
The proper scan's colours can be so much more interesting in some shots. Others aren't so bad.
I dunno. It seems like even film won't rescue me from colour editing.
Also I feel like there's a whiff of a teal/pinkish cast with the scanlight that I had a hard time getting rid of so far (just got it today), but again I'm not very good at colour editing and it's nice not to absolutely need to rely on extra software.
But I did see it in the example shots versus regular white high CRI light before I ordered it too. It has a setting for white light (cri 95) and I ran it through nlp and I still saw it but I might have messed something up.
I have a background in research, and in my research it seems I explored all the wrong answers before I found the correct answer. The following is certainly not rigorous, but explores some of the wrongs.
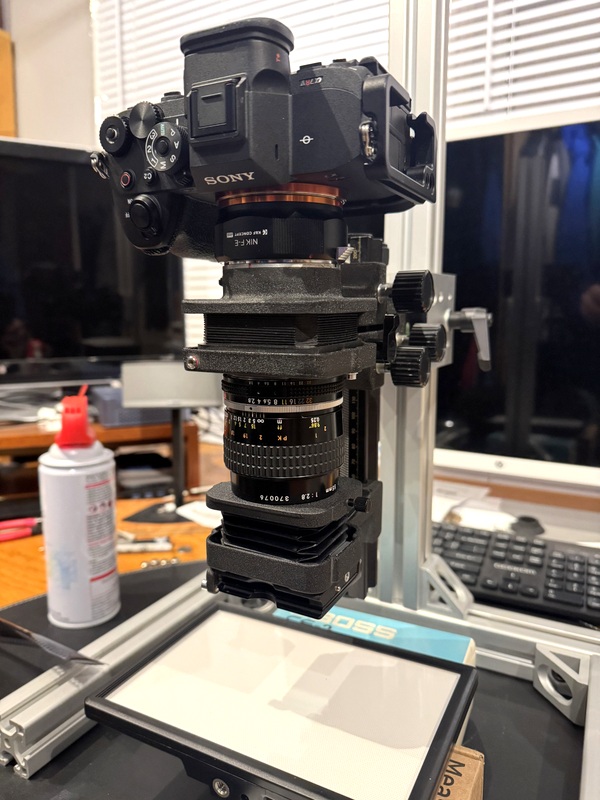
I have a Nikon bellow (PB6) and a slide copy attachment (PS6) and a 55 micro. It all fits together beautifully and it was made to copy slides and film.
This also shows the camera stand I assembled and the Viltrox LED light. The light comes without a 12v plug in adaptor, but I had a spare in a drawer.
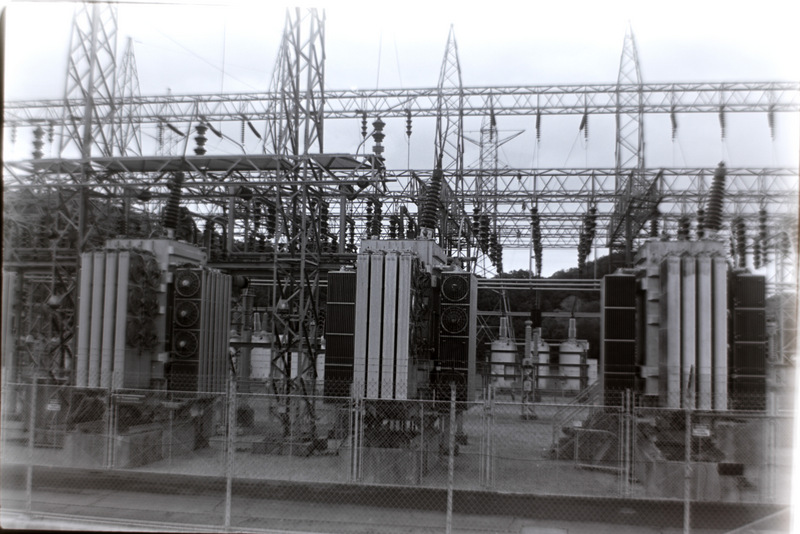
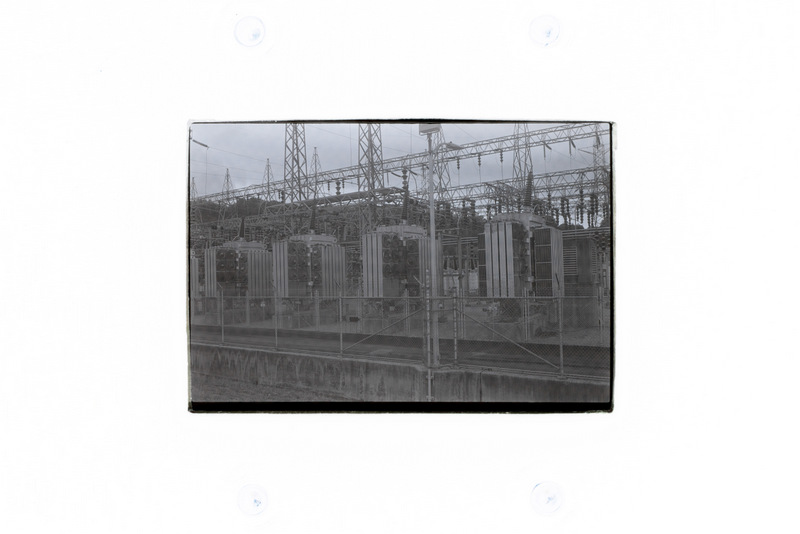
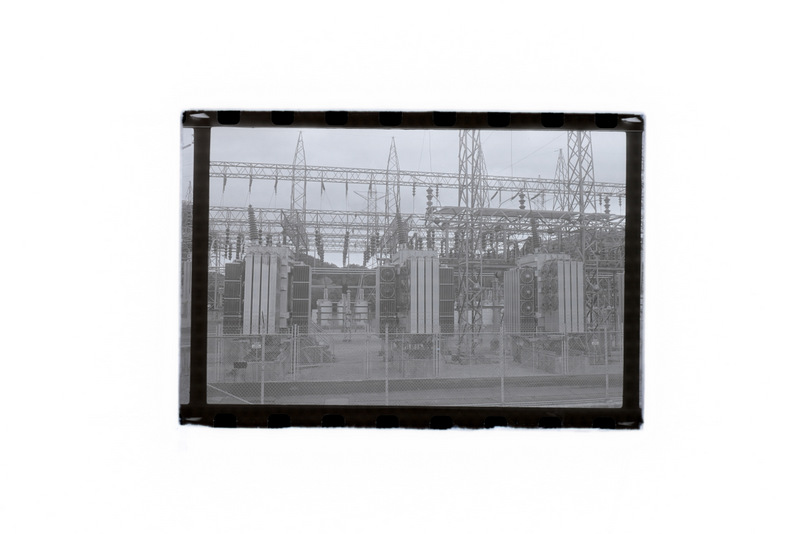
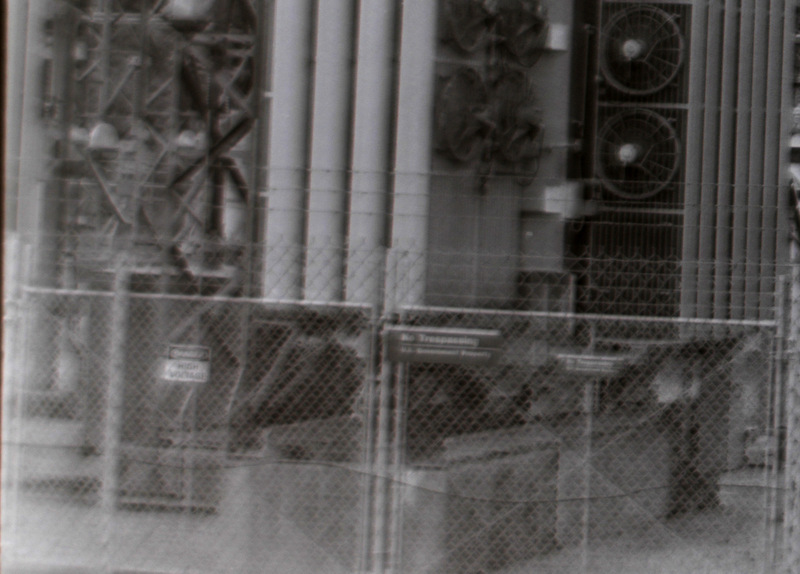
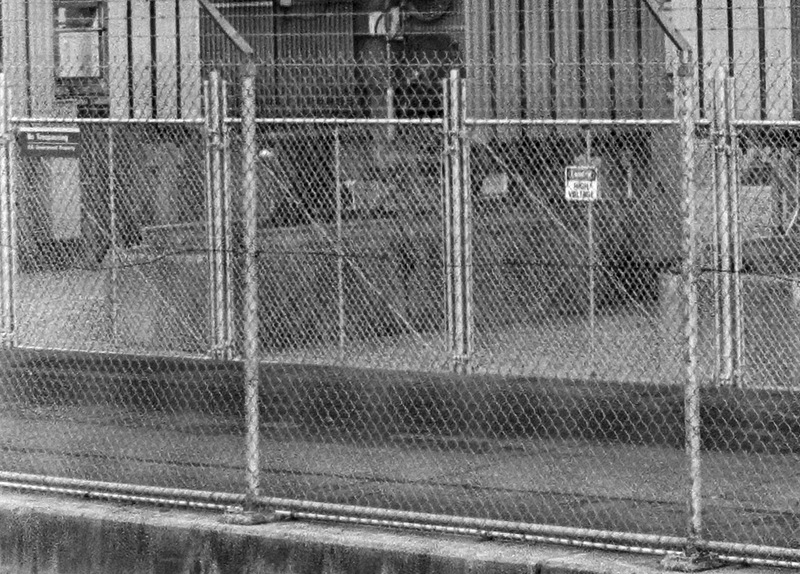
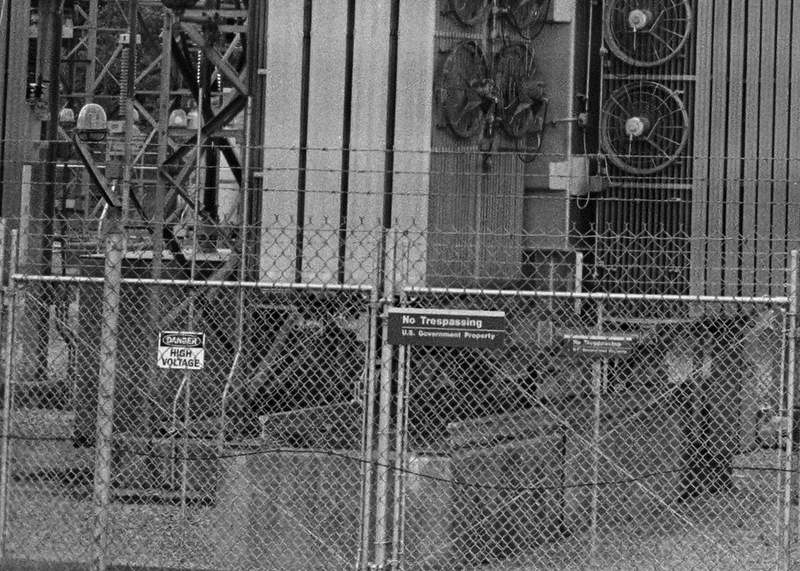
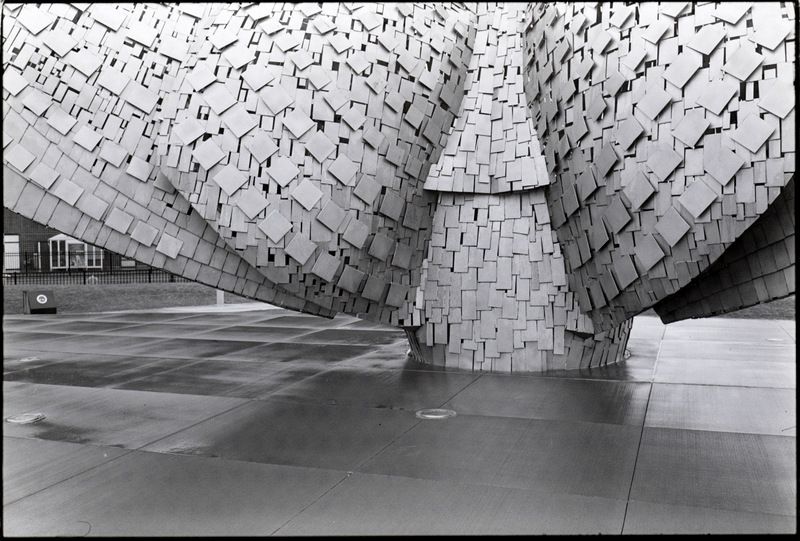
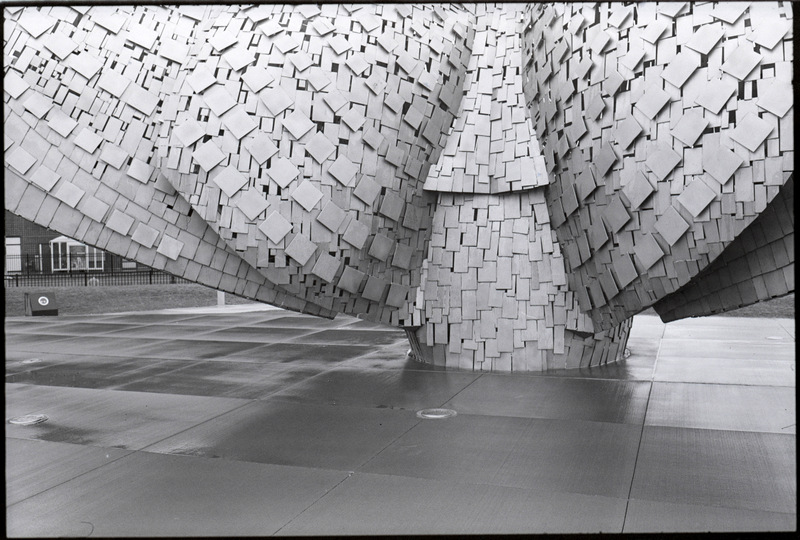
I assumed this setup would do a good job copying. Nope. Really bad. What the hell? How could this not work? I removed the bellows, and just used the 55mm and a enlarger neg carrier to hold the neg, no lens hood, room lights on, down and dirty. I also used a glass carrier, but the 55 doesn't focus close enough to fill the frame (1:1) with either neg carrier. Here's a comparison of the "out of camera" images showing the cropping.
I'm hoping you can see that the first shot (using the bellows) has terrible sharpness that at the edges make a pinhole camera look good. The second is a filed out neg carrier, and the third is a 120 glass carrier with some matt board as a mask.
Ok, this roll was a terrible one to use as an example since I accidently overexposed it by having a meter fail AND thinking I was shooting 100 when it was actually 400. Yeah, many stops overexposed. Also, I screwed up and didn't choose the same neg for the "filed out neg carrier" image. I'm sure my whole setup is not square or aligned, but I'm just trying to get in the ballpark, so hang with me a minute.
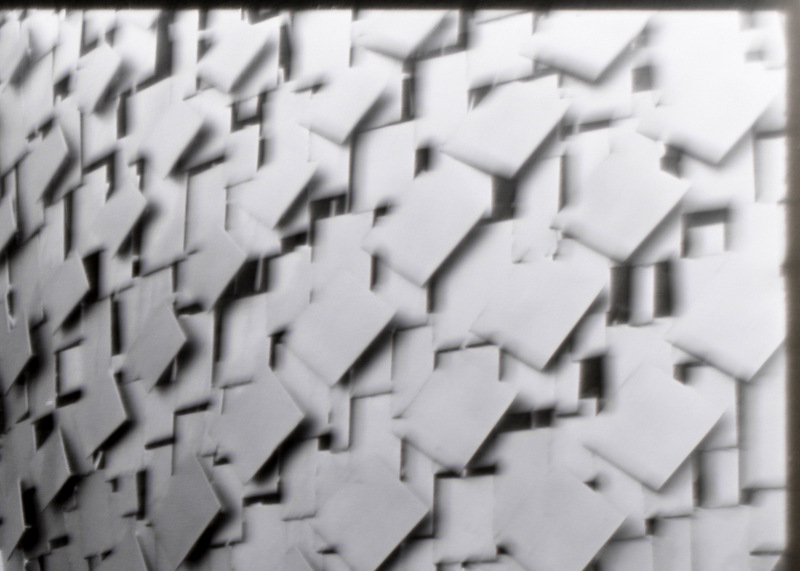
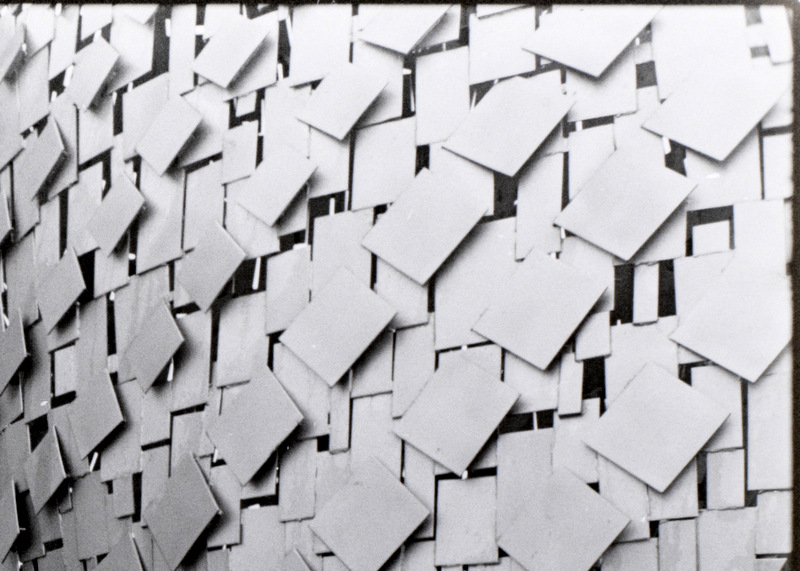
Small images don't really show the story so...
These are crops of the bellows shot, neg carrier, and glass carrier. I also scanned the neg with an Epson scanner and a crop is below.
(Edit to include correct link.)
Hopefully all these links work.
1. The bellows sucks. I did some searching and others seem to suggest they work, but I found a youtube video (using this setup) and in the comments, a guy said that the frame of the carrier is basically the same size as the neg and it shades the boarders. Make sense. Two other guys said they had the same problem. I think the lens would do better with an extension tube rather than leaving it set to infinite and using bellows extension to focus.
2. Even with a significant crop, both the neg carrier and the glass carrier do better than my scanner (at 3200 dpi).
3. I'd have to do some more comparison, but it looks like the glass carrier is giving some more sharpness. Hard to tell with different images.
Here comes the question. I'm thinking of getting the Tamron 90mm (newer version) and the Essential Film Holder is ordered. Should those work together? Any foreseen problems? I don't think I need an extension tube (for full frame) since it should go to 1:1. Comments welcome.
jay w wrote:
I have a background in research, and in my research it seems I explored all the wrong answers before I found the correct answer. The following is certainly not rigorous, but explores some of the wrongs.
I have a Nikon bellow (PB6) and a slide copy attachment (PS6) and a 55 micro. It all fits together beautifully and it was made to copy slides and film.
https://i.postimg.cc/9QqJWnb8/IMG-0474.jpg
This also shows the camera stand I assembled and the Viltrox LED light. The light comes without a 12v plug in adaptor, but I had a spare in a drawer.
I assumed this setup would do a good job copying. Nope. Really bad. What the hell? How could this not work? I removed the bellows, and just used the 55mm and a enlarger neg carrier to hold the neg, no lens hood, room lights on, down and dirty. I also used a glass carrier, but the 55 doesn't focus close enough to fill the frame (1:1) with either neg carrier. Here's a comparison of the "out of camera" images showing the cropping.
I'm hoping you can see that the first shot (using the bellows) has terrible sharpness that at the edges make a pinhole camera look good. The second is a filed out neg carrier, and the third is a 120 glass carrier with some matt board as a mask.
Ok, this roll was a terrible one to use as an example since I accidently overexposed it by having a meter fail AND thinking I was shooting 100 when it was actually 400. Yeah, many stops overexposed. Also, I screwed up and didn't choose the same neg for the "filed out neg carrier" image. I'm sure my whole setup is not square or aligned, but I'm just trying to get in the ballpark, so hang with me a minute.
1. The bellows sucks. I did some searching and others seem to suggest they work, but I found a youtube video (using this setup) and in the comments, a guy said that the frame of the carrier is basically the same size as the neg and it shades the boarders. Make sense. Two other guys said they had the same problem. I think the lens would do better with an extension tube rather than leaving it set to infinite and using bellows extension to focus.
2. Even with a significant crop, both the neg carrier and the glass carrier do better than my scanner (at 3200 dpi).
3. I'd have to do some more comparison, but it looks like the glass carrier is giving some more sharpness. Hard to tell with different images.
Here comes the question. I'm thinking of getting the Tamron 90mm (newer version) and the Essential Film Holder is ordered. Should those work together? Any foreseen problems? I don't think I need an extension tube (for full frame) since it should go to 1:1. Comments welcome.
I use a bellows setup very similar to the one pictured. I know you're going with a different setup now but just wanted to put it out there for anyone debating using a bellows, it is possible to fix the issues described here. Regarding the sharpness - were you taking your exposures at f/8 or f/11? Anything besides either of those will not work all that well, both for exposures and during focusing. Looking at the image that you provided for the setup it looks like it's on f/2.8 but I don't know if you actually shot at that. For focusing at f/8 or f/11 it can still be tricky if you're doing it off of the camera screen, but if you hook it up through HDMI to a larger monitor it becomes very easy to see the grain on the negative and adjust for focus. Once you have the correct focus you also can just leave some type of marker and always align it to that, I recommend taking a blank strip of negative and focusing on where the grain becomes sharpest to find this point; that is how I tested mine.
For the vignetting of the borders, this usually means that the back of the negative holder isn't pressed all the way in - the issue will also be exacerbated if you aren't at the correct focus point as less of the negative will be visible and so the vignetting will be present deeper into the negative. If it's at the correct focus point you will be able to see corner to corner and if the back is pressed in the vignetting should almost completely or completely disappear. You can also somewhat automate the pressing part by having something that sits on top of the holder and has something that fits snug over the back. Anything that can stay stable on the top should work, I built mine out of LEGOS, they work well for this.
As for light masking this part took me the longest to figure out, but what I've found works well is taking electricians tape and masking off the sides of the negative holder where the negatives will slide through. This has a couple of different advantages besides light masking as well, namely that it reduces the risk of scratching the negatives and also provides more friction when the back is pressed in, so holding the negative straight becomes far easier. Also having all lights off for copying during this helps a lot, but you can get away with not doing so sometimes.
Happy to show some pictures of the setup or give any further details.
tile_86 wrote:
I use a bellows setup very similar to the one pictured. I know you're going with a different setup now but just wanted to put it out there for anyone debating using a bellows, it is possible to fix the issues described here. Regarding the sharpness - were you taking your exposures at f/8 or f/11? Anything besides either of those will not work all that well, both for exposures and during focusing. Looking at the image that you provided for the setup it looks like it's on f/2.8 but I don't know if you actually shot at that. For focusing at f/8 or f/11 it can still be tricky if you're doing it off of the camera screen, but if you hook it up through HDMI to a larger monitor it becomes very easy to see the grain on the negative and adjust for focus. Once you have the correct focus you also can just leave some type of marker and always align it to that, I recommend taking a blank strip of negative and focusing on where the grain becomes sharpest to find this point; that is how I tested mine.
For the vignetting of the borders, this usually means that the back of the negative holder isn't pressed all the way in - the issue will also be exacerbated if you aren't at the correct focus point as less of the negative will be visible and so the vignetting will be present deeper into the negative. If it's at the correct focus point you will be able to see corner to corner and if the back is pressed in the vignetting should almost completely or completely disappear. You can also somewhat automate the pressing part by having something that sits on top of the holder and has something that fits snug over the back. Anything that can stay stable on the top should work, I built mine out of LEGOS, they work well for this.
As for light masking this part took me the longest to figure out, but what I've found works well is taking electricians tape and masking off the sides of the negative holder where the negatives will slide through. This has a couple of different advantages besides light masking as well, namely that it reduces the risk of scratching the negatives and also provides more friction when the back is pressed in, so holding the negative straight becomes far easier. Also having all lights off for copying during this helps a lot, but you can get away with not doing so sometimes.
Happy to show some pictures of the setup or give any further details. ...Show more →
-Exposures were at F8 or 11 (I didn't see a difference
-Focusing was at 2.8 or 5.6 (didn't make a difference) and I used a magnifier on the screen plus the in camera magnification. The center of the images (not shown were in pretty good sharpness, but it's still poor compared to without the bellows
-The back of the negative compartment was snapped in place otherwise the neg won't stay in the holder
-I tried using black electrical tape (Super 33) on 3 sides and that didn't change anything compared to without
-Room lights were off
-The lens was recently serviced, but I had this problem before and after servicing. Also, without the bellows images are sharp.
The images are so poor that I wonder if the lens should be focused close (entended) with only a minimal amount of separation from the camera. So a short extension tube with the lens racked out to minimum focus would give sharp images.
Ok, I think I figured out the problems. As they say, you can't make anything foolproof because the fools are so ingenious. Two problems (as tile_86 suggested):
-I had the negative in the wrong slot, a space a bit closer to the lens
-The bellows has a way to lock the lens at full aperture, so even though I was stopping down, the lens was still wide open.
-This time I added a mask in front of the bellows to block extraneous light. I forgot that yesterday.
Photos in order shot:
-Bellows, lens at infinity, Wide open
-Negative carrier, lens at minimum focus, F8
-Glass neg carrier, lens at minimum focus, F8
-Bellow, lens at infinity, F11
Upper right corner of each image:
-Bellows, wide open
-Neg carrier, F8
-Glass carrier, F8
-Bellows, F11
The stopped down shots all look the same to me. The bellows is more difficult to focus since locking the adjustment changes the adjustment just slightly. I may try the bellows/neg carrier combo to see if the image gets better without cropping.
Glad you figured it out! Also stealing that foolproof quote, lol. I'm curious to see how the negative carrier/bellows combination works, I've debated swapping out the original holder from the bellows set for a more modern negative carrier.
Ok, testing out a Tamron 90mm marco (Di iii). So the comparison is:
-Nikkor 55mm 2.8 micro with PB6 bellows and PS6 slide copy attachment
-Tamron 90 2.8 with a darkroom neg carrier
-Tamron 90 2.8 with a glass darkroom neg carrier
Those were all at F8. I also did:
-Tamron 90 2.8 with a glass carrier at 5.6. I was assuming the neg is flat, doesn't need the depth of field and I might eek out some more resolution
-I didn't do anything to the files except: rotate, flip, and invert. So the images look flat and this first series shows how much of the full frame (on a Sony A7Rv) the image consumes.
-Nikon 55 w/bellows
-Tamron 90 with neg carrier
-Tamron 90 with glass carrier
-The same but at 5.6
I'm seeing more flair/haze with the bellows setup. There's carboard with a cutout in front of the slide copy attachment and some black tape around the edge. The 90 had a lens hood but there was still a gap between the hood and the carrier.
Here's the bottom right corner in the same order:
The 55mm holds its own. There's some haze or lower contrast, but that could be corrected in post processing. The glass carrier also shows a hint of haze or lower contrast, so that's interesting.
Finally, I took the F8 glass carrier shot and worked on it a bit.
As I look at this, I think it's picking up on the LED grid. The negative was 3/4 inch above the light. I'm not seeing the same issue in the 5.6 exposure. Interesting.
I think the big reason to choose the Tamron (or an autofocus lens) is the obvious stuff.
-It's autofocus and the bellows is kind of tedious.
-On a copy stand, I find it easier, to walk over to the light table and load a negative compared to the bellows with the extra tape and cardboard mask. It I was working on a tripod and pointed out the window, I think the bellows would be easier. You can blow off the neg carrier after the neg is loaded, and I think that will lead to less dust. I haven't noticed a need to refocus the 55 each image. It seems the negative is in the same position, but I'm not sure my perfectionism would allow that.
-I'm hoping the essential neg carrier will be a step easier. For 4x5 I'll still use a neg carrier.
-Is it worth the cost? I looking at this as a time saver, so eventually it will be. I can always sell the lens for a couple hundred less and look at it was a rental. I can also try some macro shots.
jay w wrote:
Ok, testing out a Tamron 90mm marco (Di iii). So the comparison is:
-Nikkor 55mm 2.8 micro with PB6 bellows and PS6 slide copy attachment
-Tamron 90 2.8 with a darkroom neg carrier
-Tamron 90 2.8 with a glass darkroom neg carrier
Those were all at F8. I also did:
-Tamron 90 2.8 with a glass carrier at 5.6. I was assuming the neg is flat, doesn't need the depth of field and I might eek out some more resolution
-I didn't do anything to the files except: rotate, flip, and invert. So the images look flat and this first series shows how much of the full frame (on a Sony A7Rv) the image consumes.
I'm seeing more flair/haze with the bellows setup. There's carboard with a cutout in front of the slide copy attachment and some black tape around the edge. The 90 had a lens hood but there was still a gap between the hood and the carrier.
The 55mm holds its own. There's some haze or lower contrast, but that could be corrected in post processing. The glass carrier also shows a hint of haze or lower contrast, so that's interesting.
Finally, I took the F8 glass carrier shot and worked on it a bit.
As I look at this, I think it's picking up on the LED grid. The negative was 3/4 inch above the light. I'm not seeing the same issue in the 5.6 exposure. Interesting.
I think the big reason to choose the Tamron (or an autofocus lens) is the obvious stuff.
-It's autofocus and the bellows is kind of tedious.
-On a copy stand, I find it easier, to walk over to the light table and load a negative compared to the bellows with the extra tape and cardboard mask. It I was working on a tripod and pointed out the window, I think the bellows would be easier. You can blow off the neg carrier after the neg is loaded, and I think that will lead to less dust. I haven't noticed a need to refocus the 55 each image. It seems the negative is in the same position, but I'm not sure my perfectionism would allow that.
-I'm hoping the essential neg carrier will be a step easier. For 4x5 I'll still use a neg carrier.
-Is it worth the cost? I looking at this as a time saver, so eventually it will be. I can always sell the lens for a couple hundred less and look at it was a rental. I can also try some macro shots.
I can see a grid of blurry spots (the LED grid?) on all of these except for the ones from the Nikon 55 w/bellows. On the f/5.6 shot the spots are dark whereas they're light on the others.