carstenw
Offline
Upload & Sell: Off
|
 Re: Medium-Large Format tips Re: Medium-Large Format tips | |
Yes, they are no good any more, you can throw that film out. Film is light-sensitive, and it doesn\'t stop being light-sensitive until it has been developed, so by looking at it, you have exposed it to so much light that your photos are \"overwritten\". I sometimes forget that some people don\'t have any experience with film at all. I grew up with the stuff and take some things for granted.
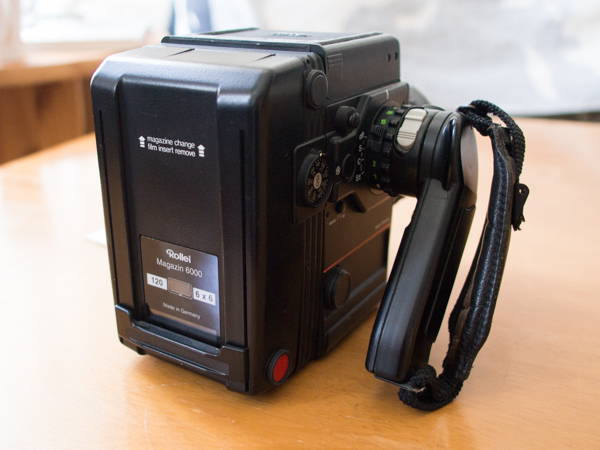
Since this is a tips thread, here are the proper steps to load a film in a Rolleiflex 6008. You know most of this already, I am just posting everything for completeness and future reference.
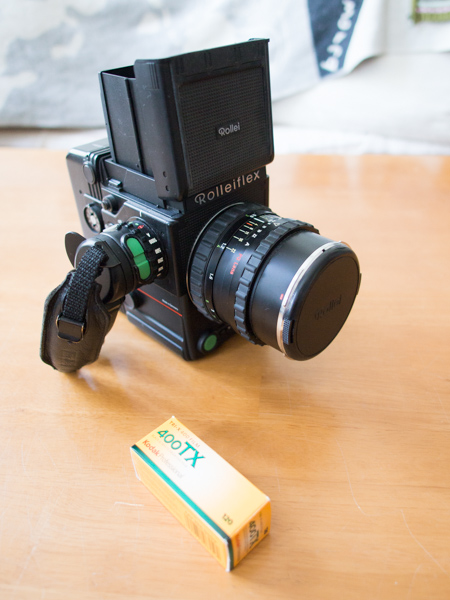
Here is my beauty, and a roll of 120 Tri-X:
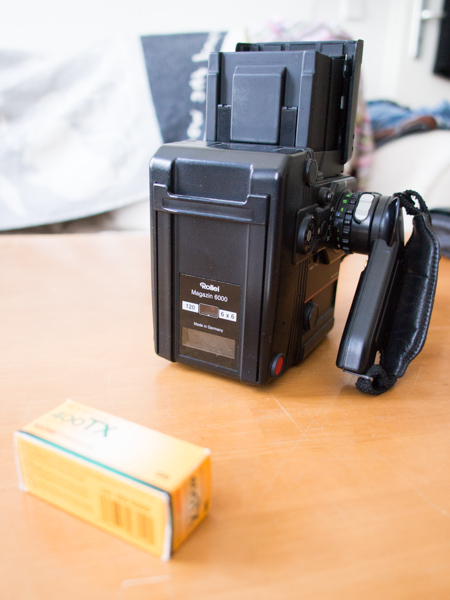
To remove the back, you need to slide the film back slider to the top, as shown. Then press the opposing red buttons to remove the back:
When you open it, note how the insert sits in it, and note the two symbols on the right hand side. There is a fat symbol and a skinny symbol, showing where the film should be (fat), and the take-up spool (thin):
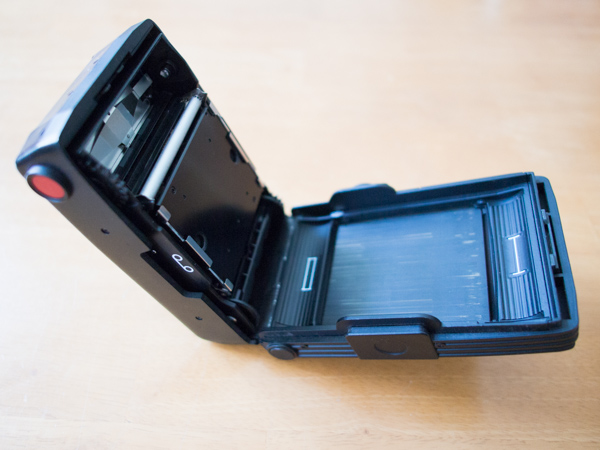
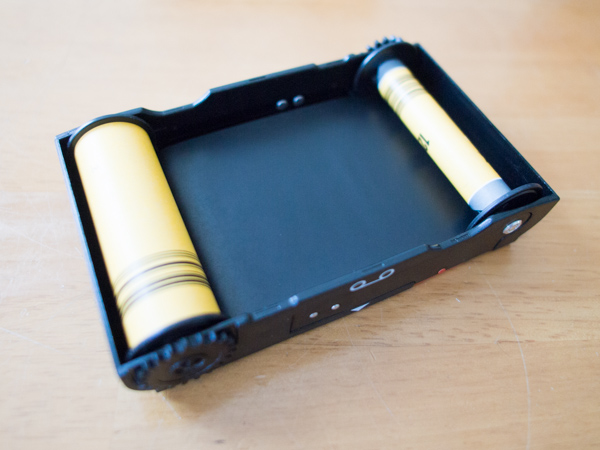
When you take the insert out, there is no need to move the take-up spool, as on a Hasselblad, because it is symmetrical and can be inserted either way. The way this is sitting on the table is the same way up it was sitting in the film back:
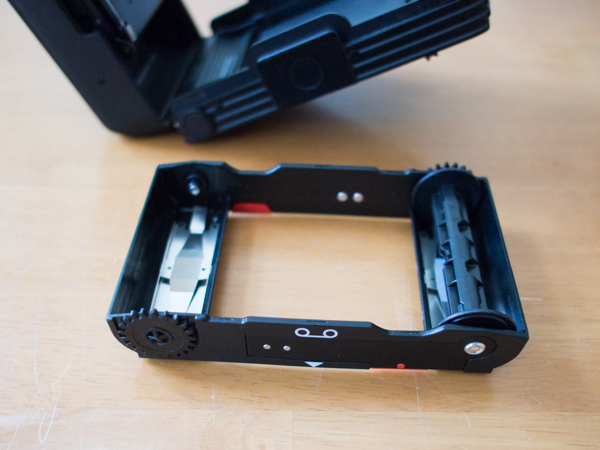
Insert the roll of film like this. Note the symbol on the side showing that the film should be pulled across the bottom, not the top:

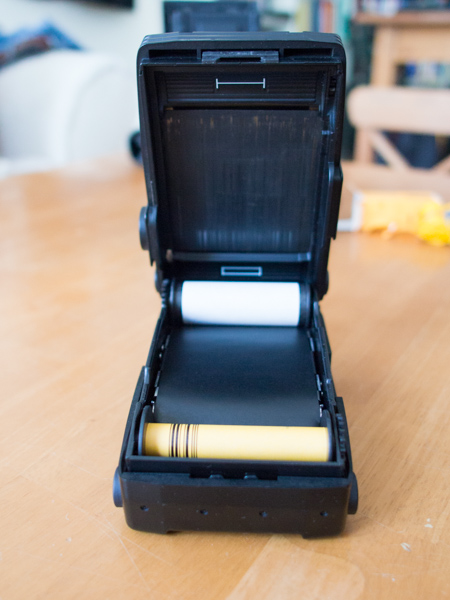
Pull the film across, you stick the film end through a slot on the take-up spool, hold it while you turn the geared wheel with your fingers, until it is firm:
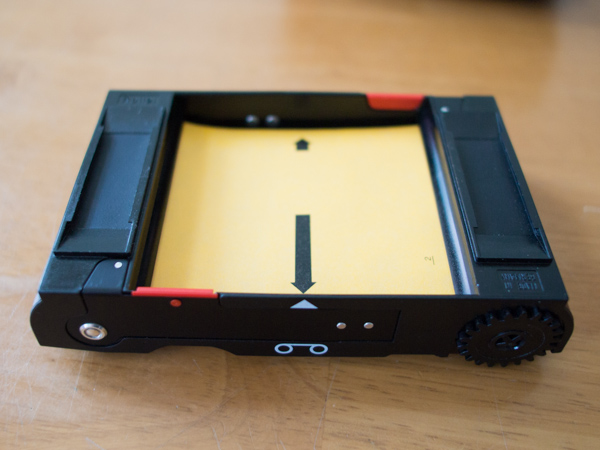
Flipping the insert over, keep winding the same way until the arrow on the film lines up with the arrow on the insert (different films have different arrows, but it should be easy to spot):
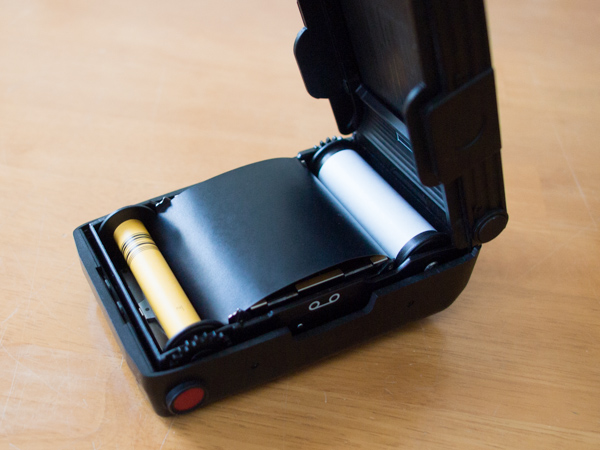
Flip the insert back over again, and lay it into the back, noting the fat and thin ends should line up with the symbols we saw before:
Gently press the insert down until the film pops up as shown:
Close the back gently until it clicks. If it doesn\'t close, probably the insert has been put in the wrong way. Then put the back on the camera and slide the film back slider to the bottom, as shown:
The film is in, the back is on, and the camera is almost ready to shoot. The first time you try to shoot, the camera will wind the film from S (start) to 1, and you will be able to see the upcoming numbers to the right of the 1. It will go to 12, and when you have made that shot, the film is finished, and you won\'t be able to make any more shots.
When you have shot the film, the camera will roll it to the end. Go somewhere away from bright light. You slide the slider back to the top, and then you can remove the back if you like, or just open it on the camera. Careful not to let the film get all loose. Pull the end tight, and fold the tip of it back, and then lick the end of the little glue strip, and glue the roll closed. Now put it somewhere dark and keep it dark until it is being developed. Putting it back in the carton and taping it closed is good, or you can get special plastic containers for this from film supply stores.
I would send away the first couple of rolls, but if you find that you enjoy the whole thing, then maybe think about trying to develop your rolls yourself, which can be quite fun. For the complete experience, you could set up a darkroom, but this is a huge step up in dedication and complexity, and it takes space and time. I would love to have one, but it isn\'t practical right now for me. Maybe in the future.
|


