p.1 #1 · Sony RX1R II Full Disassembly and Sensor Dust Cleaning Review
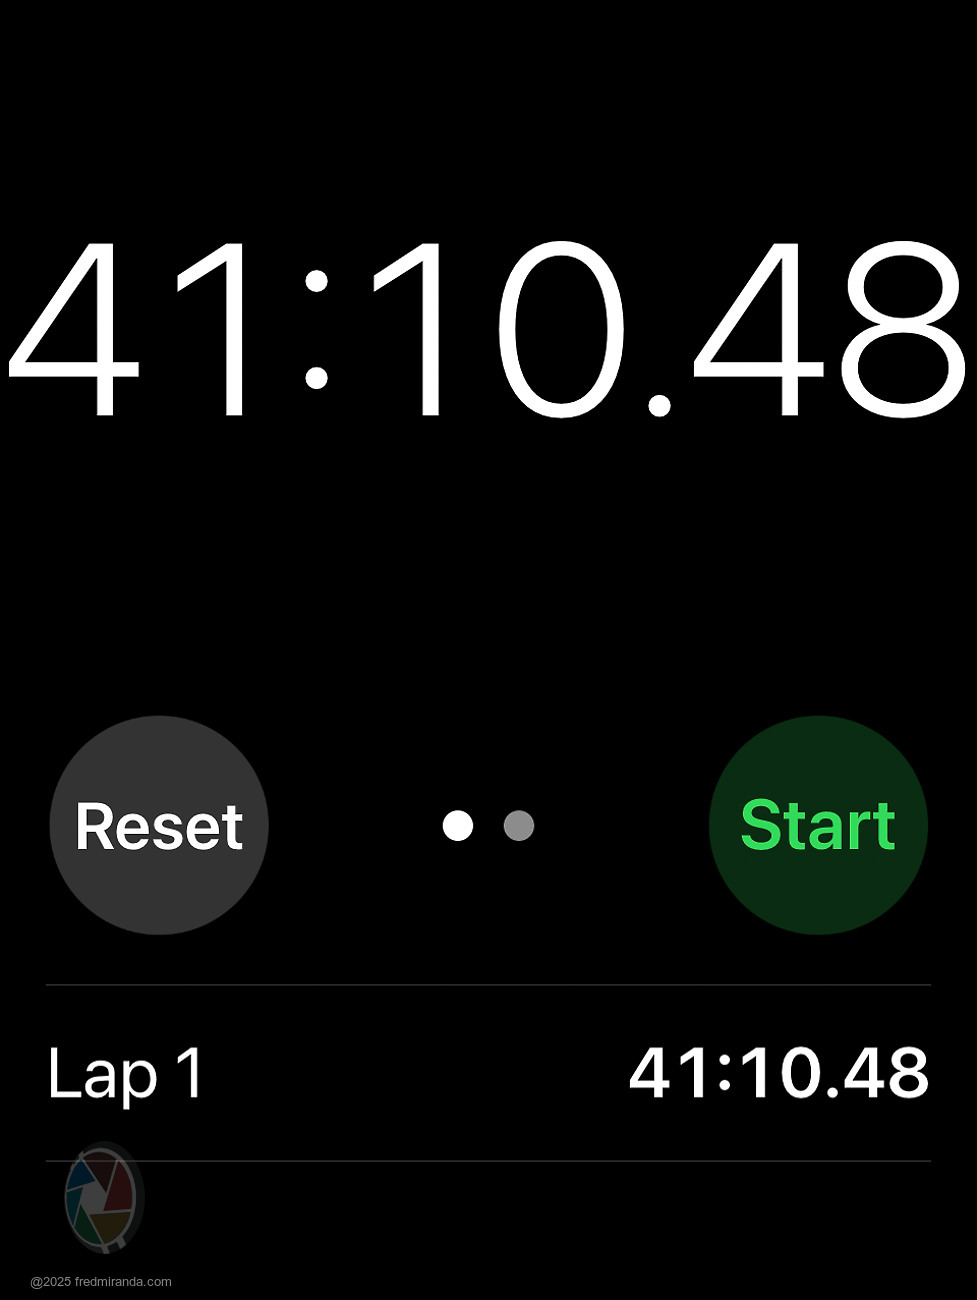
I finally worked up the courage to do a full disassembly of my Sony RX1R II. The entire process took about 40 minutes to get inside far enough to reach the sensor and lens for cleaning.
A few key lessons stood out during the process:
1) Ribbon cables � Some of these are extremely small and fragile, especially the flip-lock (ZIF) flaps that hold them in place. Patience is essential here. I didn't encounter any issues, but moving too quickly can easily damage a connector. There's only one slide-lock connector in the camera, and that's for the tiny ribbon linking the back LCD. Unlike the flip-lock connectors, this one has no flap - the cable simply slides in and out. To lift the flip-lock tabs, I used my nail; they pivot 90 degrees very easily for ribbon removal. Be sure to push the flap back down to secure the ribbon during reassembly.
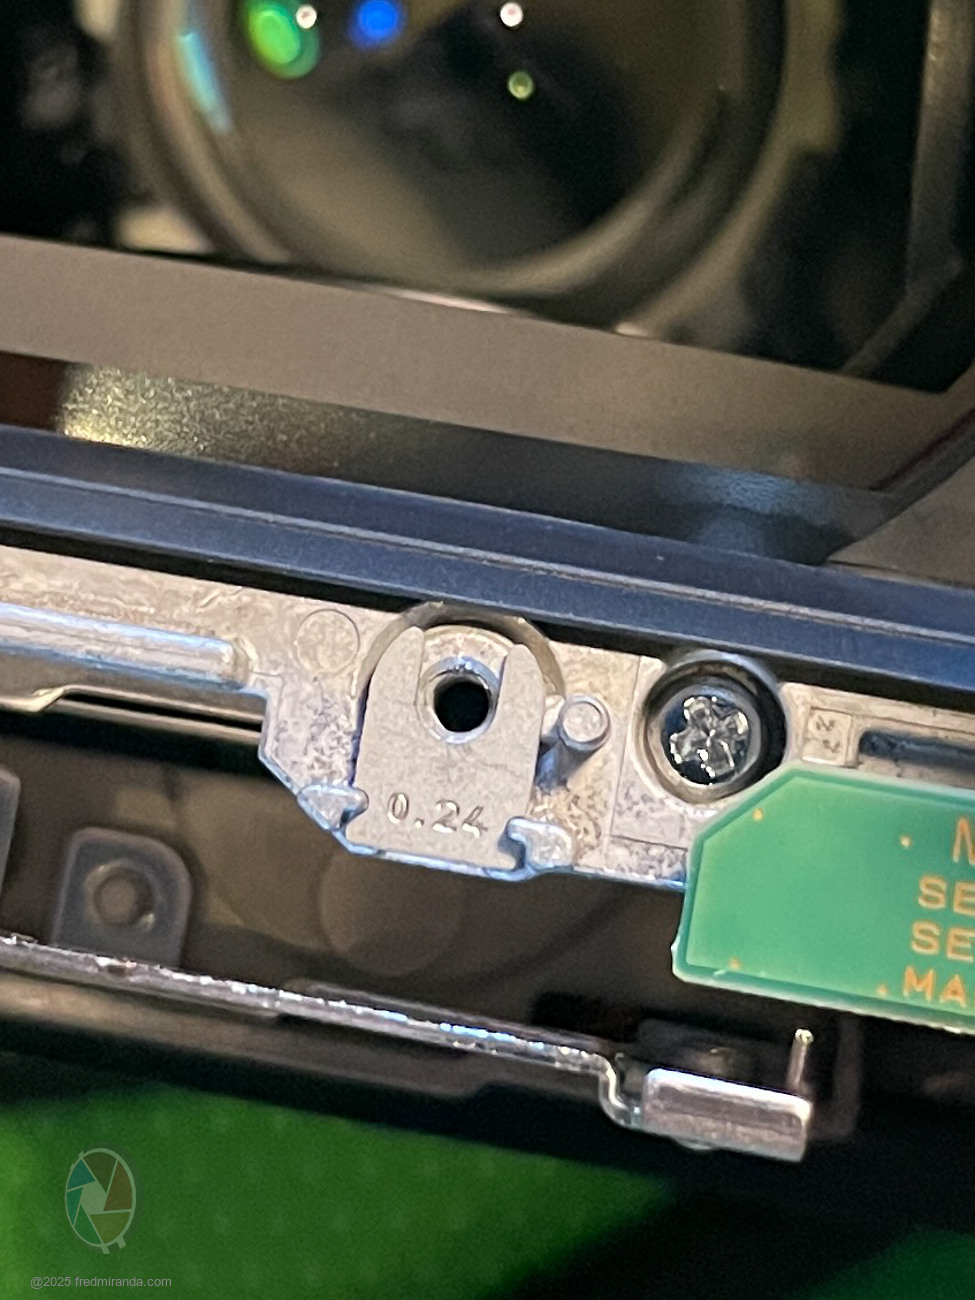
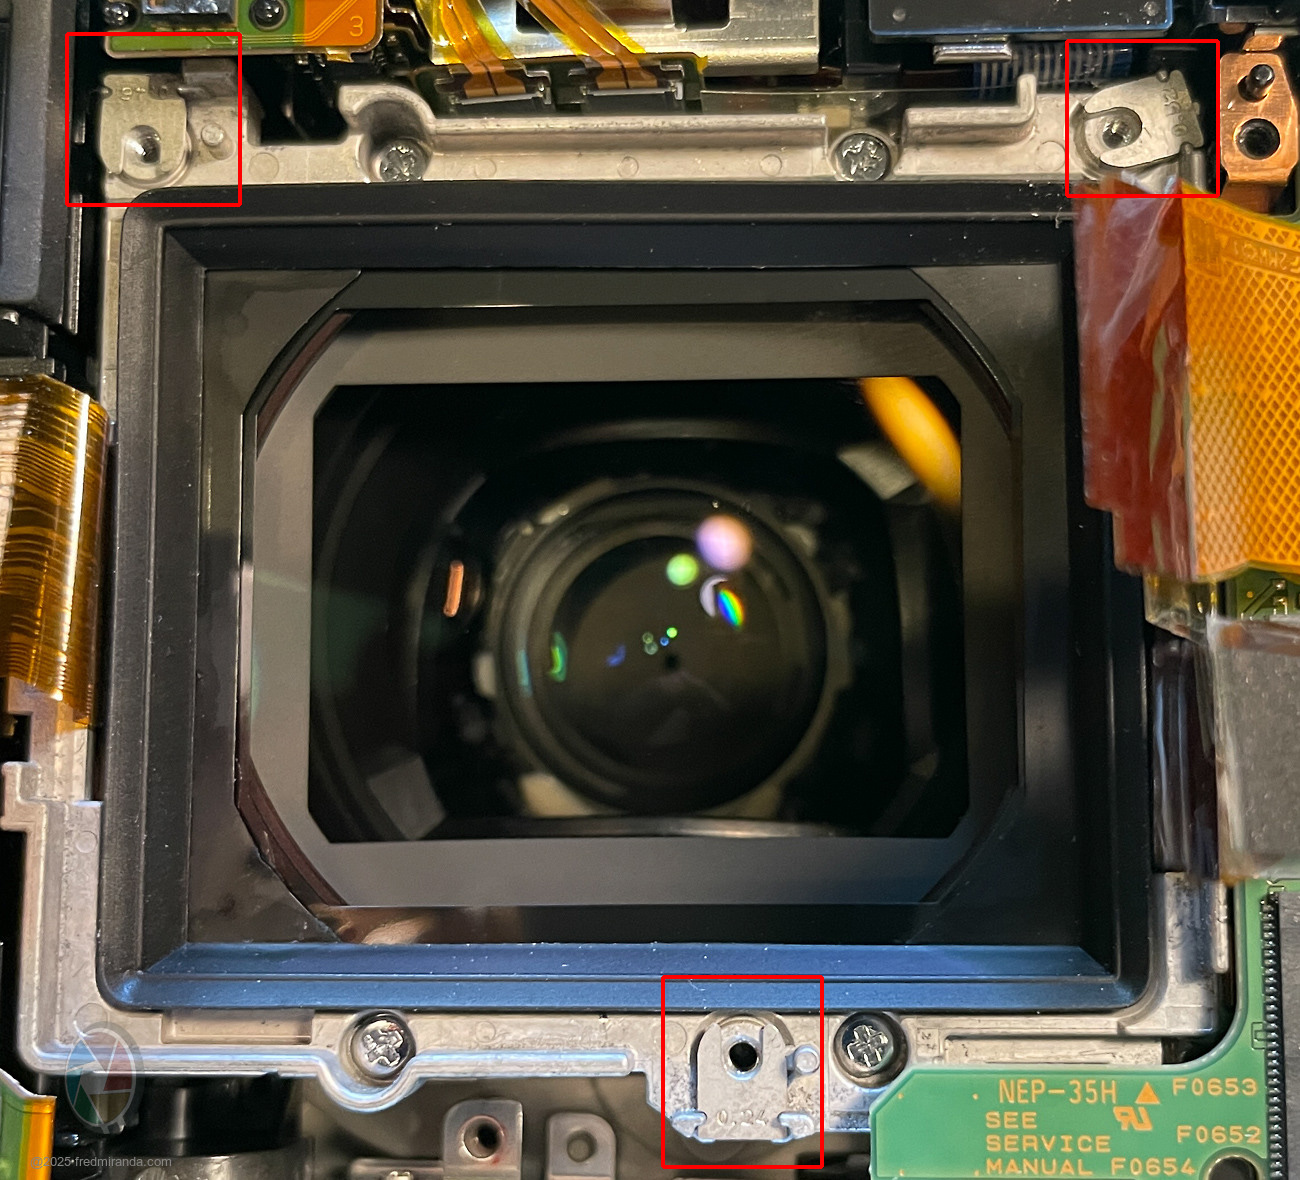
2) Calibration shims � These must go back exactly where they came from. Mine measured 0.24 (bottom), 0.52 (top right), and 0.46 (top left). I made sure each returned to its original position. Misplacing them can throw off sensor and lens alignment, which only Sony can recalibrate correctly.
When I reached the sensor, I found four dust specks: one large and three small. Unfortunately, I also noticed a large speck behind the cover glass. The RX1R II's design doesn't allow access to the rear element; the cover glass is sealed as part of the lens system. There's no way to remove it, so that speck will remain. Because the glass sits so close to the sensor, I initially expected the dust to show up even at very small apertures.
(UPDATE: Good News! That lens dust doesn't appear in images, even at f/22. Even sending it to a service shop like KEH would only remove sensor dust; the speck inside the lens assembly would remain. (BTW: KEH currently charges $350+tax+shipping for this service)
This first attempt took 41 minutes to take apart and another 45 minutes to reassemble while figuring things out. Now that I know the process, I could probably do it in about 30 minutes total.
If you're comfortable working with small and fragile electronics, I think this is safe as long as you take your time and stay patient. It can feel a bit advanced if you're not used to working with tiny components, but it's manageable with careful handling.
Here�s a simple 12-step guide:
Precautions Before Starting:
1. Use a grounded workspace - Wear rubber-soled shoes and, if possible, use an anti-static mat to prevent static discharge.
2. Work in a clean environment - A dust-free or low-dust area is ideal. Avoid carpeted rooms if possible.
3. Keep hands clean - Wash hands or wear lint-free gloves to avoid oils and dirt on delicate components.
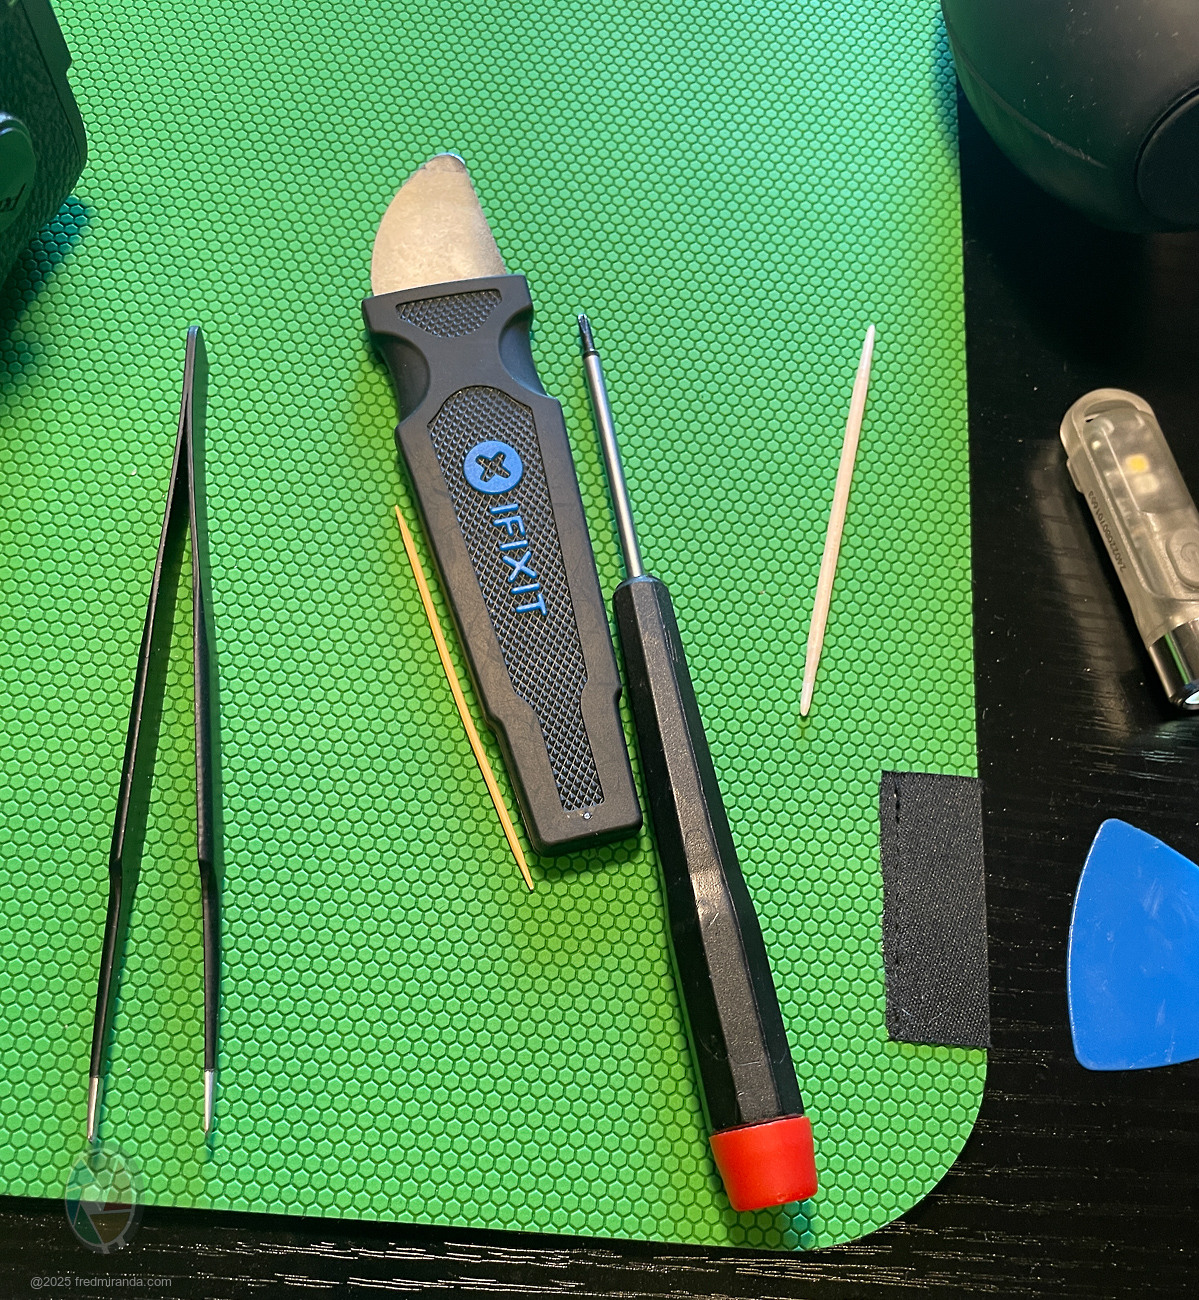
4. Use proper tools - Small precision screwdrivers, tweezers, and an air blower are recommended. (see image showing my tools at the end)
5. Take your time - Rushing increases the risk of damaging tiny ribbon cables or misplacing calibration shims.
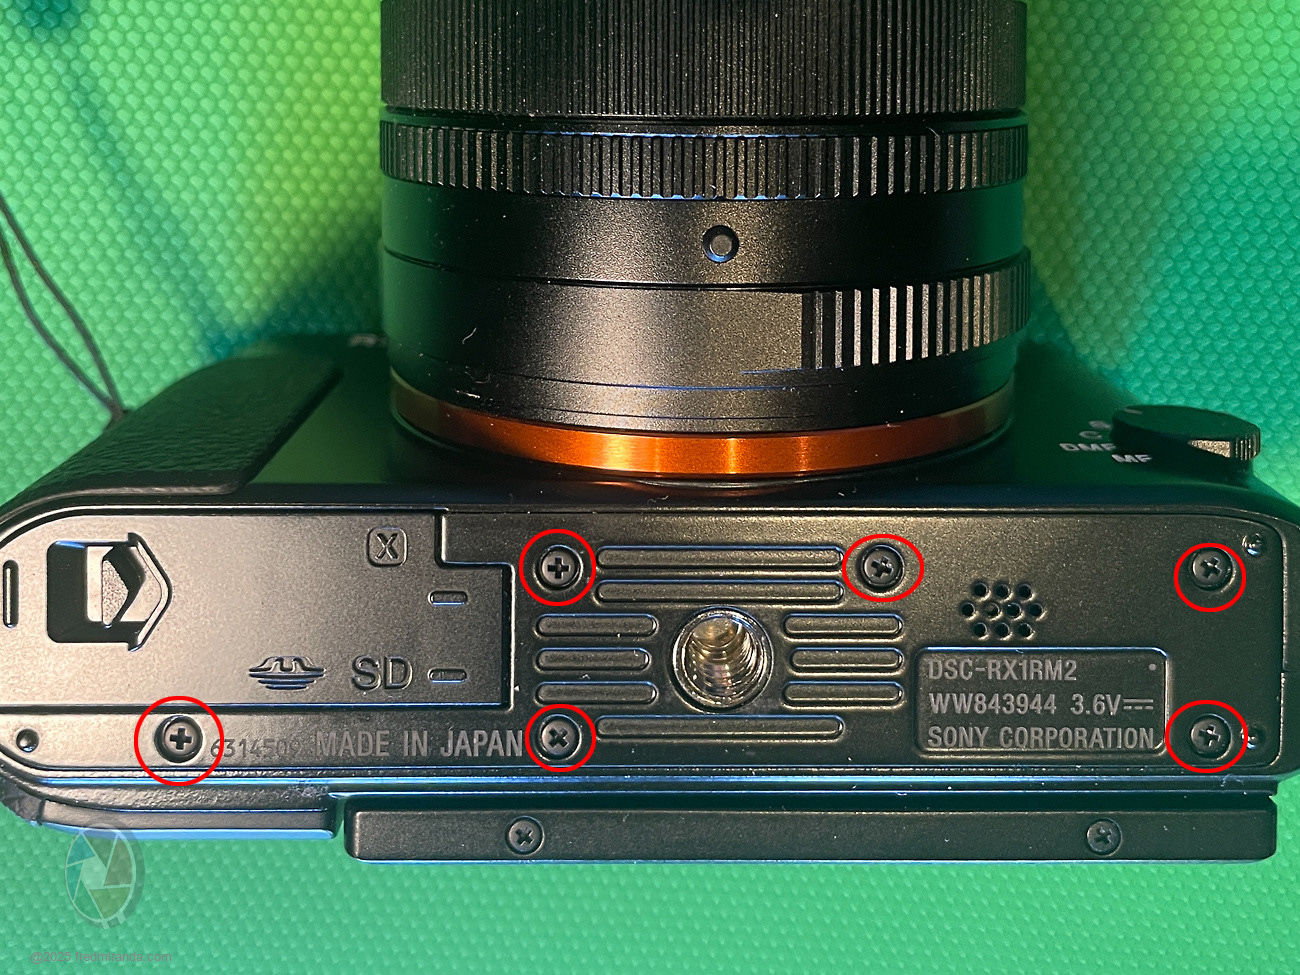
STEP 1: Remove the 6 screws from the bottom plate
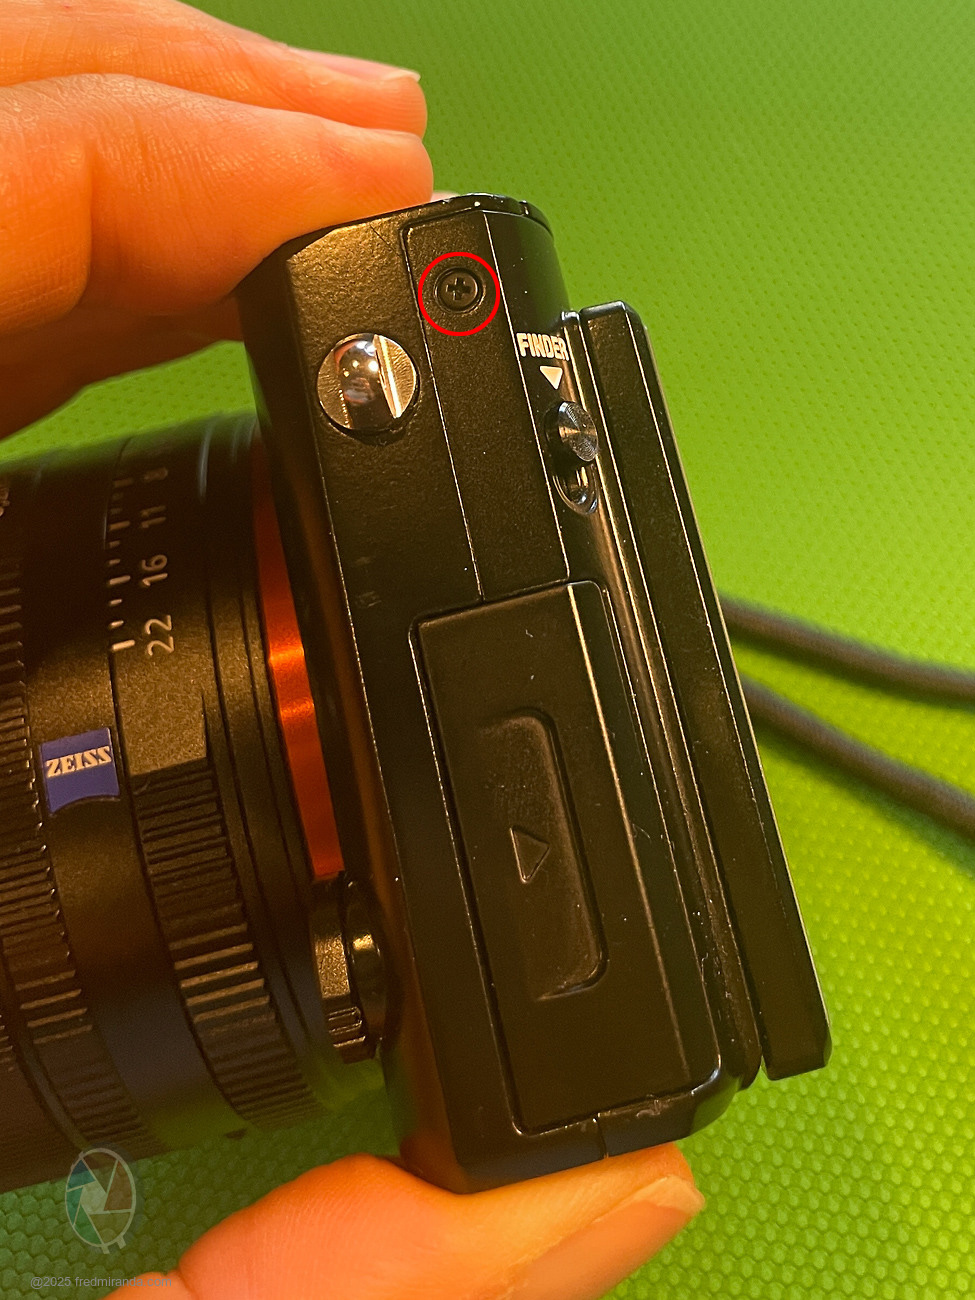
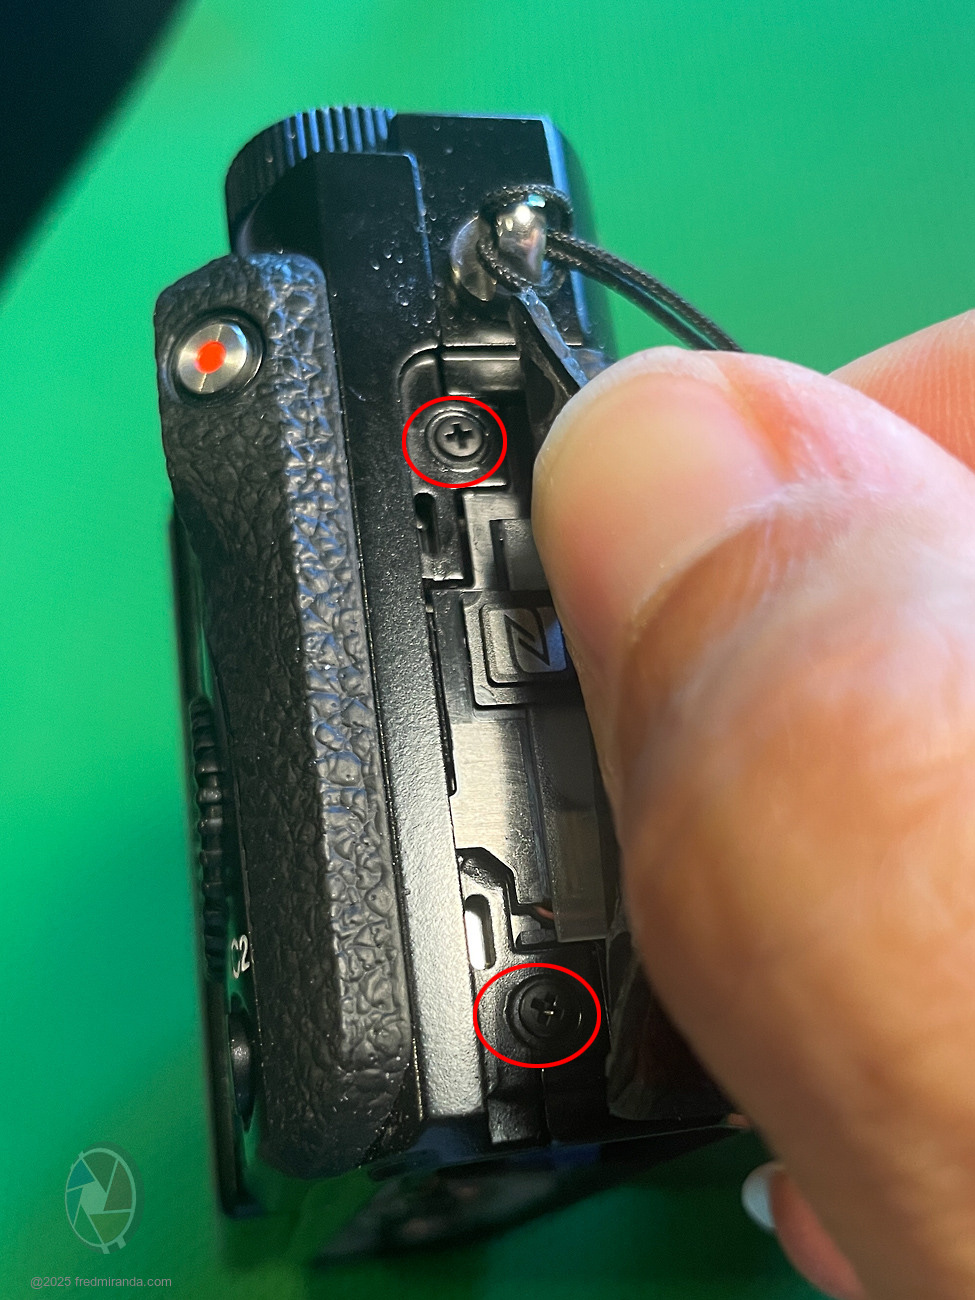
STEP 2: Remove 1 screw from the left side of the camera
STEP 3: Remove 2 screws from the right side
The screws are underneath the side rubber. Use a guitar pick (or similar tool) to lift the rubber gently.
STEP 4: Disconnect 2 ribbons to remove the back plate
� The bottom blue ribbon is a slide-lock type; it slides straight in and out.
� The top ribbon is flip-lock type; carefully lift the gray section with your nail to release it.
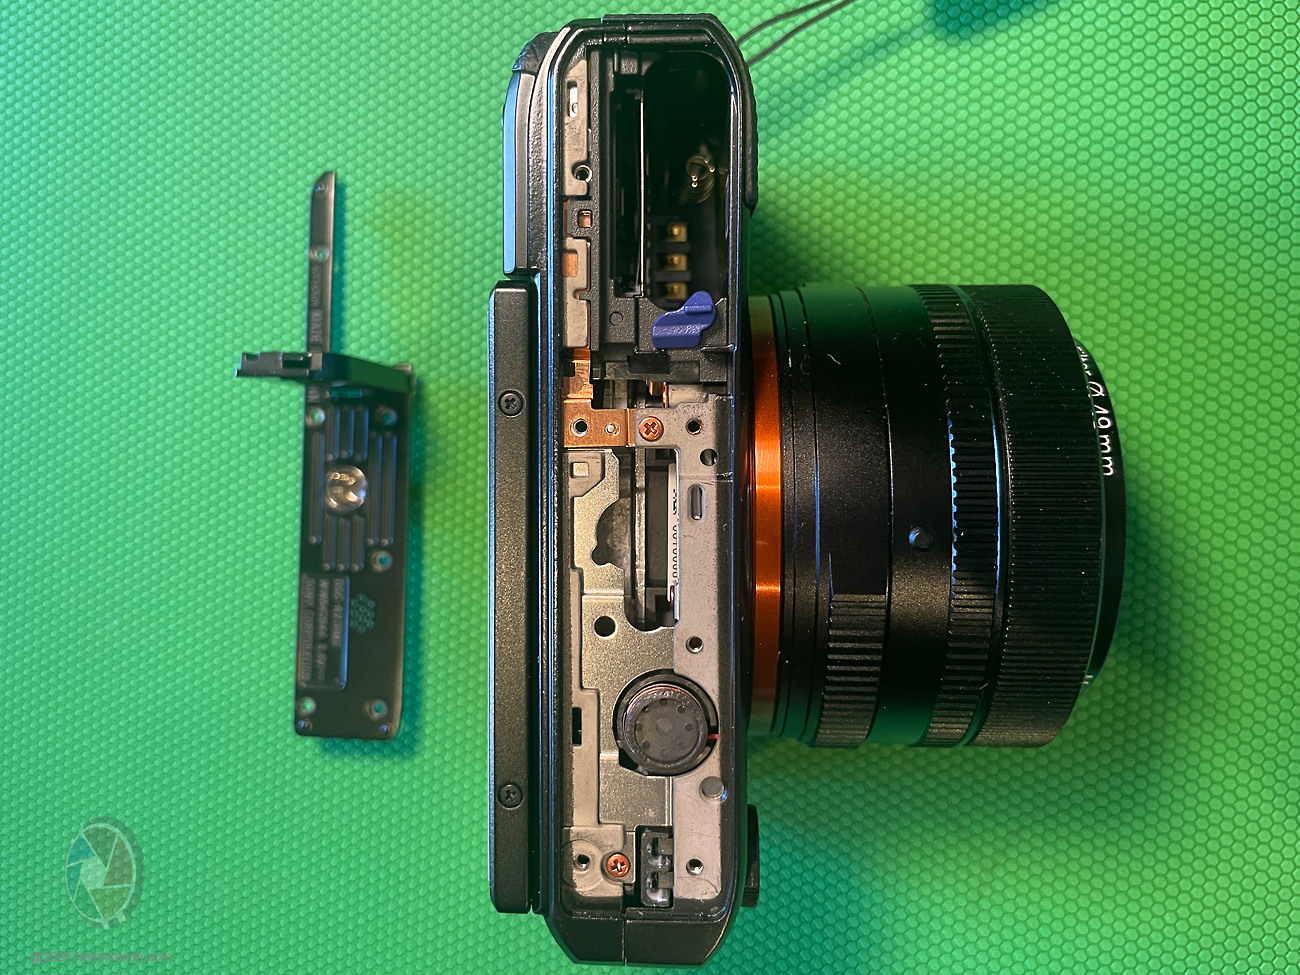
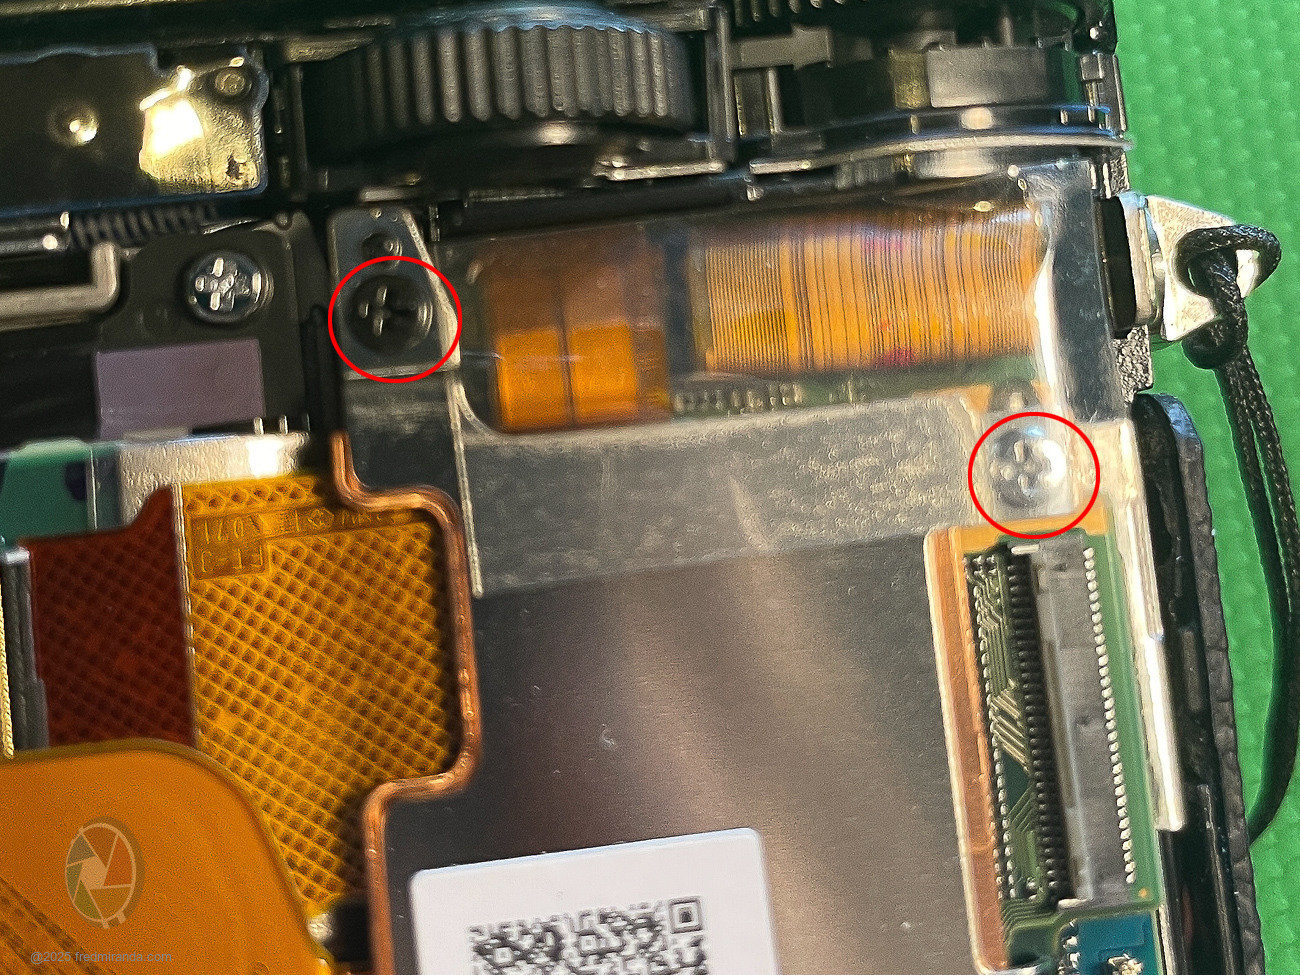
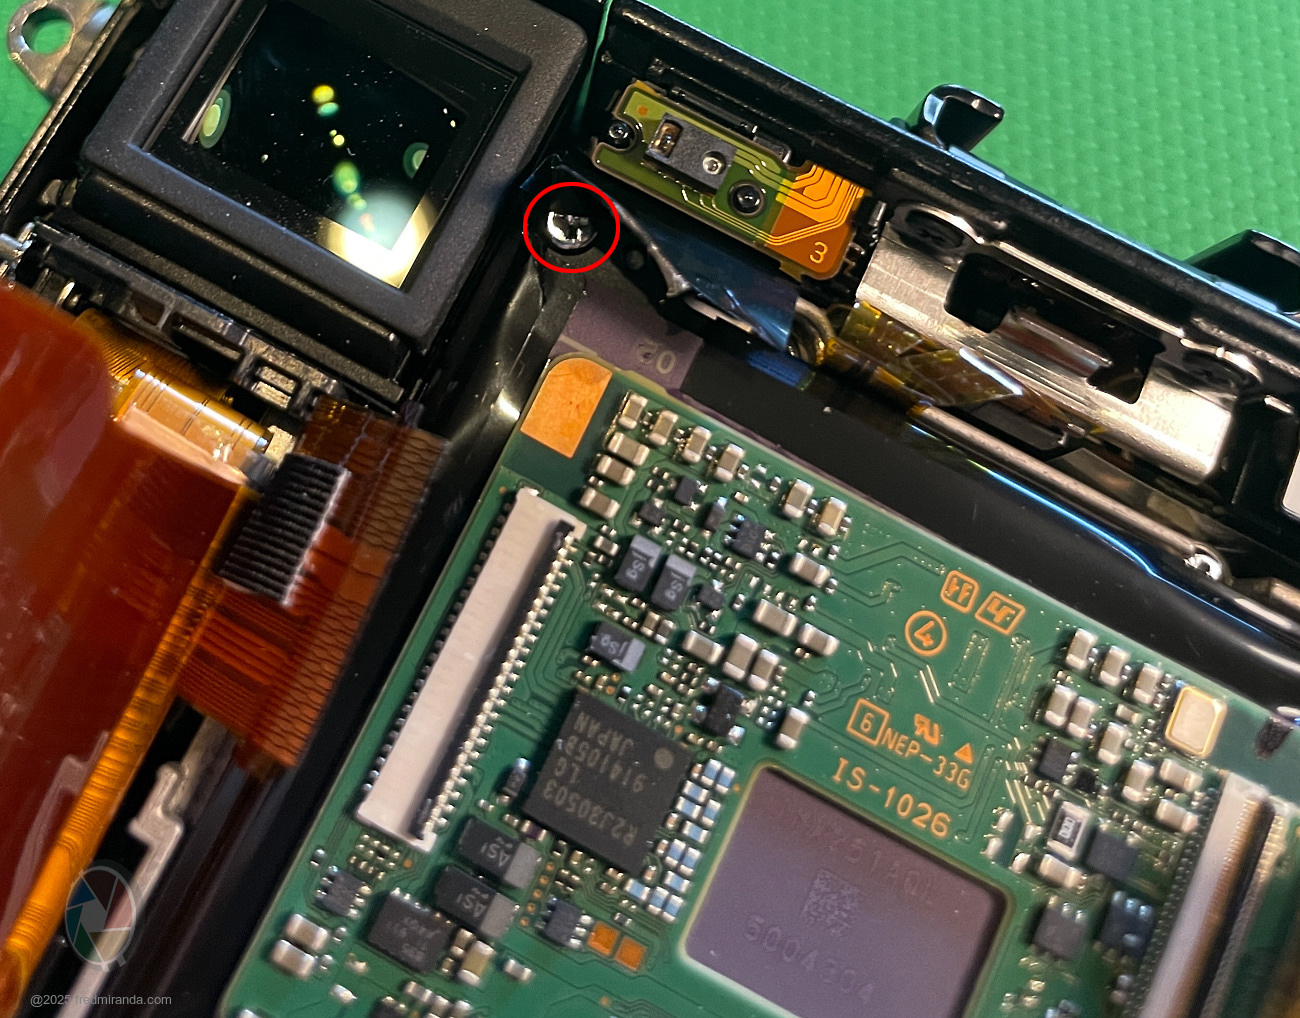
STEP 5: Remove the silver bracket
Remove the lower screw and the top two screws (one black, one silver). The top silver screw is hidden under a transparent tape.
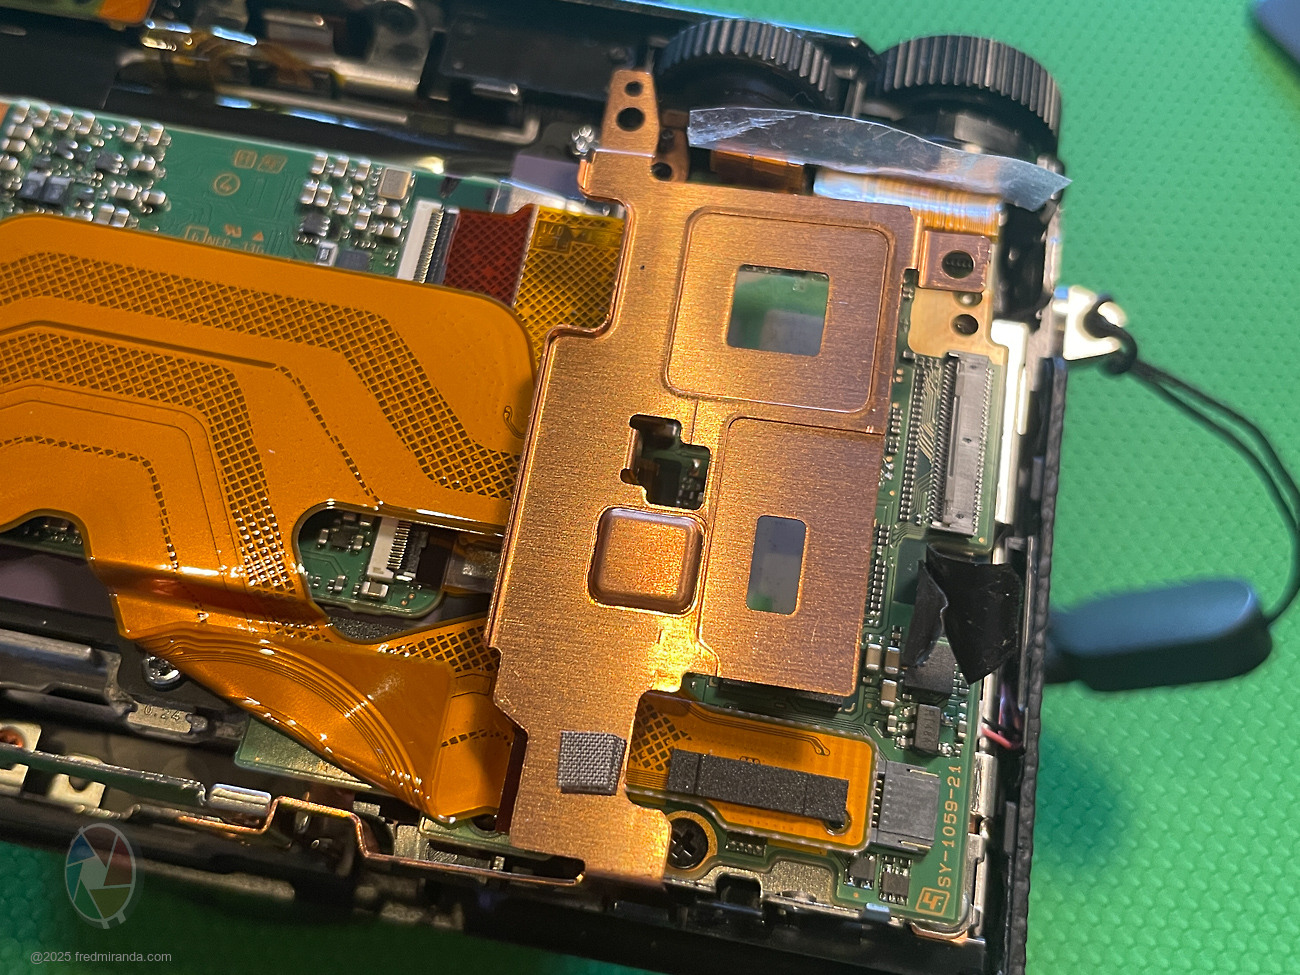
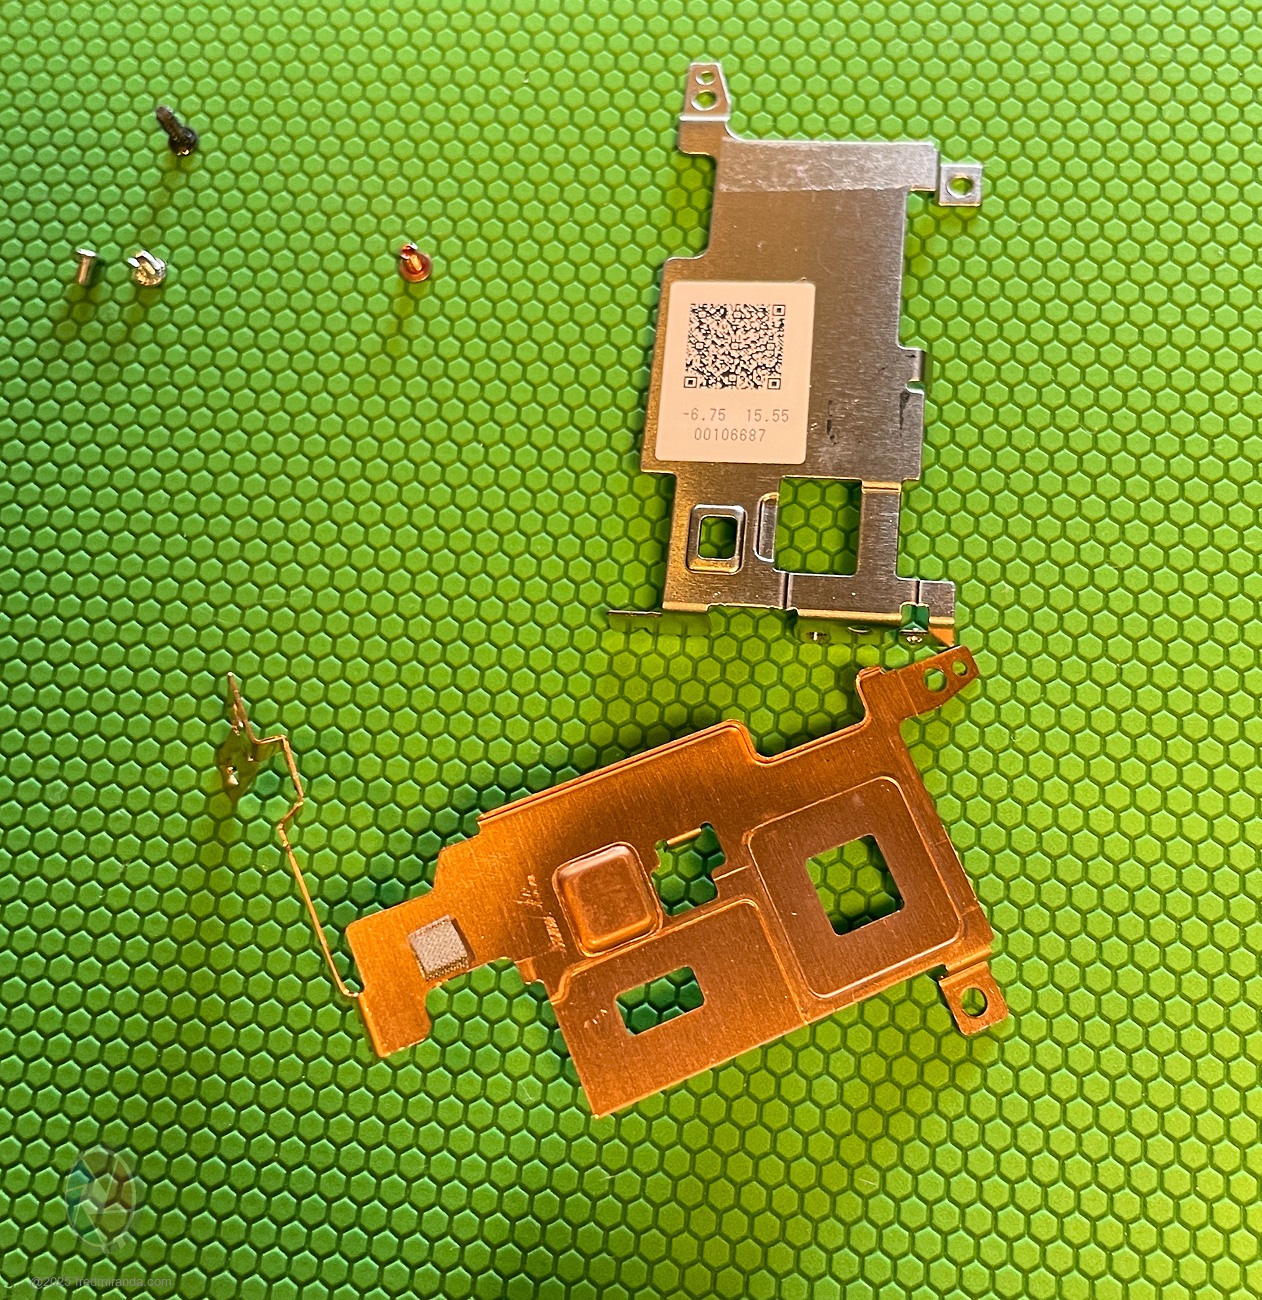
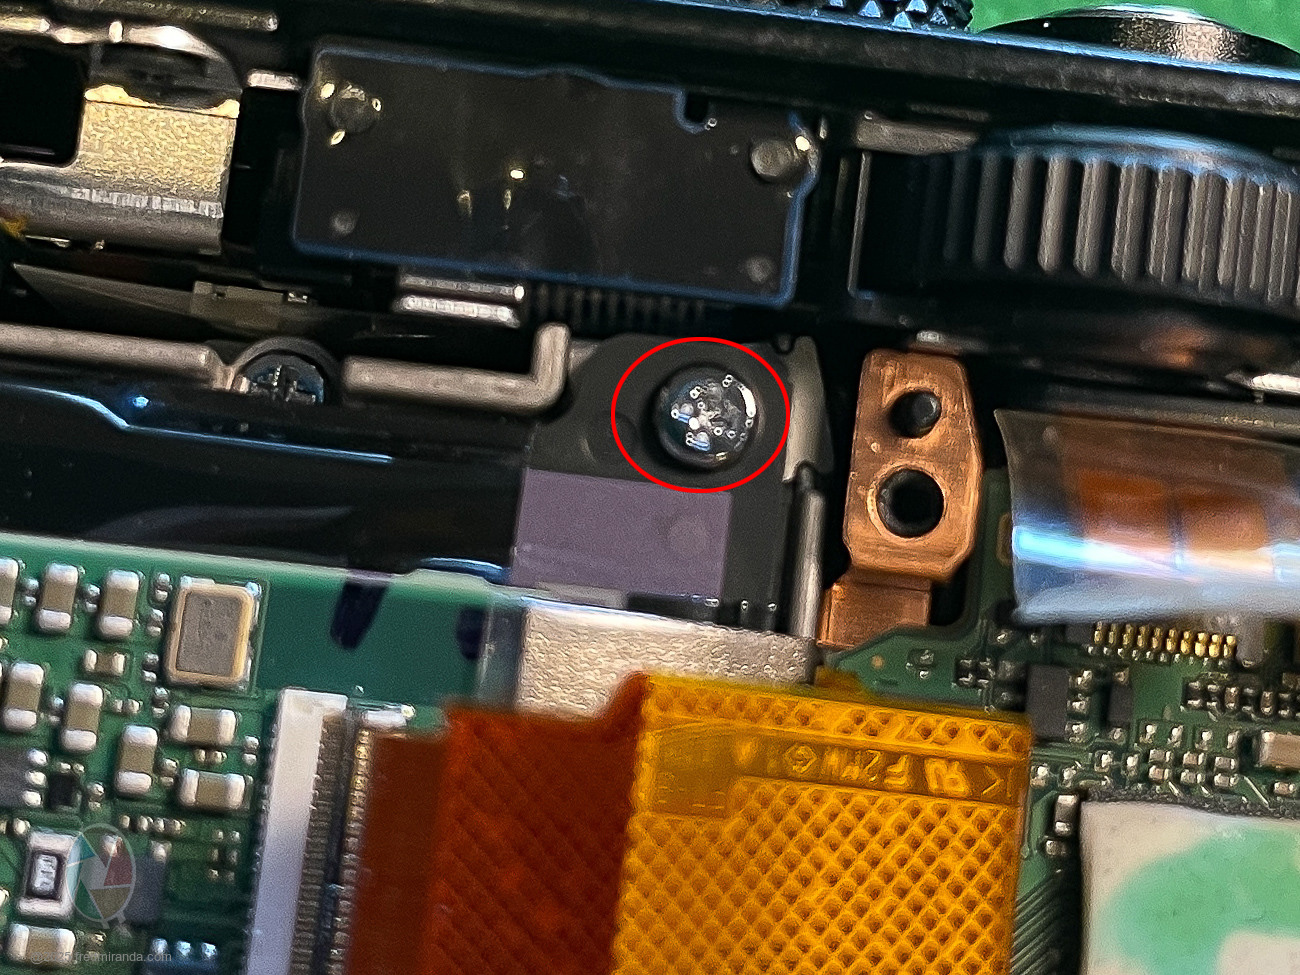
STEP 6: Remove the copper heatsink bracket
Unscrew the bottom screw. The heatsink is glued to the chips but lifts easily. Keep your screws organized.
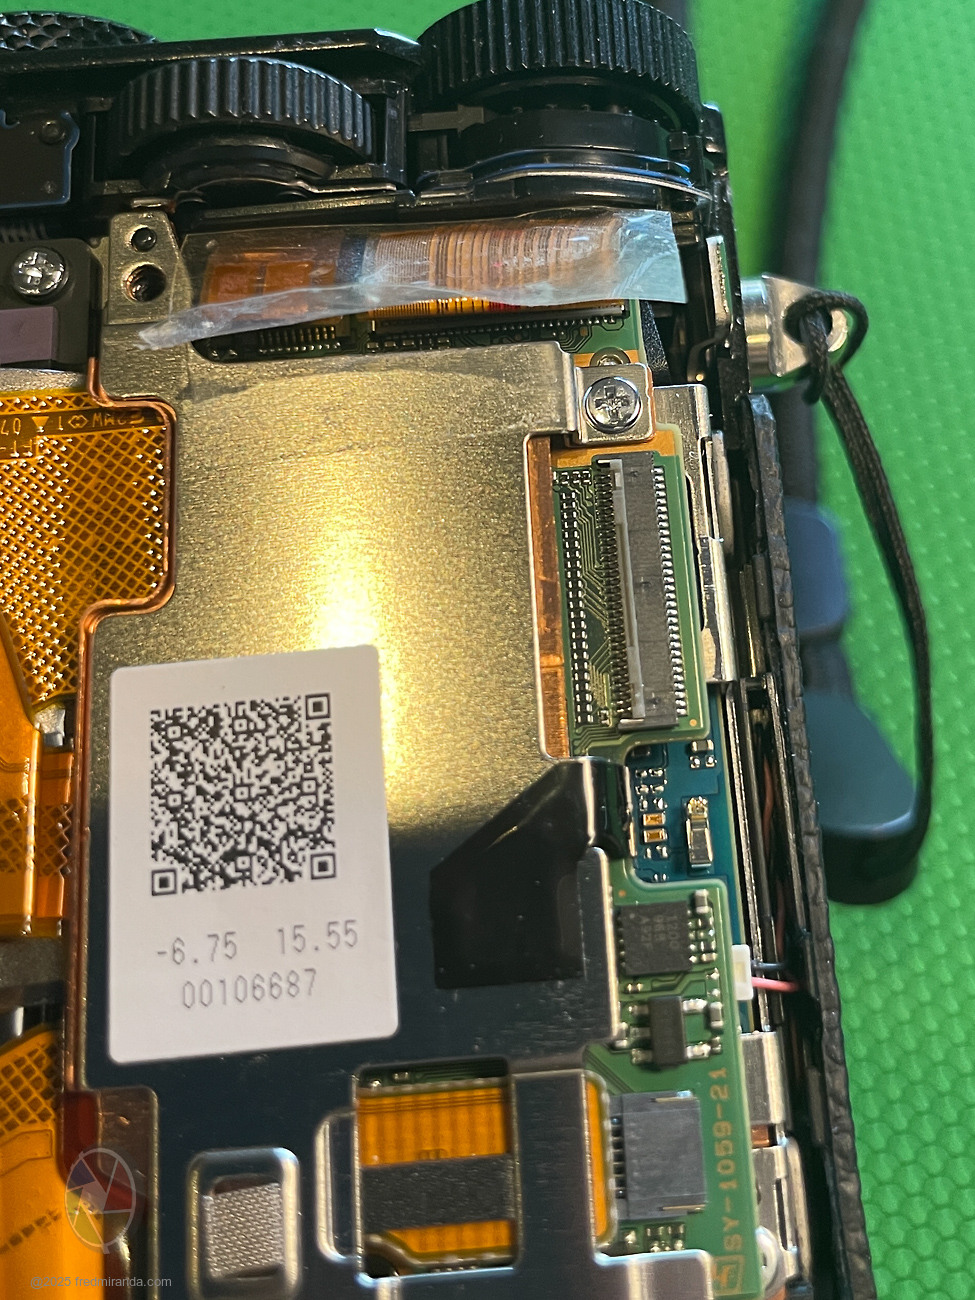
STEP 7: Full view of the back without side brackets
Start removing the remaining ribbons. The one previously underneath the bracket lifts out easily.
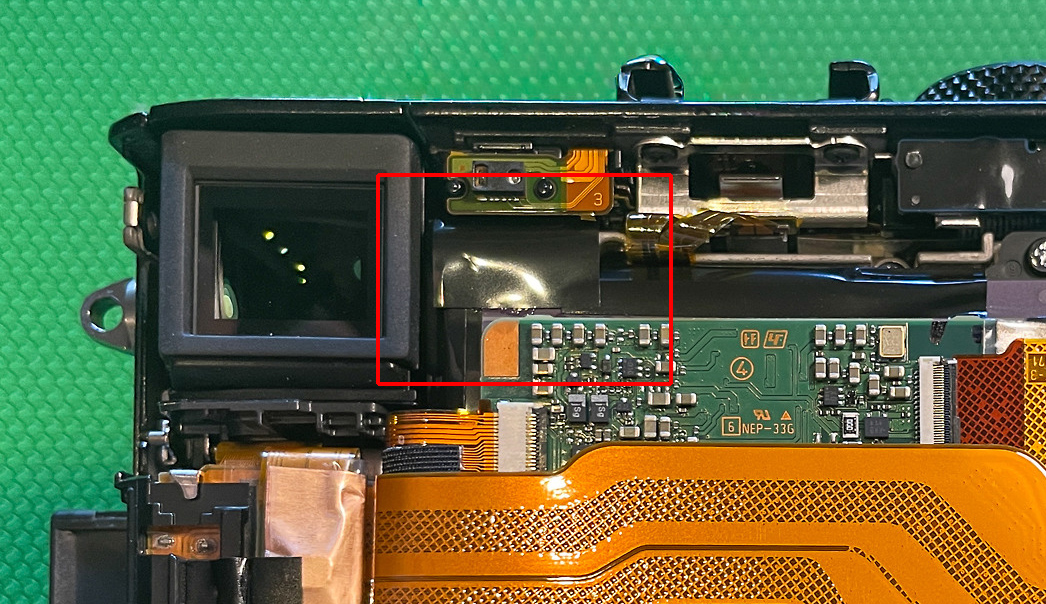
STEP 8: Remove the two right-side ribbons (flip-lock)
Lift the black section of the flap to release them.
STEP 9: Remove the remaining left ribbon (flip-lock)
Lift the black section of the flap.
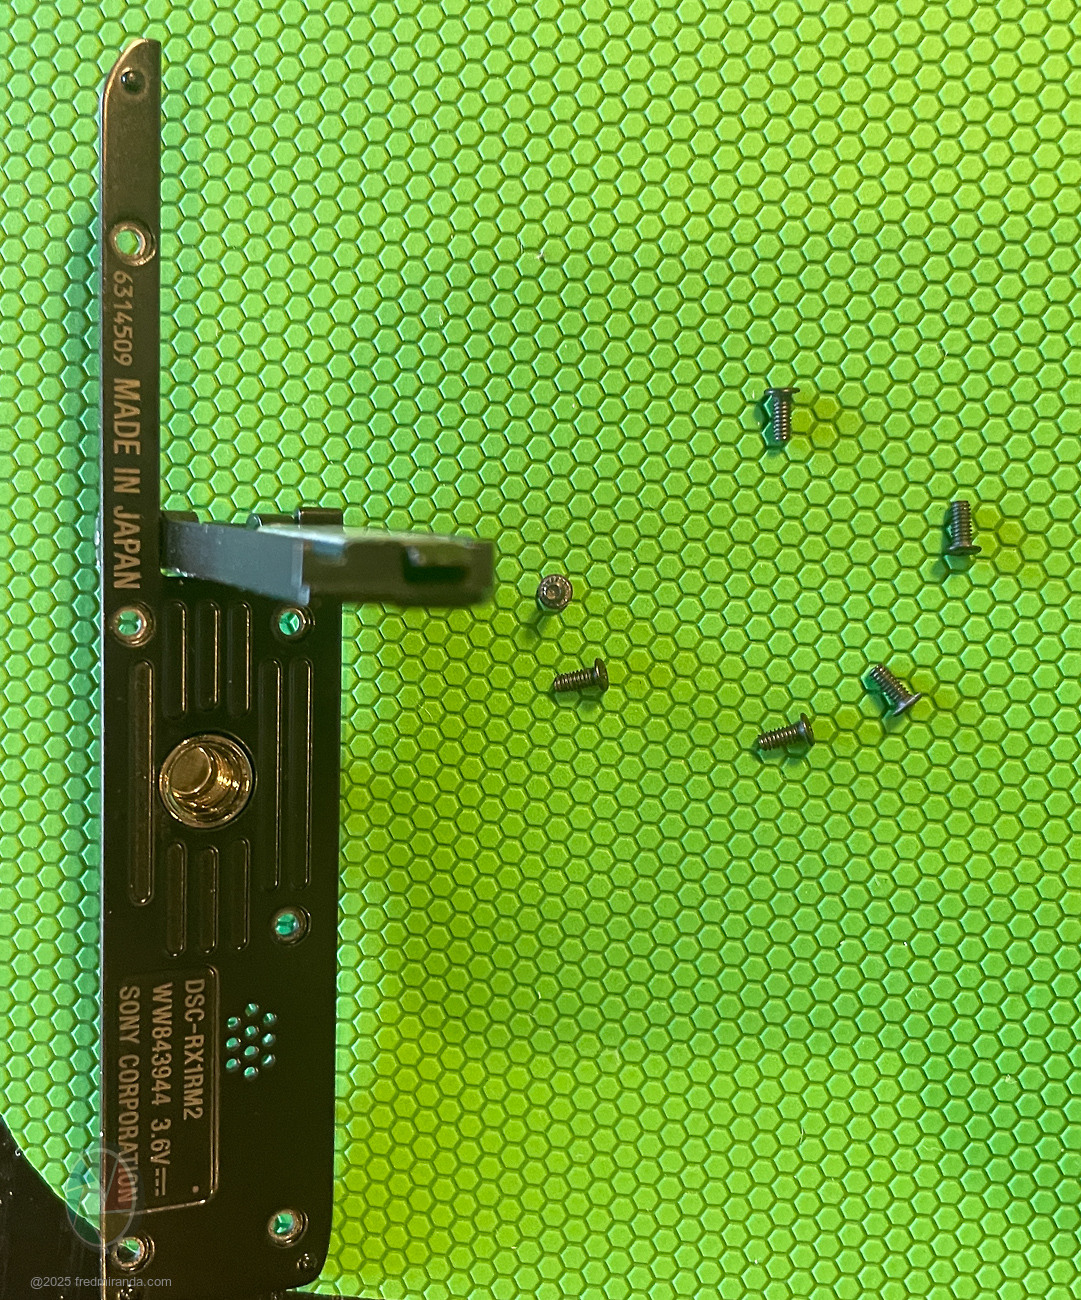
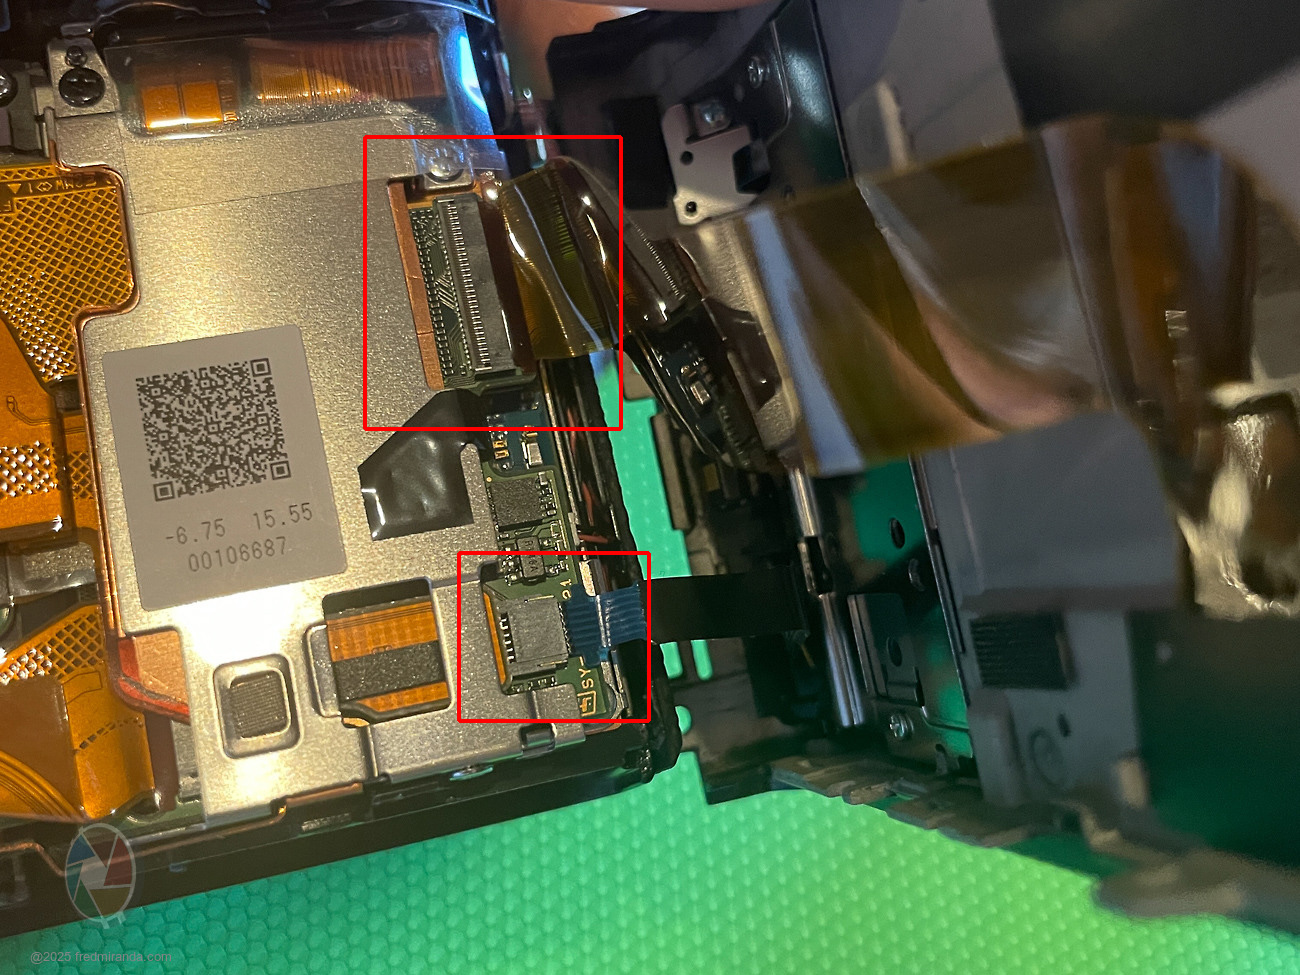
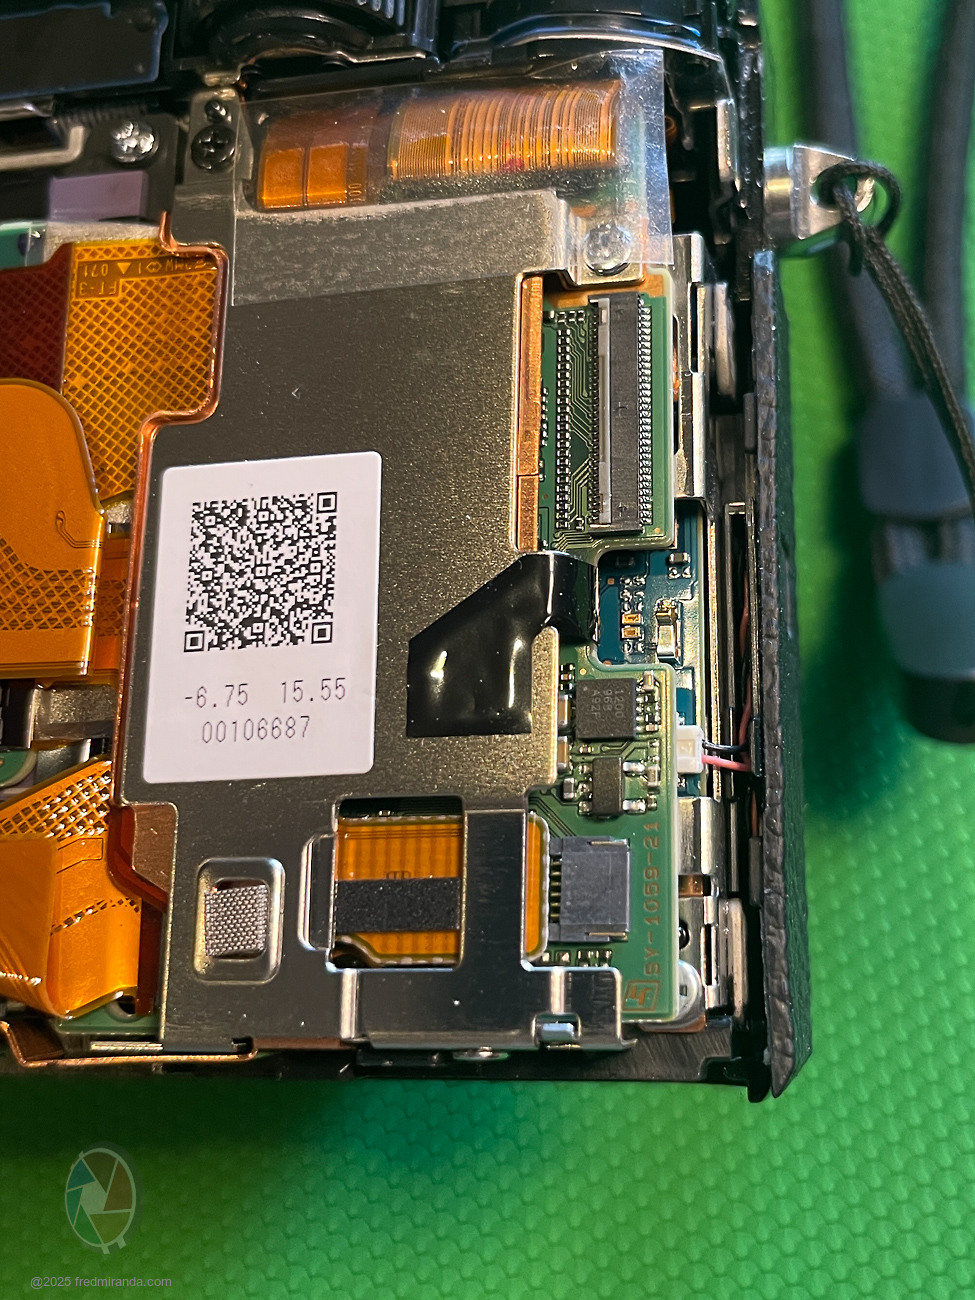
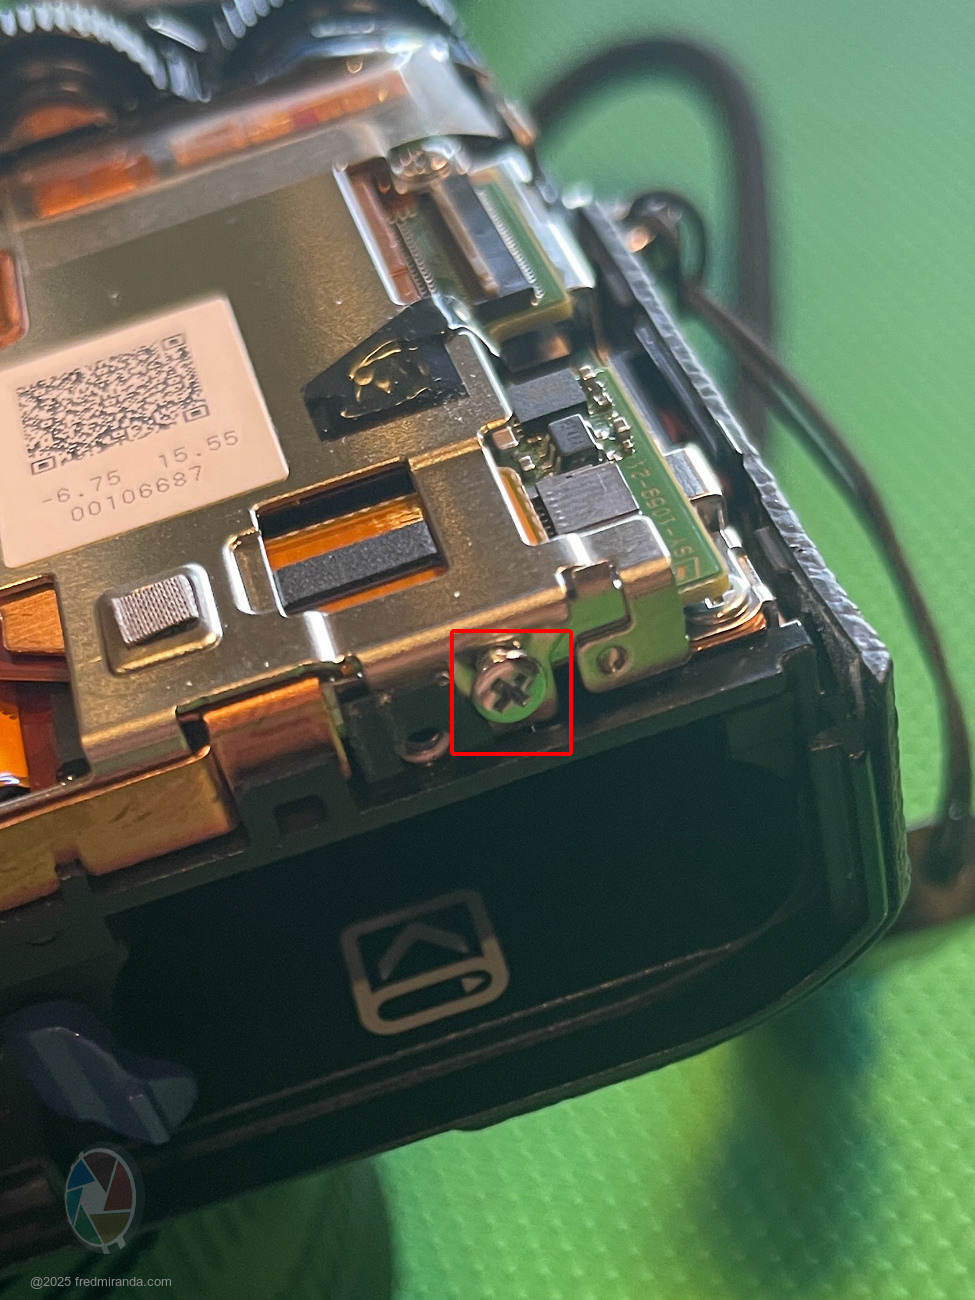
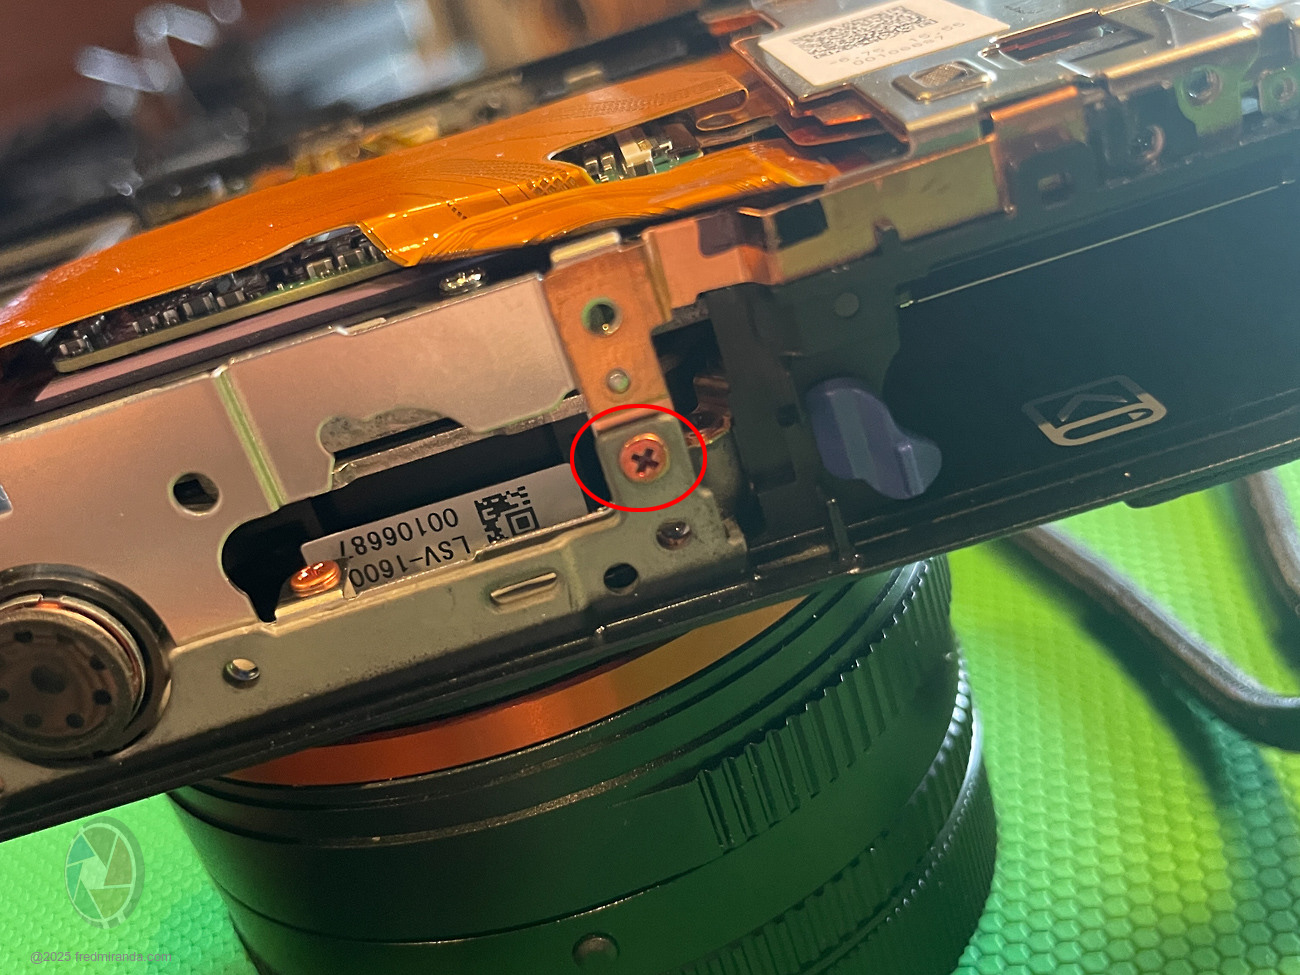
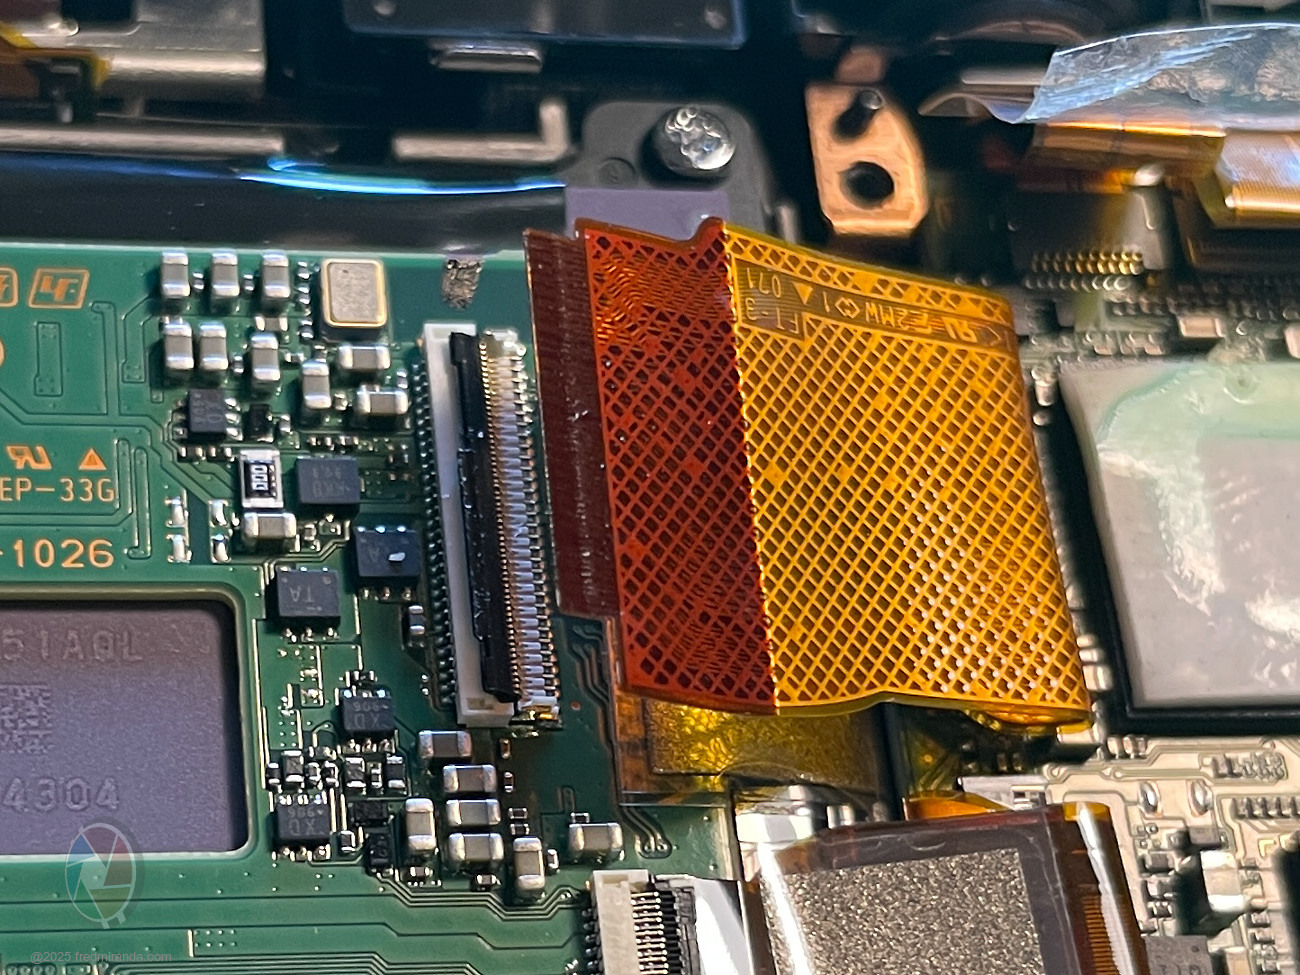
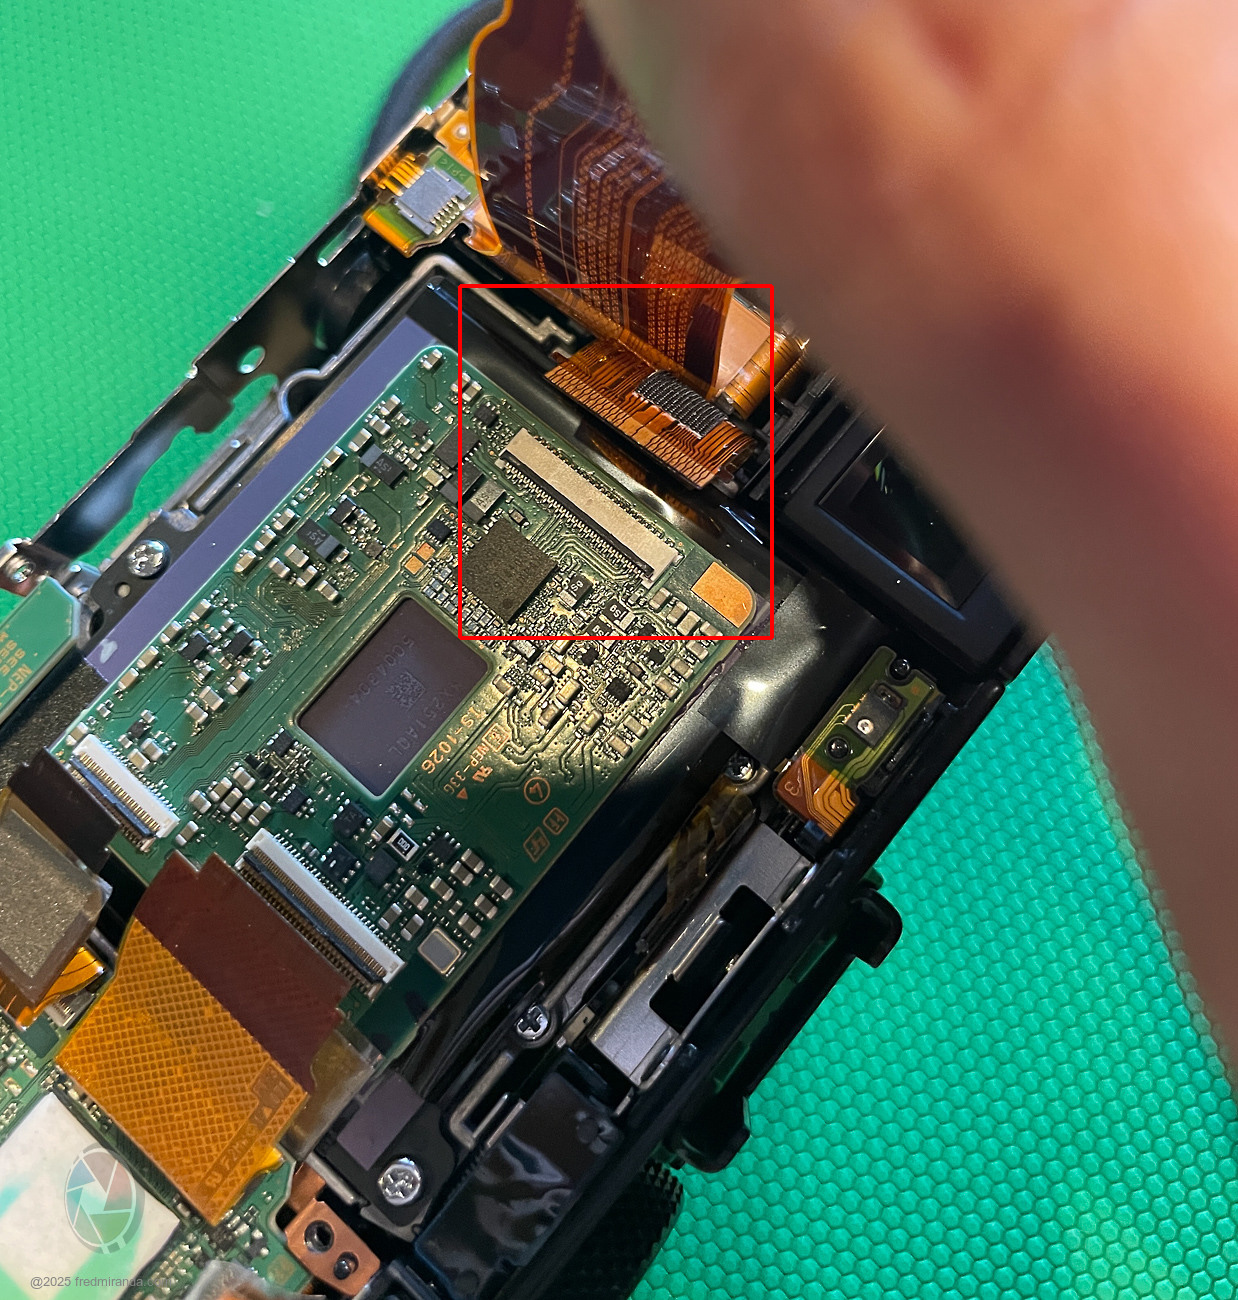
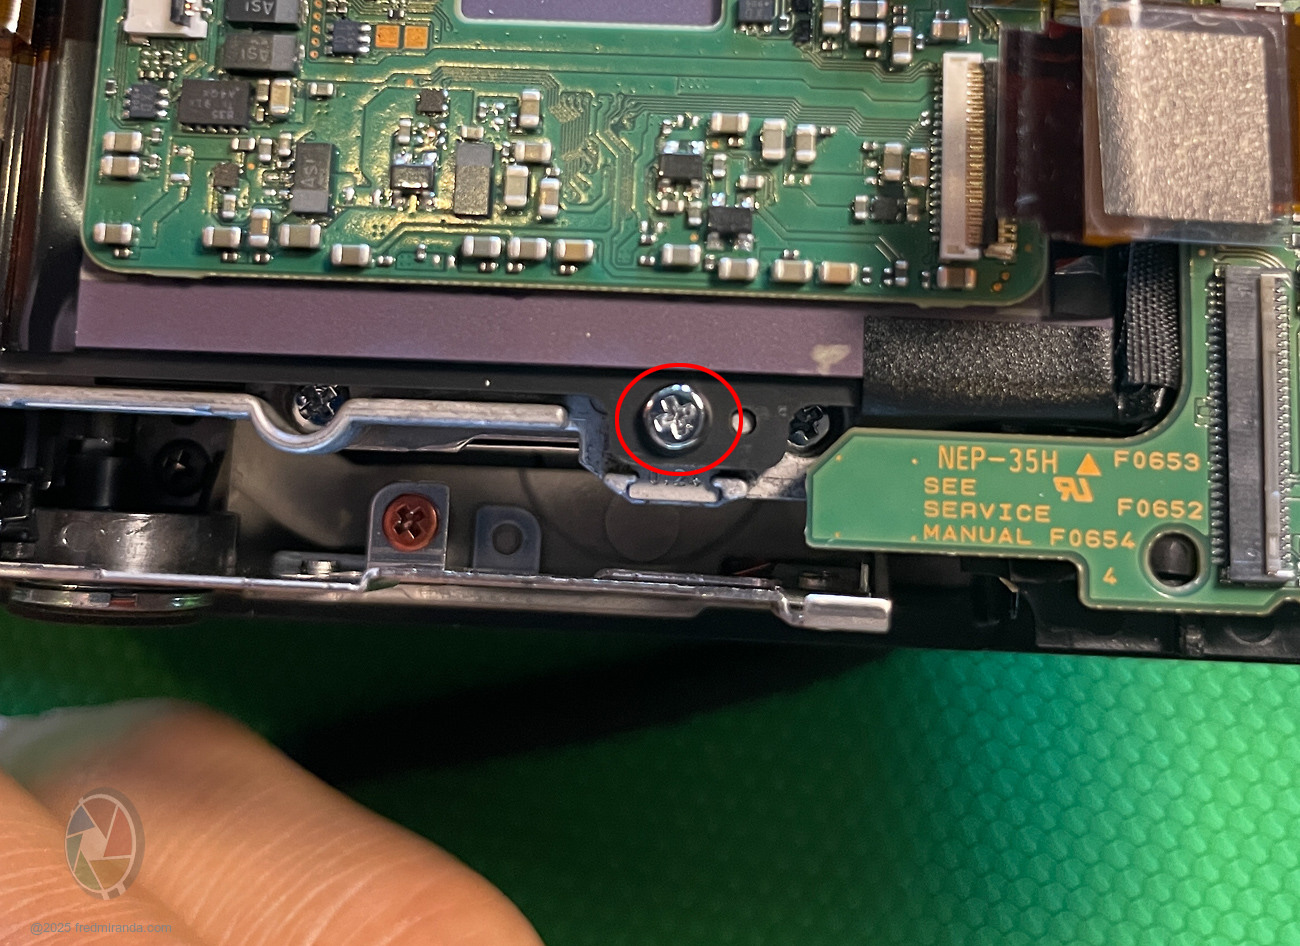
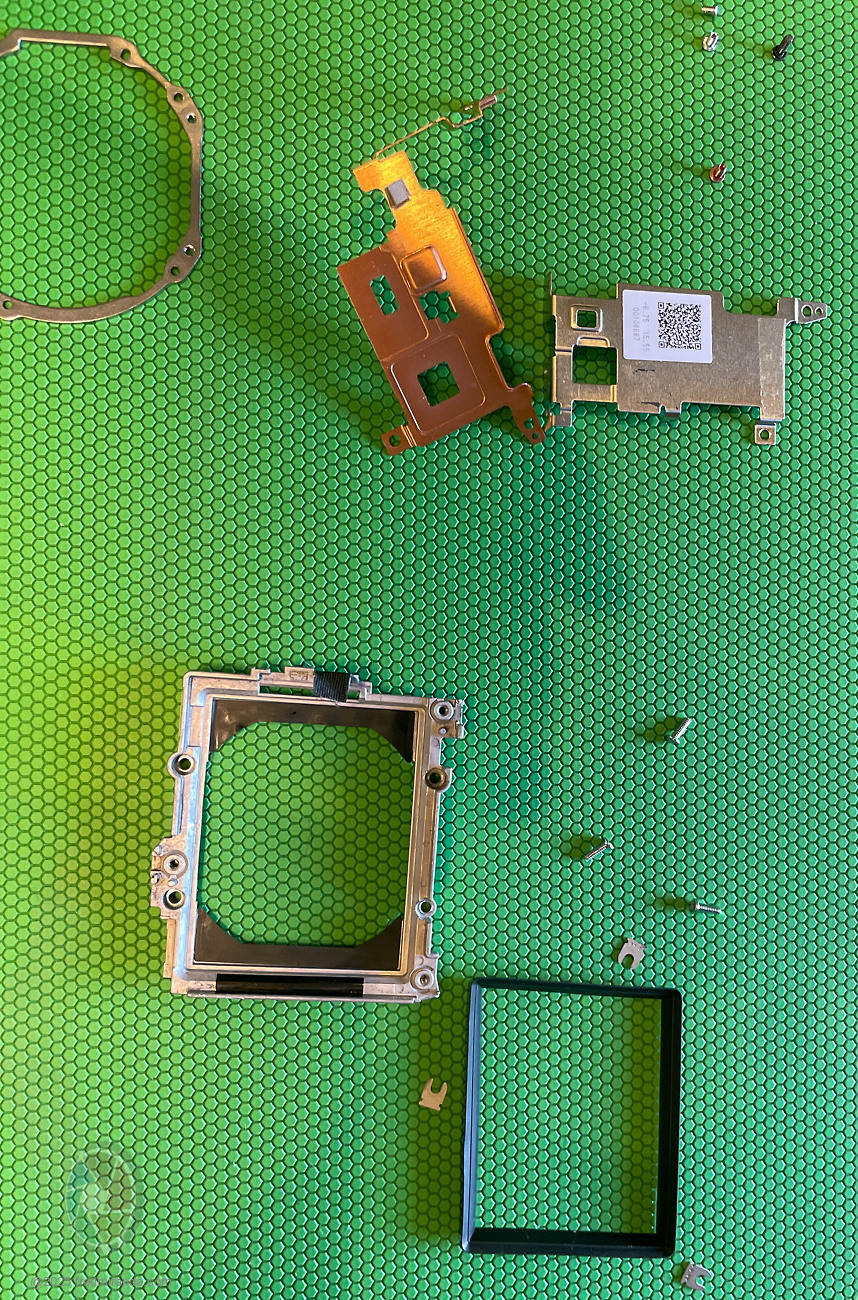
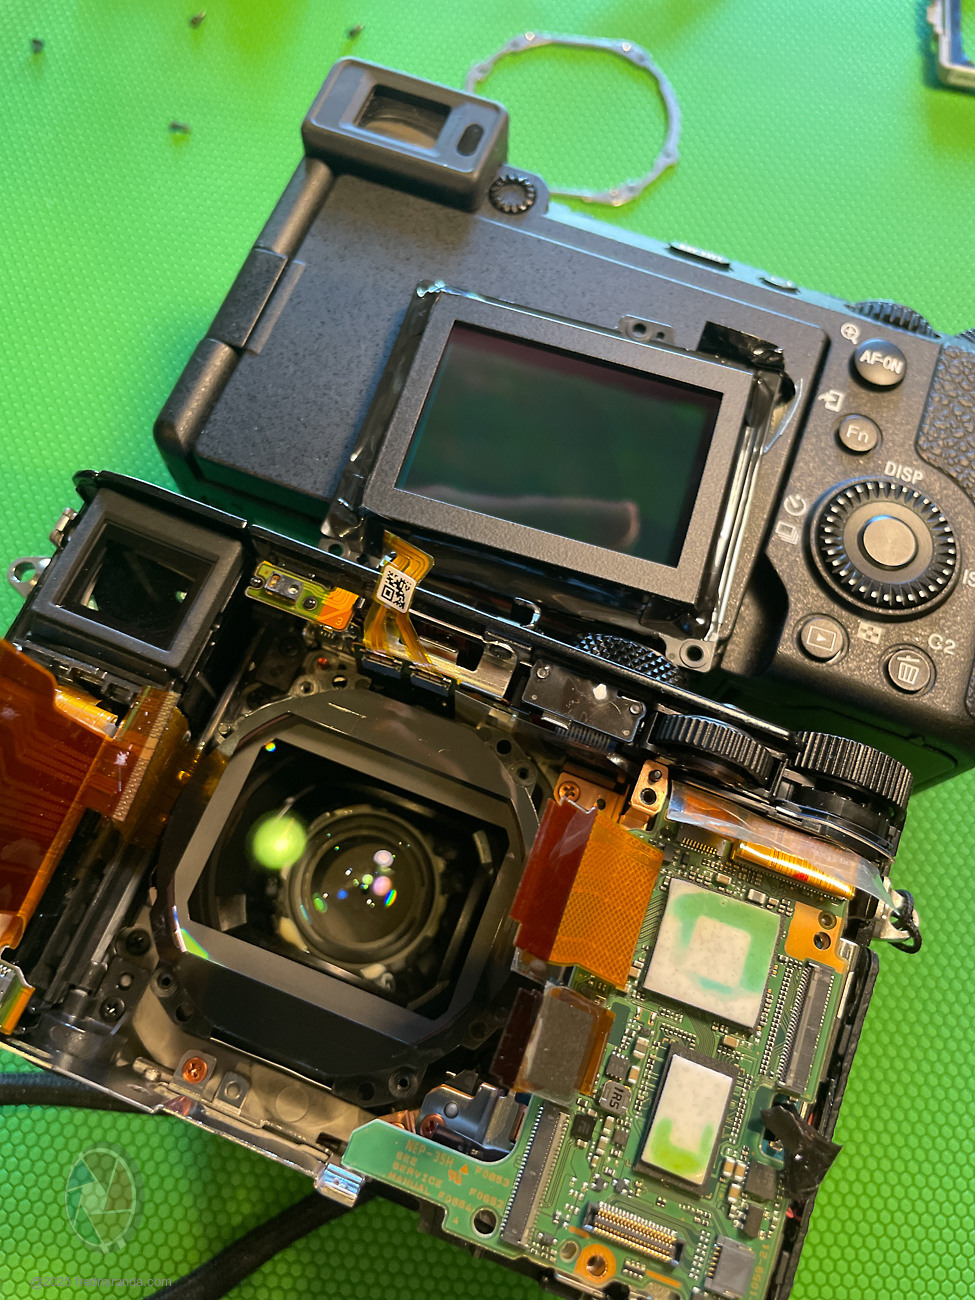
STEP 10: Remove the board holding the sensor
� There are 3 screws total; the top-left screw is under black tape.
� That tape is important�it likely fixes the light leak issue seen in early RX1R II models. Replace it or use a new piece during reassembly.
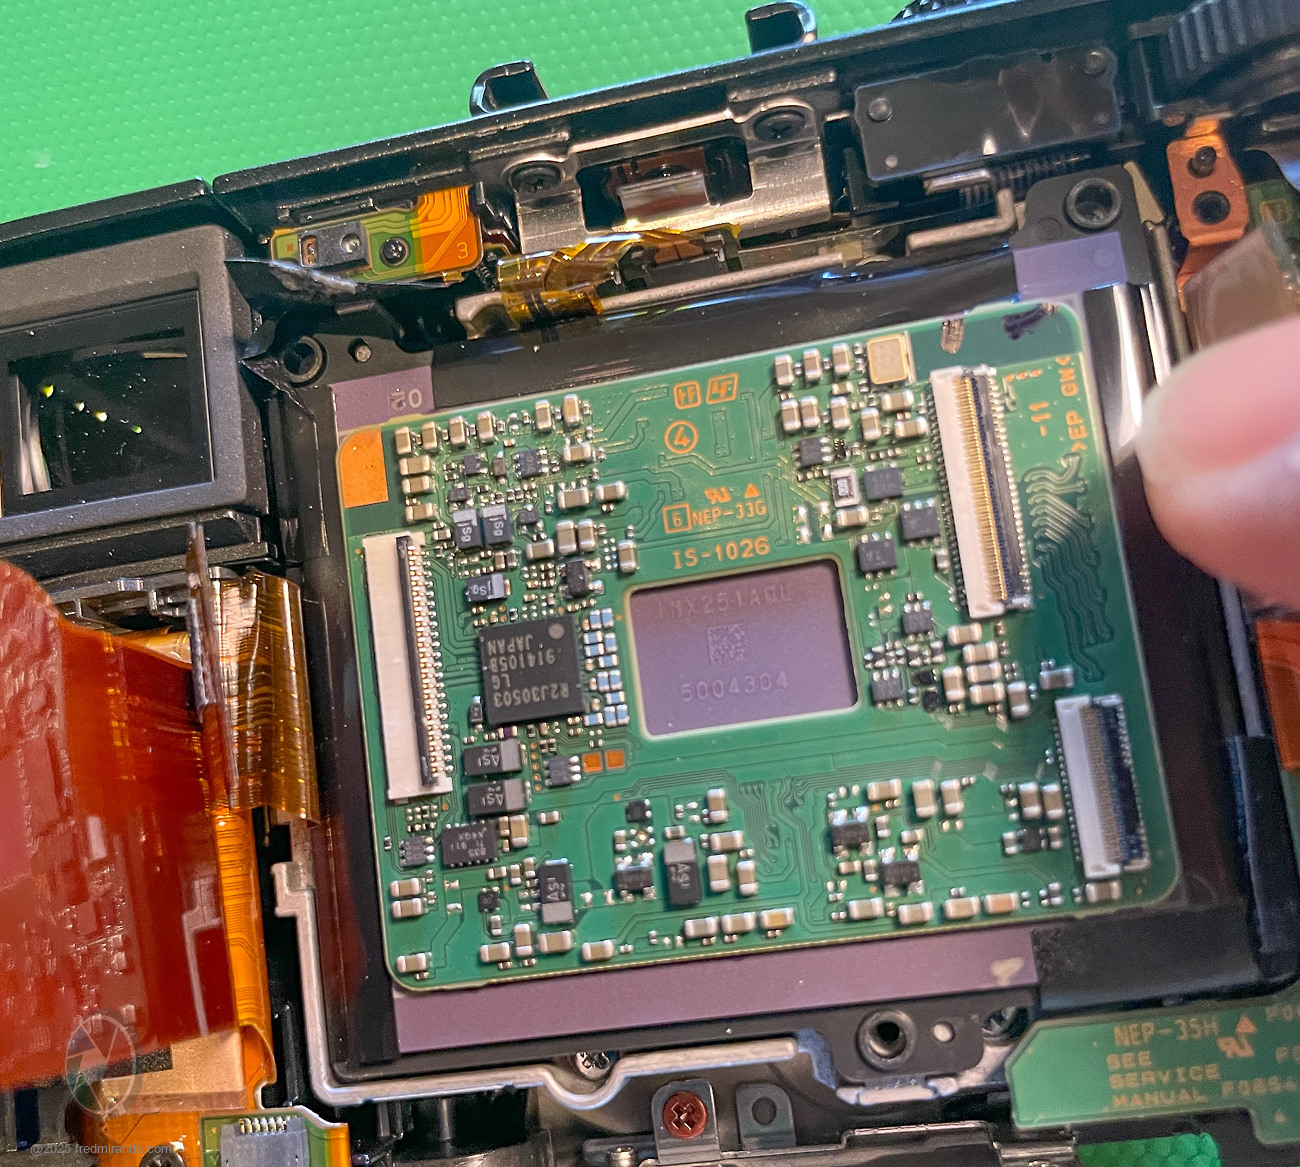
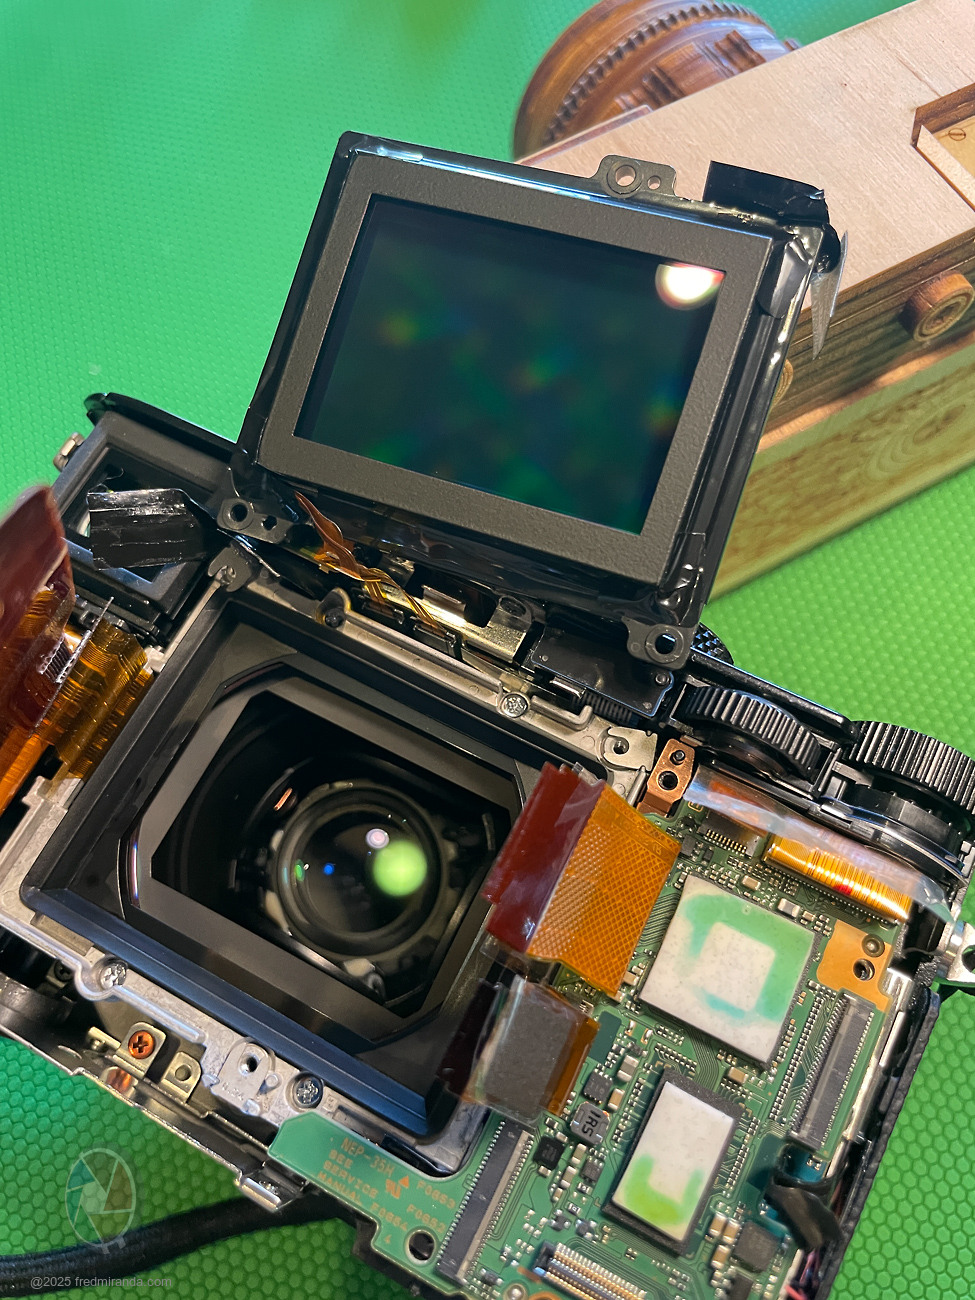
STEP 11: Lift the board to access the sensor
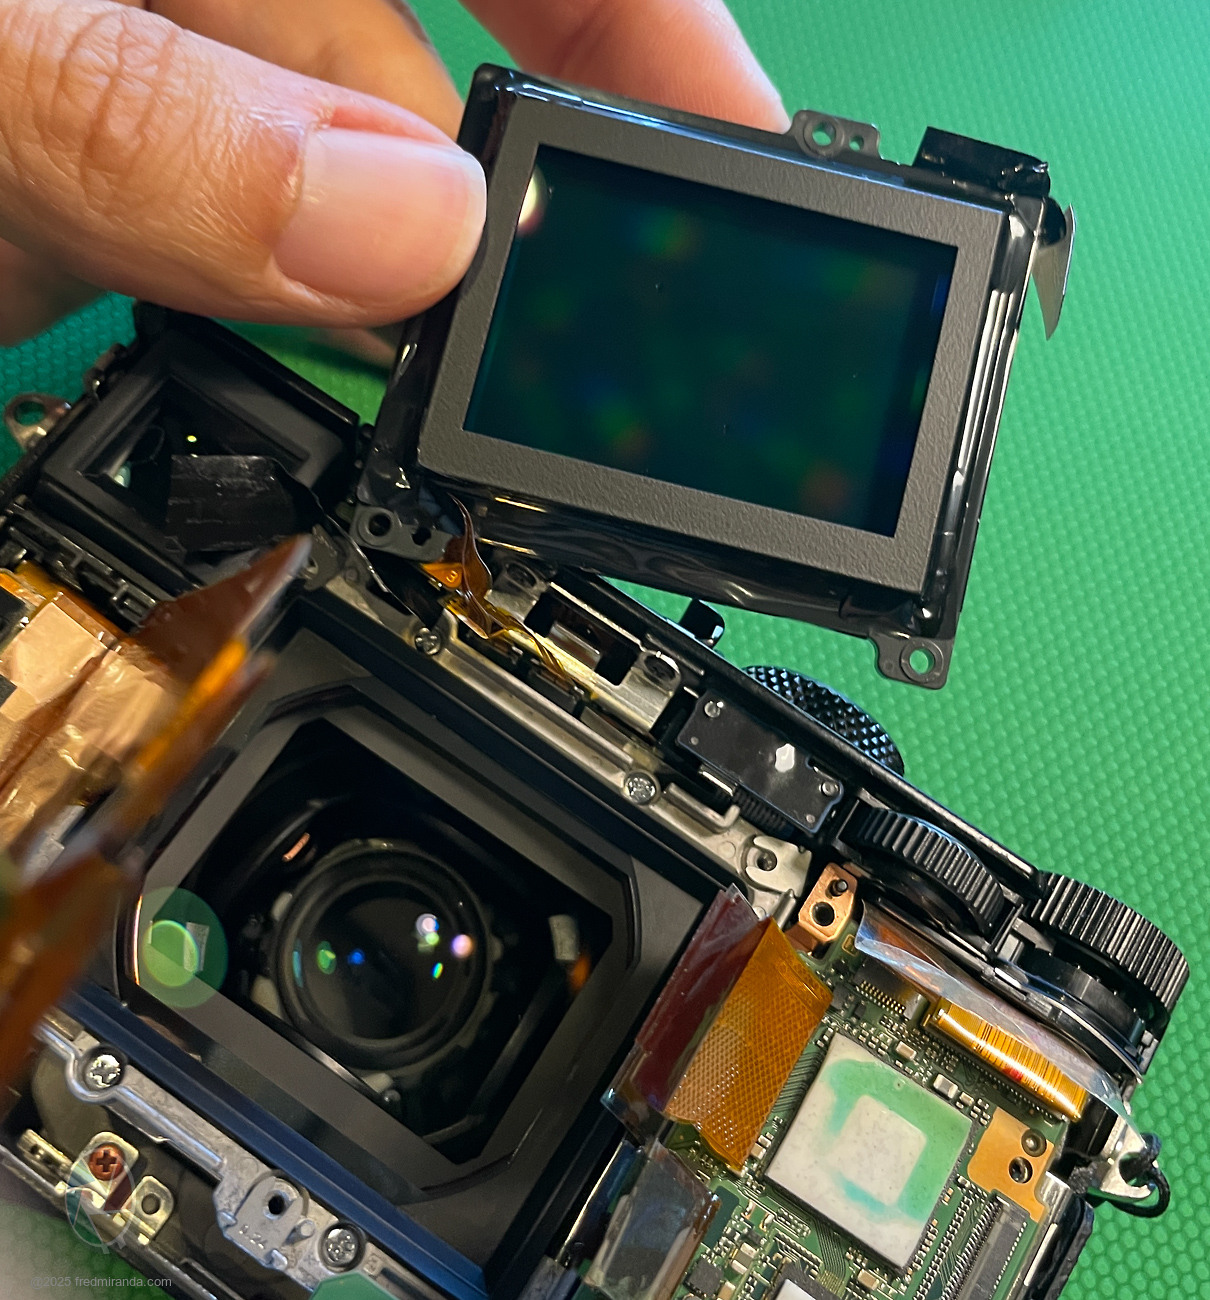
I didn�t disconnect the sensor ribbons; I laid the board flat beside the top of the camera. Notice dust on the sensor and a speck on the lens cover glass. The cover glass is glued and cannot be removed.
STEP 12: Clean the sensor and lens cover glass
I used an air blower to remove any dust and ensured the sensor and cover glass were completely clean.
That's it! Reverse the steps for reassembly.
BONUS: Close-ups of the calibration shims
� Two on top, one at the bottom. Take photos to record their positions and thicknesses.
I ended up removing the lens to see if I could clean that dust but I didn't find a way. This is NOT required to clean the sensor dust:
Tools I used:
Final Result:
No dust is visible at f/22. Highly recommend learning this process...you may need it again in the future!
Reminder: Reapply the black tape over the top-left screw; you can reuse the original or a new piece.
I hope you find this guide helpful. It can serve as a reference if you decide to attempt this yourself, but proceed at your own risk. FredMiranda.com is not responsible for any damage or issues that may occur - this is provided purely as a guide.
Similar steps can be used to remove dust from the original RX1 and RX1R cameras. The RX1R III likely has a comparable method to access the sensor, though the ribbon layout may differ.
If you have any questions or need clarification, feel free to reach out.
Sony RX1R II fully reassembled and working perfectly, with a completely clean sensor.
p.1 #3 · Sony RX1R II Full Disassembly and Sensor Dust Cleaning Review
Love this and admire your courage TFS...
For my day job, I�ve spent the past 25 years working in the electronics and semiconductor industry, where I�ve been directly and indirectly involved in the bring-up and testing of various boards. Still, I wouldn�t be bold enough to tinker with my own cameras
p.1 #4 · Sony RX1R II Full Disassembly and Sensor Dust Cleaning Review
Wow, Fred, congratulations on a successful disassembly! And the guide is fantastic! Seriously, your past experience of disassembling lenses is showing here.
The patience and high precision is the key, especially when opening and self-exploring, yet you found time to blend it with taking great pictures of the process.
It's very impressive to read through such a high number of important fine details you point attention too.
p.1 #5 · Sony RX1R II Full Disassembly and Sensor Dust Cleaning Review
As a retired copier technician who has looked at many, many service manuals on how to disassemble and replace parts, this has to be the simplest instructions to follow I have seen. Now I can search for a bargain priced one because of dust on the sensor. Well done.
p.1 #6 · Sony RX1R II Full Disassembly and Sensor Dust Cleaning Review
Yes kudos Fred!
I am not a Sony user but it intrigued me how you took the initiative to attempt such a feat! In my younger days maybe, if time permitted and patience(?), I might add!!!.. I loved playing with Lincoln logs and erector sets....building "forts" out of whatever we could find.....I think most "people" would not attempt such feats. Rightly so but not unheard of.
Well done.
Dan
p.1 #7 · Sony RX1R II Full Disassembly and Sensor Dust Cleaning Review
Thank you! I'm glad it came across clearly. The process is actually simpler than it looks, but I wanted to be as detailed as possible. Once the camera is open, it's easy to just focus on the work, so I'm glad I stopped to take some photos with my phone along the way.
By the way, I didn't mention this in the disassembly post, but my sensor actually had more than four dust spots. Some were faint, but a few were showing up in my images. Here's an example at f/22 before the cleaning. It was enough to bug me, and the fact that even a brand-new RX1R II I tested already had dust spots tells me this is a skill worth learning yourself. The first time is always the toughest.
DSC-RX1RM235mm F2.0 lens35mmf/22.01/60s250 ISO0.0 EV
p.1 #9 · Sony RX1R II Full Disassembly and Sensor Dust Cleaning Review
Great job, read and details...Look at all that stuff in there...
I could always take anything apart but putting back together was a challenge sometimes, this looks tricky but turned out well for you. Thank God for cell phones to take pictures and videos.
p.1 #10 · Sony RX1R II Full Disassembly and Sensor Dust Cleaning Review
As someone who has created step-by-step tech documents and manuals in his former jobs, your instructions for taking about the RX1R II are outstanding. Not a bad way for someone to make some Benjamins for an hour of work.
p.1 #11 · Sony RX1R II Full Disassembly and Sensor Dust Cleaning Review
Thank you for capturing this process so well. Now, I'm no longer scared of dust getting on my RX1Rii. What an amazing camera. No wonder Sony couldn't improve it much on ii.
p.1 #12 · Sony RX1R II Full Disassembly and Sensor Dust Cleaning Review
My next adventure, aside from cleaning dust on the sensor, will be replacing the internal battery in the RX1R II. The battery typically lasts about 10 to 15 years before it can no longer hold a charge or maintain the date and time. When that happens, it will need to be replaced.
This battery is quite different from the one in the RX1 and RX1R cameras. (which looks like AAA double batteries underneath the internal flash.
In the RX1R II, it is a rechargeable coin-type battery. Sony calls it the BT2950, but it is not available for purchase. I will likely use a similar battery with the same specifications, such as the Panasonic ML1220 Rechargeable Lithium Battery, 3V Coin Cell.
Voltage - 3V
Capacity - 15mAh
Weight - 0.8g
Size - 12mm x 2.0mm
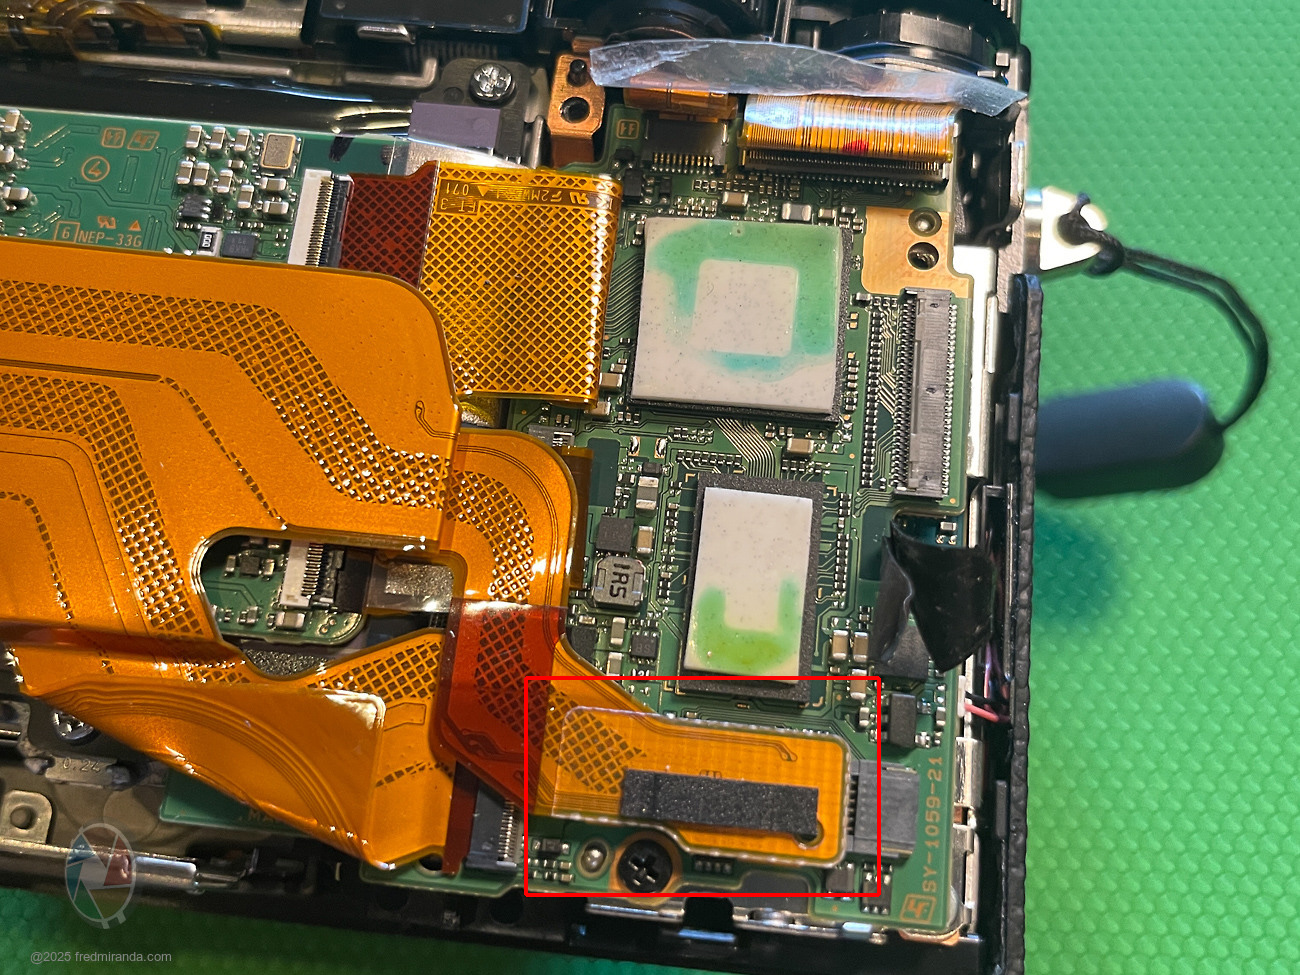
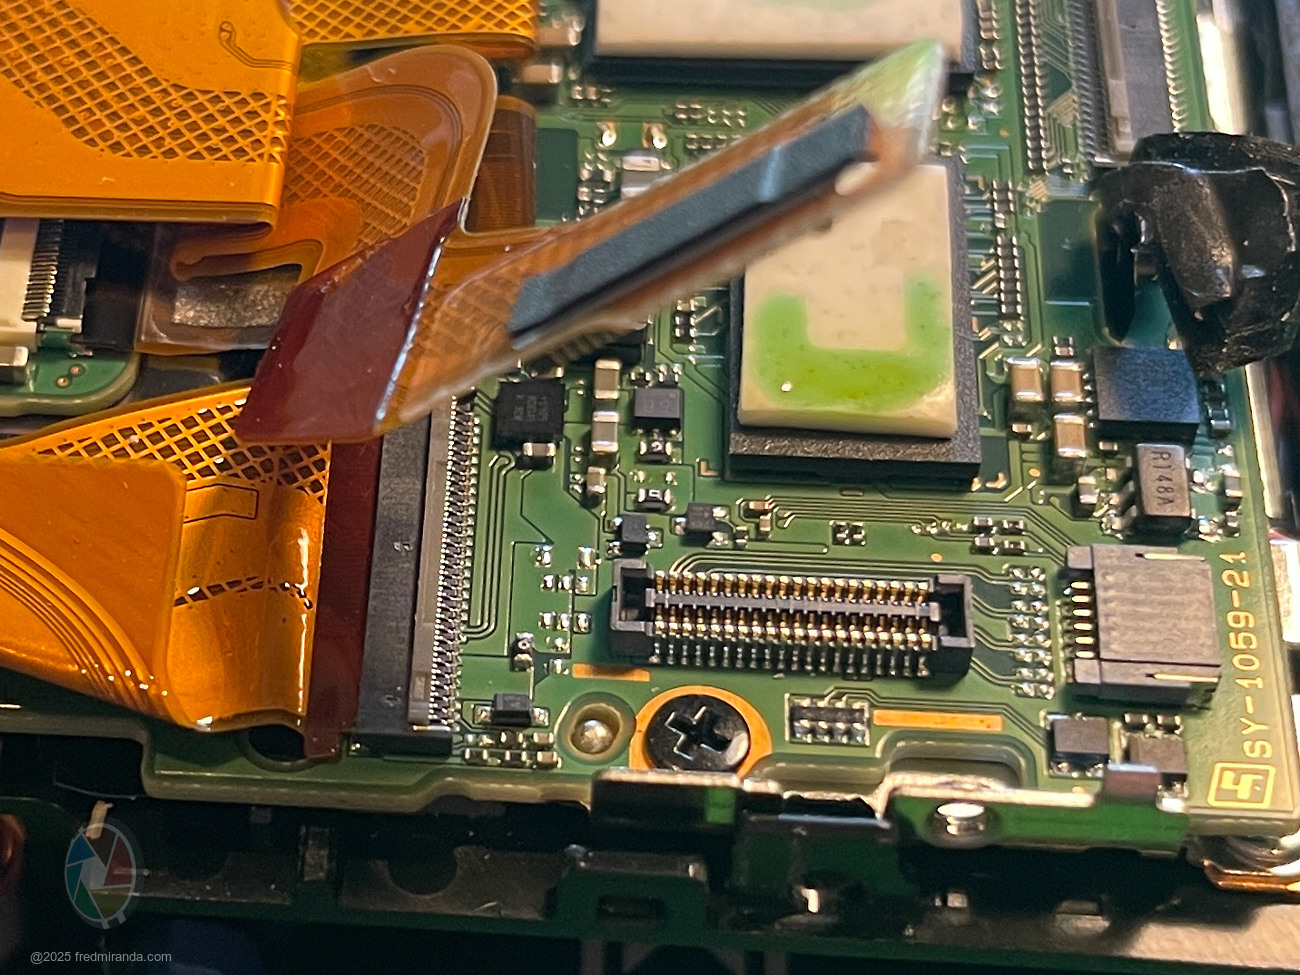
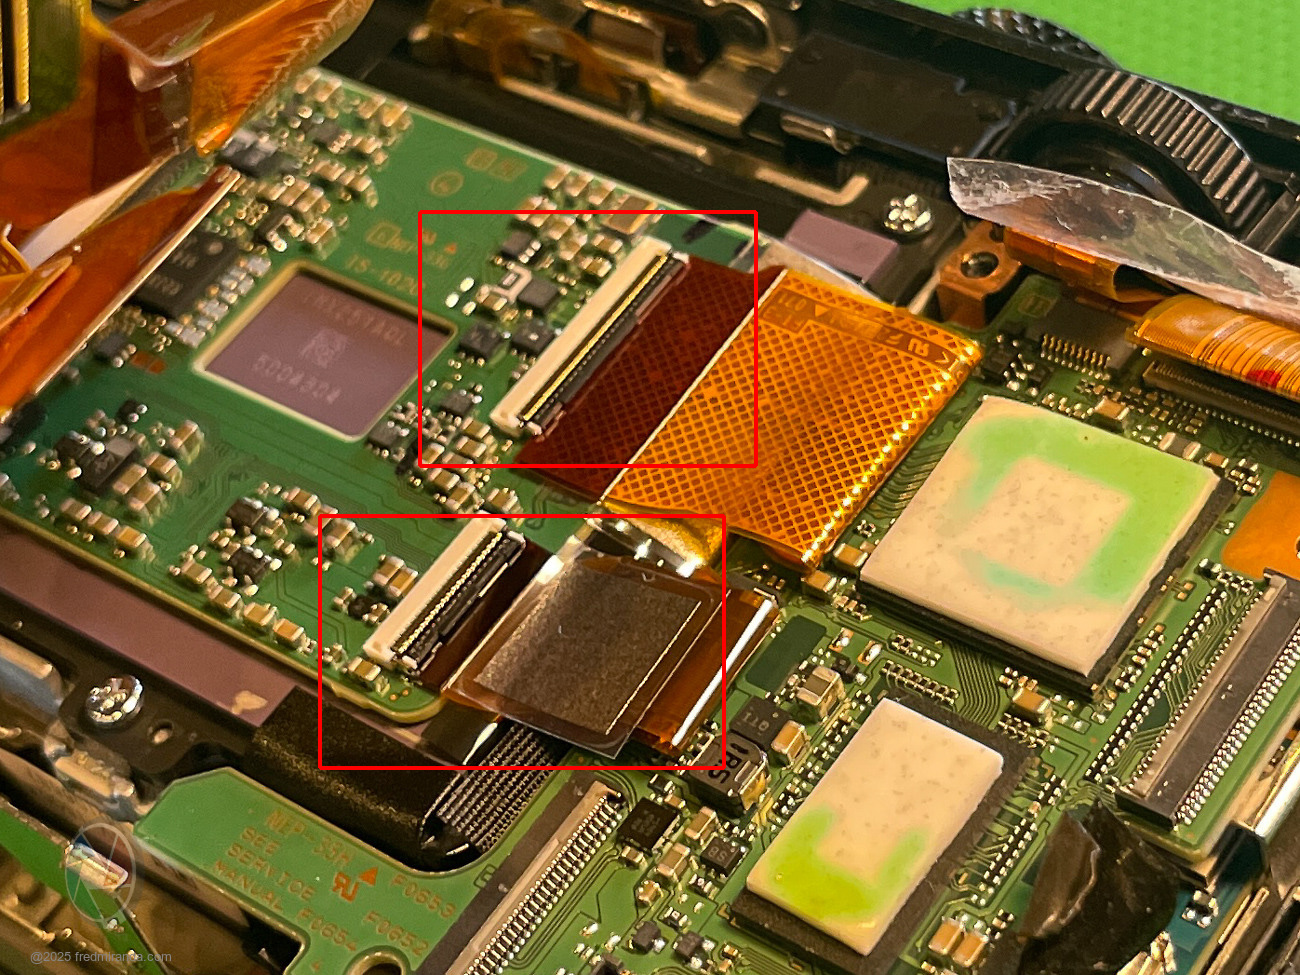
The battery is probably located behind the Main Board (beneath the shutter and dial buttons when viewed from the back of the camera), which means a deeper disassembly than what I described for sensor cleaning. Here is what the main board looks like:
Note: The FC-1004 flexible board is likely positioned behind it, and that is where the battery can be replaced. See the illustration from Sony's service manual for reference.
p.1 #13 · Sony RX1R II Full Disassembly and Sensor Dust Cleaning Review
For the RX1R II FC-1004 flexible board image above, the battery seems to be sitting under a metal tab with no visible solder points, it is likely a clip-mounted battery rather than soldered. This would make replacement much easier, as we just need to carefully lift the tab and slide the battery out.
p.1 #14 · Sony RX1R II Full Disassembly and Sensor Dust Cleaning Review
Good luck with the battery replacement, Fred.
Based on my experience when I used to replace batteries for portable audiophile players, you'll want to buy a few as there's always a dud in the mix and double check the voltage with the multimeter prior to installation. Have fun and look forward to your results.
p.1 #16 · Sony RX1R II Full Disassembly and Sensor Dust Cleaning Review
A day after surgery, I took my RX1R II out for a full test to make sure everything is 100%. All is working perfectly...the LCD, EVF, flash, and even transferring images to my iPhone. The best part is the sensor is completely clean.
DSC-RX1RM235mm F2.0 lens35mmf/2.81/2000s100 ISO0.0 EV
DSC-RX1RM235mm F2.0 lens35mmf/2.01/1600s100 ISO0.0 EV
DSC-RX1RM235mm F2.0 lens35mmf/2.01/800s100 ISO0.0 EV
DSC-RX1RM235mm F2.0 lens35mmf/2.01/400s100 ISO0.0 EV
DSC-RX1RM235mm F2.0 lens35mmf/2.01/60s2500 ISO-1.3 EV
p.1 #17 · Sony RX1R II Full Disassembly and Sensor Dust Cleaning Review
Fred Miranda wrote:
For the RX1R II FC-1004 flexible board image above, the battery seems to be sitting under a metal tab with no visible solder points, it is likely a clip-mounted battery rather than soldered. This would make replacement much easier, as we just need to carefully lift the tab and slide the battery out.
Great work Fred!
The lithium battery socket on the FC-1004 flexible board is meant for single-use; the plastic will likely break or bend when you try to remove the battery. You could possibly re-use the socket, but I'd recommend some hot-glue or flexible cement in a pinch (though this will off-gas) to hold the new battery in place. Otherwise the full FC-1004 part is available from Sony (you need to order the battery separate): https://sonyparts.com/products/a-2082-960-a
p.1 #18 · Sony RX1R II Full Disassembly and Sensor Dust Cleaning Review
Also, a couple of tips you may want to add to the first post, as one who has repaired a number of cameras:
- IMPORTANT: while the RX1R II has no onboard flash, any other camera with an onboard flash contains a high-voltage capacitor. This capacitor is usually 330 volts and carries dangerously high energy (joules) that can stop your heart! These capacitors MUST be drained before working safely and can be done with a 1kohm resistor or you can buy what's called a 'capacitor discharge pen'.
- Use of a wood or plastic toothpick, or guitar pick is recommended for unlatching/lifting the ZIF connectors.
- Use Yellow FrogTape (not brown,blue or green painters tape) to gently pull out the ribbon cables from the ZIF connectors. Tweezers will result in a damaged ribbon cable eventually. The yellow frogtape is low adhesive and solvent free.
- Wrap removed electronic parts in paper envelopes or anti-static bags. Do not use regular plastic 'ziploc' bags or plastic containers, as static electricity could potentially damage a board.
- For screw organizer, get some blank pieces of paper, pencil and clear tape. Sketch out each 'layer' you work with on the paper and place the screws in the position they were removed from using the clear tape; e.g. when removing the outer screws draw out the bottom of the camera, circle where the screws go, then remove the screw and place tape over it on the paper.
- During reassembly, don't over-tighten screws. The service manual specifies torque specs for each screw, and while not overly critical, over-tightening can result in stripped plastic threads or warped parts.
- During reassemble, the black tape you reference is likely Kapton / Polyimide tape. You can use standard electrical tape in a pinch, but it does off-gas and leave a residue.
p.1 #19 · Sony RX1R II Full Disassembly and Sensor Dust Cleaning Review
Tschanrm wrote:
Great work Fred!
The lithium battery socket on the FC-1004 flexible board is meant for single-use; the plastic will likely break or bend when you try to remove the battery. You could possibly re-use the socket, but I'd recommend some hot-glue or flexible cement in a pinch (though this will off-gas) to hold the new battery in place. Otherwise the full FC-1004 part is available from Sony (you need to order the battery separate): https://sonyparts.com/products/a-2082-960-a
Thanks a lot! I'll wait until my battery gives out, but really appreciate you posting the part number. I couldn't track it down myself, and that Sony parts link is super helpful. Hard to imagine the battery wouldn't be easily replaceable, but it's good to know the 1004 board is affordable and available if needed. I think I'll go ahead and order one just in case.
BTW, do you think the Panasonic ML1220 Rechargeable Lithium Battery, 3V Coin Cell would work just as well as the Sony BT2950 battery?
Fun fact: Sony has been using the same internal battery and socket since at least as far back as the A6000. Sony 1-251-928-21. It's in many, many cameras, as recent as the A7SIII and A7IV from what I have seen.
Fred Miranda wrote:
Thanks a lot! I'll wait until my battery gives out, but really appreciate you posting the part number. I couldn't track it down myself, and that Sony parts link is super helpful. Hard to imagine the battery wouldn't be easily replaceable, but it's good to know the 1004 board is affordable and available if needed. I think I'll go ahead and order one just in case.
BTW, do you think the Panasonic ML1220 Rechargeable Lithium Battery, 3V Coin Cell would work just as well as the Sony BT2950 battery?


 TFS...


